vue-router-multi-view


![]()
![]()
Sponsors
Silver
![]()
Bronze
![]()
About
Replace <router-view/> with <router-multi-view/> to keep the DOM of the deactivated route alive.
Useful Links
Installation
Npm
npm install --save vue-router-multi-view
Install the plugin into Vue:
VueOr use the directives and components directly:
VueBrowser
Include vue-router-multi-view in the page.
If Vue is detected in the Page, the plugin is installed automatically.
Manually install the plugin into Vue:
VueUsage
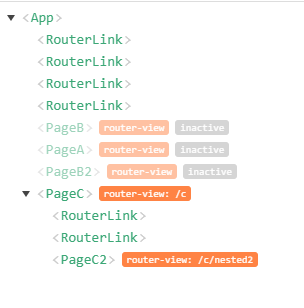
Replace <router-view/> with <router-multi-view/> and replace the name prop by the viewName prop (this is to prevent potential conflicts with <transition-group>).
⚠️ Contrary to <router-view/>, <router-multi-view/> will need to wrap the content with an element or component (default: <div>).
If you were using the keep-alive component, you need to remove it. So if you had:
It should be replaced by:
<router-multi-view /> already includes keep-alive and will trigger the activated and deactivated hooks on the children components.
⚠️ It is recommended to use props for the routes.
Example:
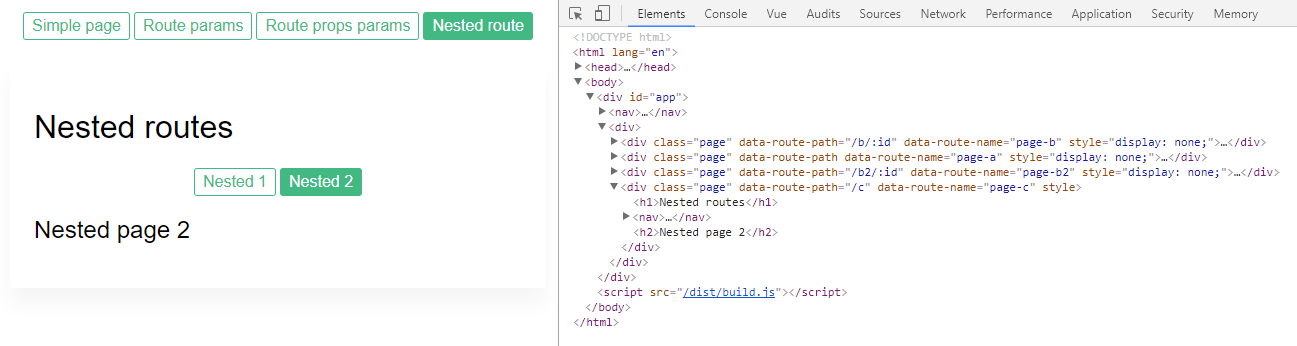
Example of rendered HTML:
Nested routes Nested 1 Nested 2 <!----> Route with props params bar Simple page You can change the element or component used to wrap the routes with the morph prop:
To use transition, you need to use the viewName prop to set the name of the view, to prevent a conflict with the name prop for the transition:
Here view-name and morph are <router-multi-view/> props, while tag and name are <transition-group> props.