STACKER-plugin-CLI : WordPress Plugin Developer Toolkit
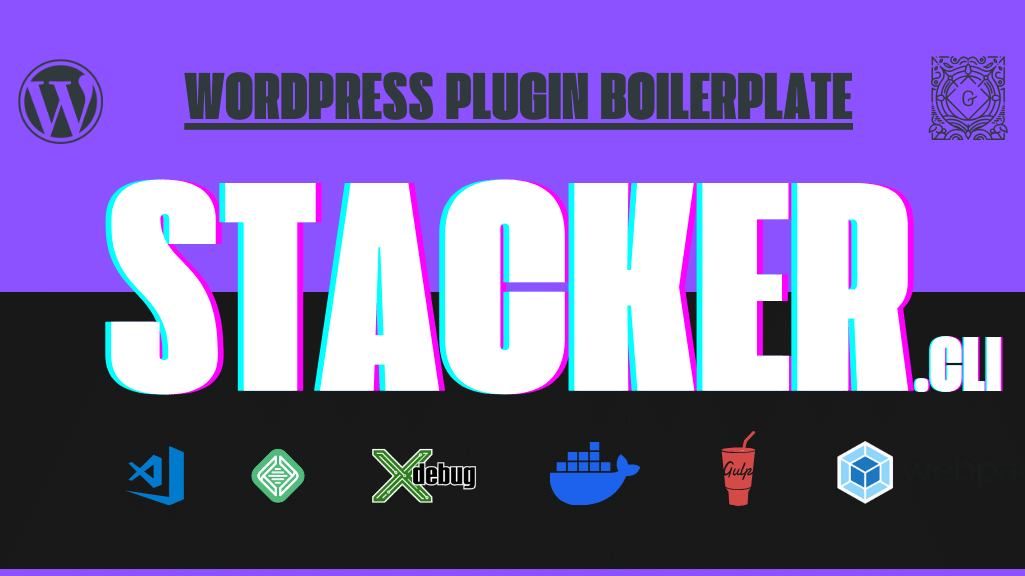
A Zero-Configuration WordPress plugin development toolkit that kickstarts your next WordPress plugin development project with modern tools and workflows.
Out-Of-The-Box Support For: Classes & Functions Autoloading, Gutenberg Blocks, Xdebug, PHPUnit tests, Docker-Compose, LocalWP, WordPress Coding Standards, JavaScript & SCSS lints, Husky hooks to make sure that you always commit error-free code, and VSCode configs to configure your IDE to setup perfectly for your plugin development experience.
| A FOSS (Free & Open Source Software) WordPress project. Developed & Maintained by @provineet. | Vineet Verma |


Stacker Plugin Boilerplate Supports
- Classes & Functions auto-loading for 'inc' folder
- Optional GutenBerg Blocks development
- Docker Compose or wpLocal development envrionment
- Xdebug for VScode
- PHPUnit test
- Composer dependencies
- NPM dependencies
- WordPress Coding Standards, WooCommerce Coding Standards & Fixes via PHPCS/PHPCBF
- Gulp, SASS, Babel, Webpack, AutoPrefixer, BrowserSync (Reloads your browser while development), assets minification and image optimizations.
🚀 How the CLI works?
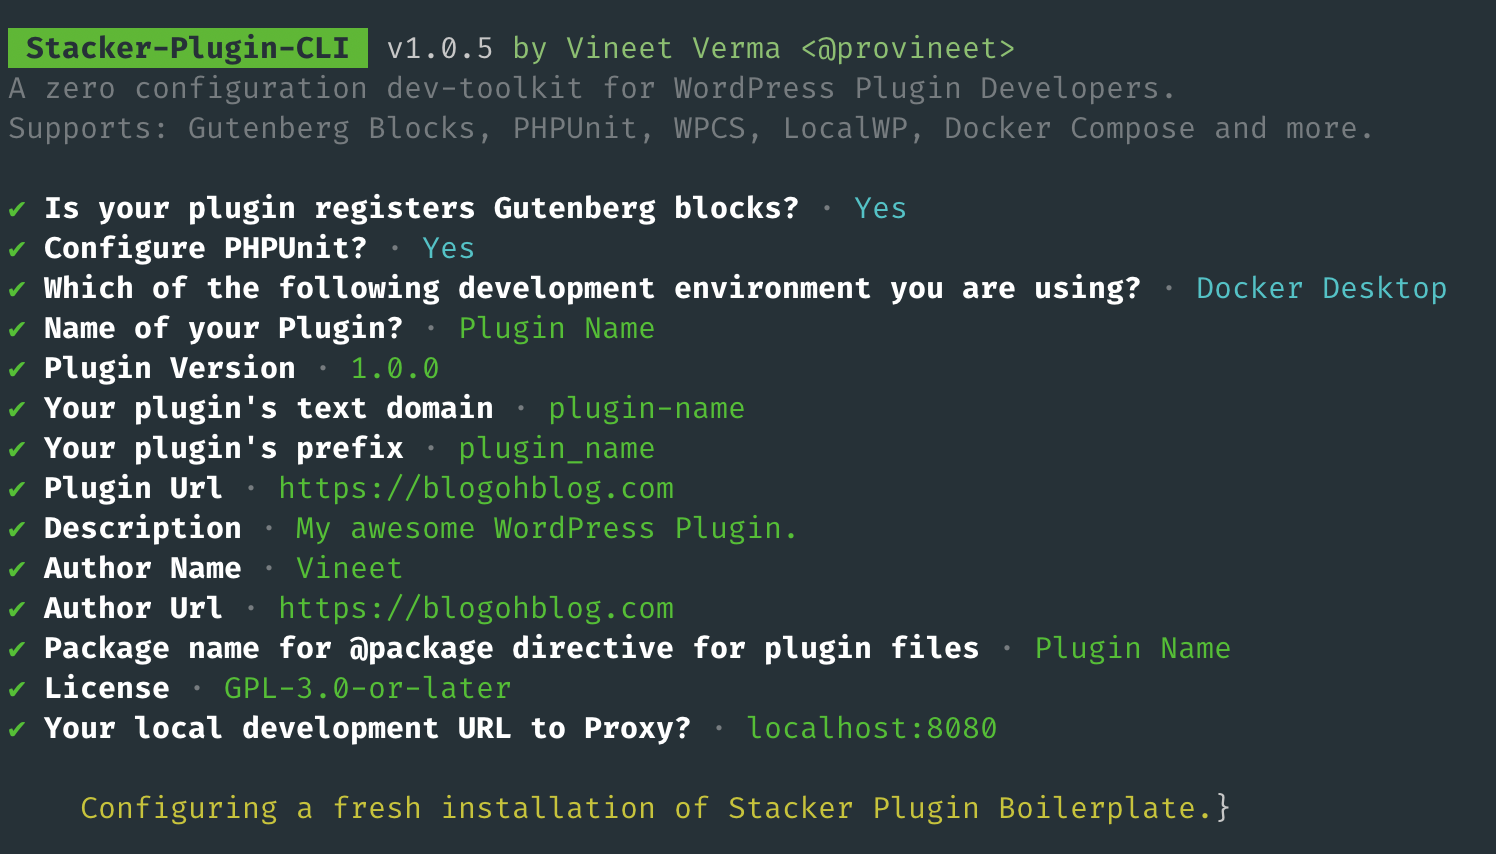
Stacker-plugin-cli asks a set of questions required to scaffolds your WordPress plugin.
➡️ Quick Installation
In your terminal window; cd to your plugin development folder 'wp-content/plugins' and run the below given npx command:
$ npx stacker-plugin-cli
You will be asked a few questions to generate & configure your plugin files, answer them correctly and a fresh WordPress plugin boilerplate will be generated inside your current working directory (which usually, should be your wp-content/plugins) folder.
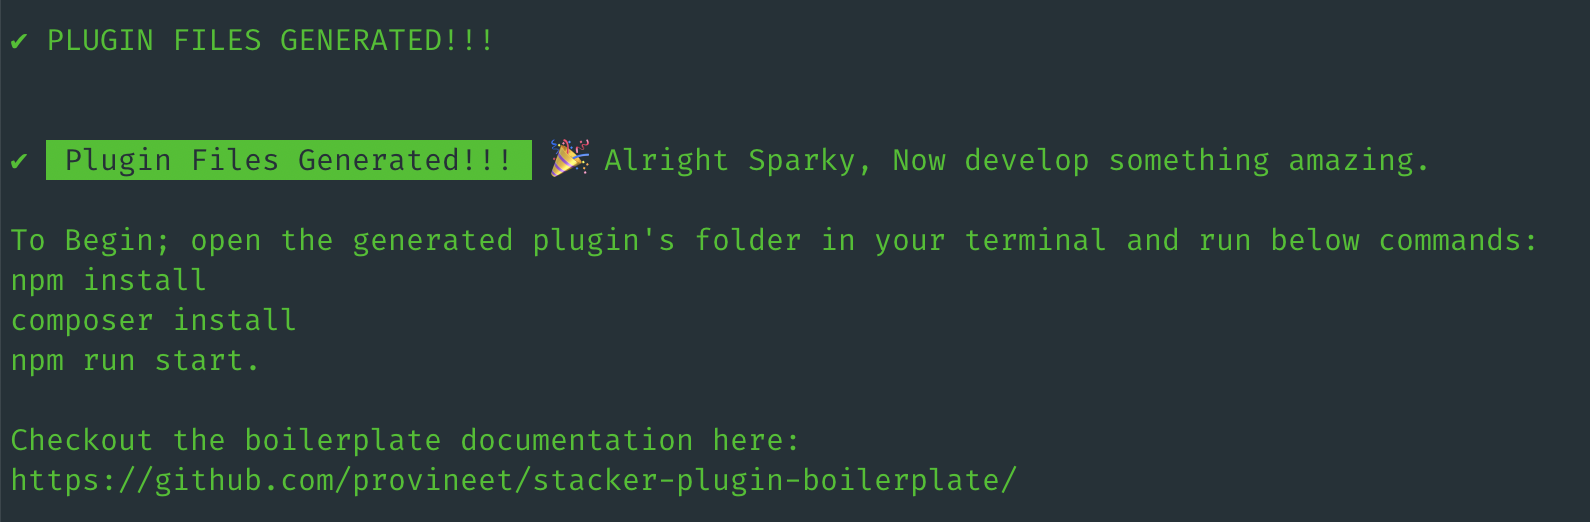
Once the files are generated successfully, cd to your generated plugin's directory and install npm and composer dependencies.
$ cd Your-Plugin-Folder
$ npm install
$ composer install
Now, you can start building your plugin using the npm command below:
$ npm run start
📂 Generated Plugin's Folder Structure with docker compose, xdebug, and phpunit configured
./plugin-name
├── Dockerfile                          '(Dockerfile to build images in docker compose)'
├── blocks.webpack.config.js            '(webpack config for wpscript)'
├── composer.json                       '(composer json)'
├── docker-compose.yaml                 '(docker compose yaml file)'
├── docker-configs                      '(config files for docker compose env)'
│   ├── php-file-size.ini
│   └── xdebug.ini
├── inc                                 '(inc folder of our plugin)'
│   ├── admin
│   │   ├── class-admin.php             '(contains the admin class of our plugin)'
│   │   ├── class-hooks.php             '(contains admin hooks of our plugin)'
│   │   └── index.php
│   ├── class-autoloader.php            '(Our plugin classes autoloader. Works for files inside 'inc' folder only)'
│   ├── class-loader.php                '(Our plugin loader class to bootstrap the plugin)'
│   ├── helpers                         '(Helper functions of our plugin. Any file with *-functions.php name will be autoloaded)'
│   │   ├── helper-functions.php
│   │   └── index.php
│   ├── index.php
│   ├── public                          '(Frontend functionality classes of our plugin goes here.)'
│   │   ├── class-frontend.php
│   │   └── index.php
│   ├── repositories                    '(Any class deals with creating repositories lies here.)'
│   │   ├── class-user.php
│   │   └── index.php
│   └── services                        '(Any class for different services lies here. e.g. api or db queries)'
│       ├── class-api.php
│       ├── class-db.php
│       └── index.php
├── index.php
├── package.json                        '(npm packages definition file)'
├── phpunit.xml.dist                    '(file to configure options for PHPUnit)'
├── plugin-name.php                     '(Our main plugin file)'
└── src                                 '(contains source files for blocks and plugin assets)'
    ├── assets                          '(plugin common frontend and backend assets)'
    └── blocks                          '(gutenberg blocks files)'
⚡️ Begin Installation
⚡️ Create a fresh plugin in your plugin's folder
In your terminal window; cd to your plugin development folder 'wp-content/plugins/' and run the below given npx command:
$ npx stacker-plugin-cli
You will be asked a few questions to generate & configure your plugin files, answer them correctly and a fresh WordPress plugin boilerplate will be generated inside your current working directory (which usually, should be your wp-content/plugins) folder.
$ npm run start
Start your development environment to watch changes in your PHP, Js, and SCSS files.
$ composer run phpcs
To sniff your plugin's php files for WordPress coding standards.
$ composer run phpcbf
To fix WordPress coding standards errors within your plugin's directory.
⚡️ Installation Configuration Options Available
In the CLI questions you will be asked to pick these options to generate the plugin files depending on your development:
- Installation with Docker Compose : Choose Docker Compose as your development environment.
- Installation to be used with WP Local (https://localwp.com) : Choose WPLocal as your development environment.
- Installation with xdebug configured : From the options select 'Yes' for configuring xdebug.
- Installation with PHPUnit configured : From the options select 'Yes' for configuring PHPunit.
⚡️ How to run php tests?
$ npx stacker-plugin-cli
Run PHP tests by running below command in your generated plugin's folder:
$ composer run test
⚡️ NPM Commands available
-
npm run build: To build your plugin files with blocks and other assets. -
npm run start: To start watching your development changes in JS, IMG, and SCSS files in src/blocks and src/assets folder. Kicks hot-reloading as well. -
npm run dist: To create a distributable version of plugin and zip file. -
npm run devdist: To create a distributable version of plugin for other fellow developers who don't have access to your private git repo. -
npm run format: To format your plugin's SCSS and Js files.
⚡️ Composer Commands available
-
composer run test: To run php tests defined in ./tests/ directory of your plugin. -
composer run phpcs: To execute PHP Code Sniffer with WordPress coding standards on your plugin files. -
composer run phpcbf: To execute PHP Code Beautifier with WordPress coding standards on your plugin files to fix PHPWPCS errors in your plugin files.
Follow me on twitter. I tweet about Dev Tools, latest tech and tuts for the community. 🐦 @MrVineetVerma
If you have any query or suggestions, please feel free to get in touch with me on twitter or just fork the github repo and start contributing.