Signo
Open source, self hosted signing service with support for PKCS#11 tokens
What is it?
Signo is a simple NodeJS application that can be used to sign files through an HTTP API. It currently has support for plain signing (returns the binary signature for any given file) and Authenticode signing (signs a windows executable).
Motivation
New codesigning certificates need to be stored on a hardware token which comes with a great challenge for CI applications. Signo tries to solve this by providing a HTTP API which can be used to generate signed executables.
Quick Start
Signo is available either through NPM (https://www.npmjs.com/package/signo-server) or Docker Hub (https://hub.docker.com/r/gergof/signo). The simplest way to get it is through NPM.
First of all you need a Linux machine with NodeJS 16 or 18 installed.
Then you need to install signo as a global package.
sudo npm install -g signo-serverNow you can start it using signo start. If you want to integrate it with Systemd, you can do the following:
sudo signo service install --password 'AdminPa$$w0rd'If you want to run signo as root (only root user can use the default https port), also pass the --no-user parameter.
This command will create a system unit called signo.service, a configuration folder (/etc/signo), a base configuration (/etc/signo/signo.yml) and a log folder (/var/log/signo). The admin password is set to the value of the --password option or defaults to admin.
Now you have to set an SSL certificate in /etc/signo/signo.yml and list the PKCS#11 modules there.
You can start and stop the service using signo service start and signo service stop anytime.
To set up tokens, signing engines, etc you can log in with the user admin and the password you set earlier.
If you want to delete the service you can execute the following:
sudo signo service remove --removeConfig
sudo npm remove -g signo-server
YubiKey example
The cheapest solution is probably a YubiKey 5 FIPS validated hardware token. The setup looks as following for it on a Debian based OS:
# Become root
sudo -s

# Install NodeJS 16 or 18
curl -fsSL https://deb.nodesource.com/setup_18.x | bash -
apt install nodejs

# Install Signo
npm install -g signo-server

# Create a systemd service that will run as root
signo service install --password 'SomeSecureAdminPassword' --no-user

# Get some SSL certificates for Signo
# They can even be self-signed. The important is that your infrastructure trusts that certificate
# And save them to /etc/signo/signo.key (private key)
# and /etc/signo/signo.crt (certificate)

# Install pkcs11 module for yubikey
# Your distribution might already include the yubico-piv-tool package which has this.
# In that case you can use `apt install yubico-piv-tool`, but if you want to get a
# a somewhat fresh version, you have to compile it from source (recommended)
apt install build-essential cmake libtool libssl-dev pkg-config check libpcsclite-dev gengetopt help2man zlib1g-dev pcscd
git clone --depth 1 --branch yubico-piv-tool-2.5.0 https://github.com/Yubico/yubico-piv-tool.git
cd yubico-piv-tool
mkdir build
cd build
cmake ..
make
make install

# Update your configuration in /etc/signo/signo.yml
nano /etc/signo/signo.yml
# at the pkcs11Modules section add an entry, for example:
# ...
# pkcs11Modules:
#   YKCS11: /usr/local/lib/libykcs11.so

# Enable and start the service:
systemctl enable signo
systemctl start signo
# or you can use the `signo service start` command
Features
Users
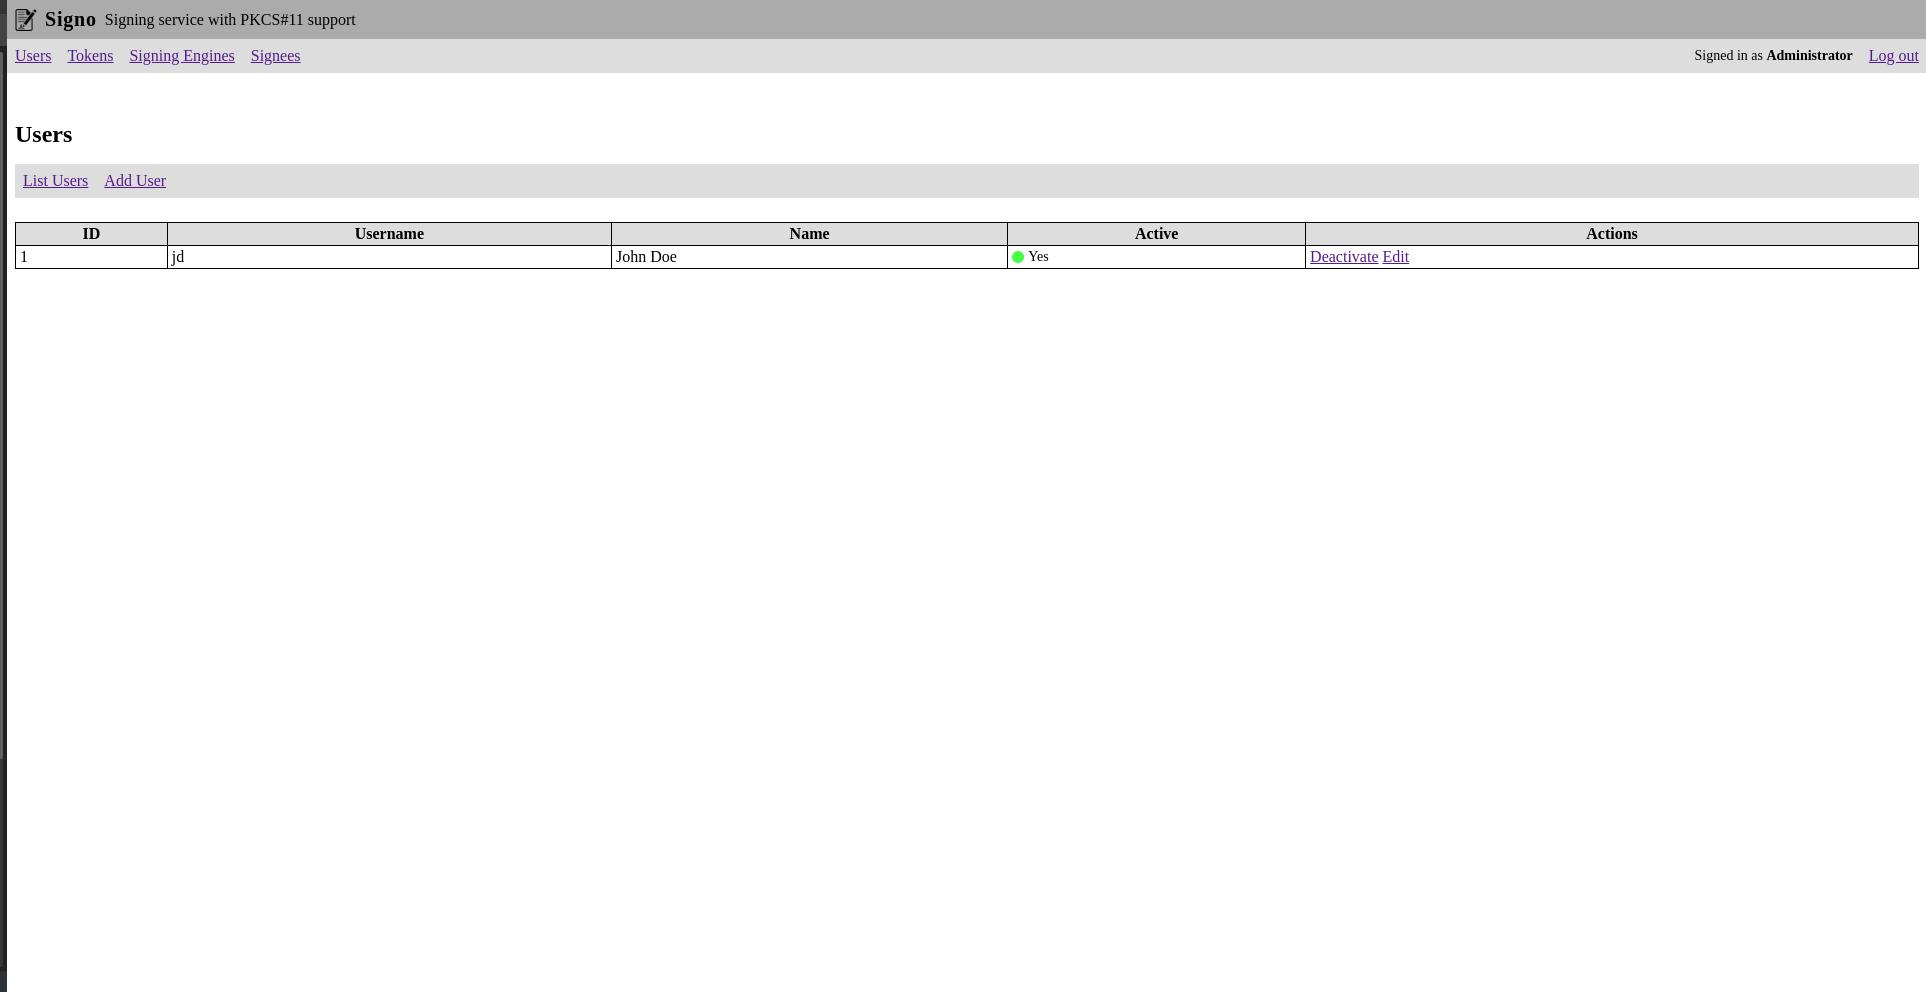
You can create multiple users that are allowed to manage tokens, signing engines and signees.
Tokens
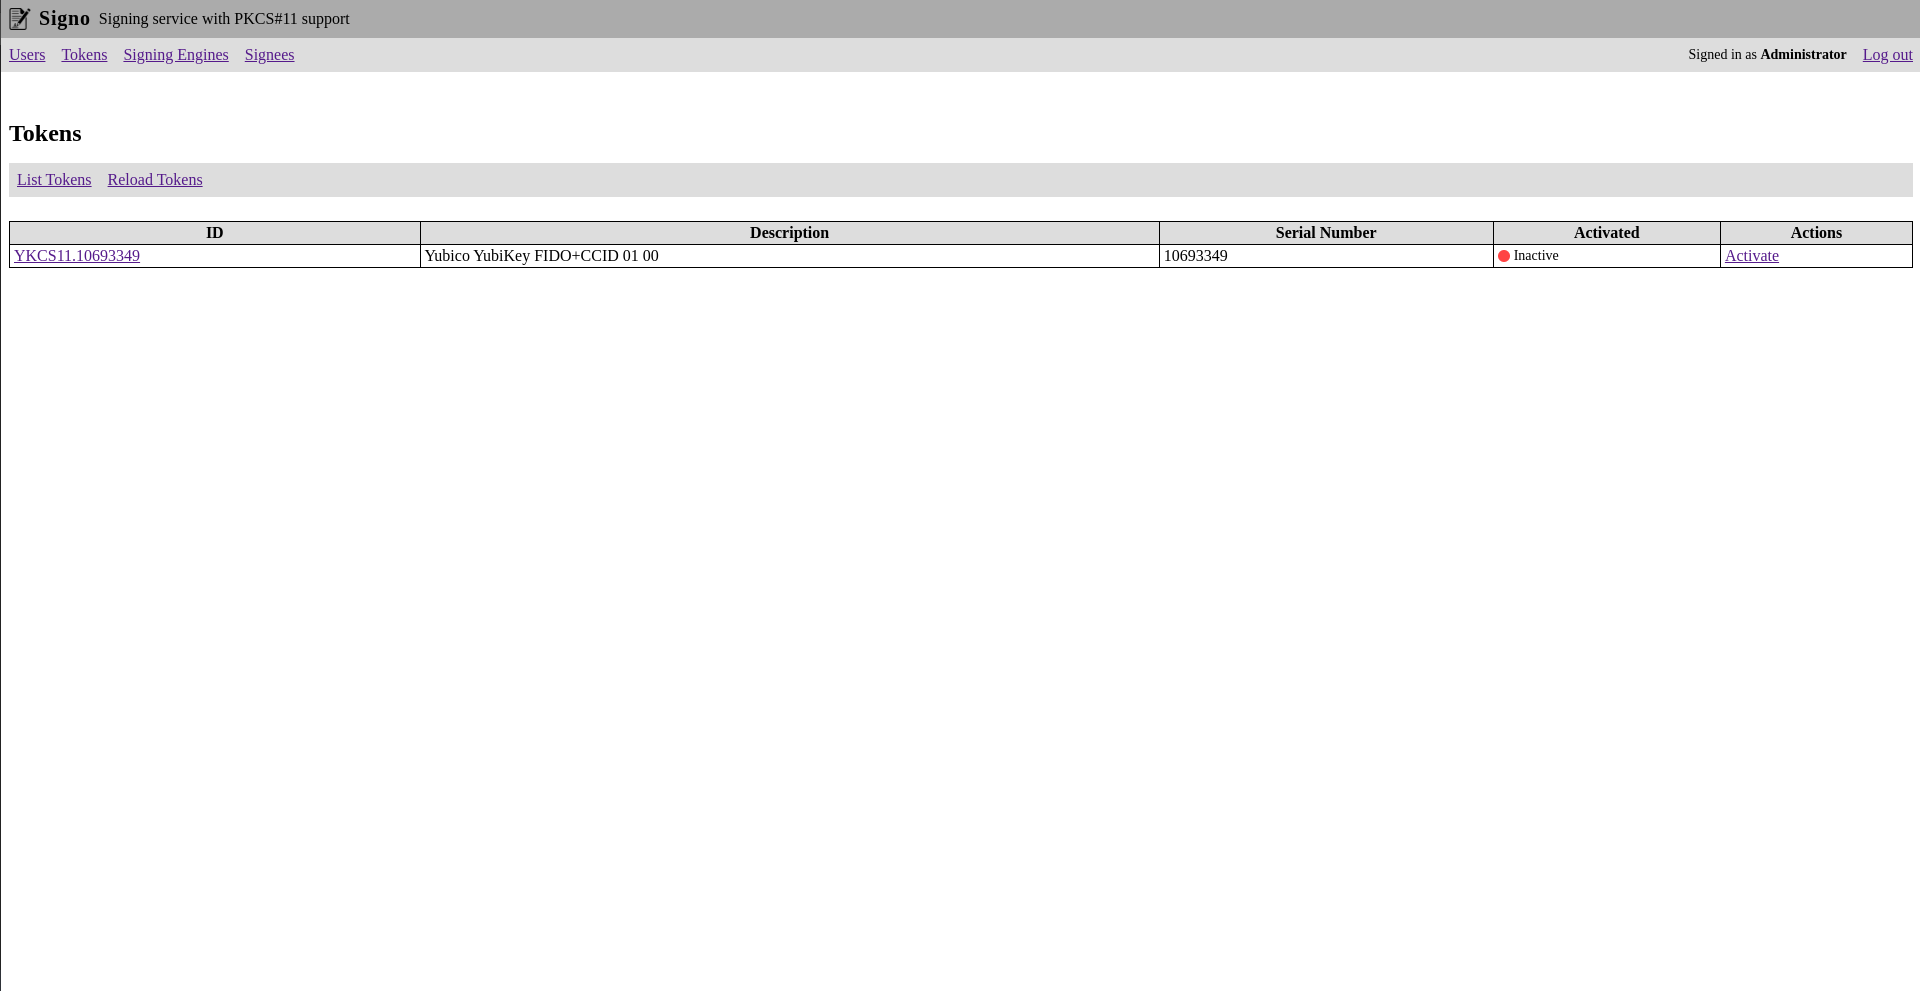
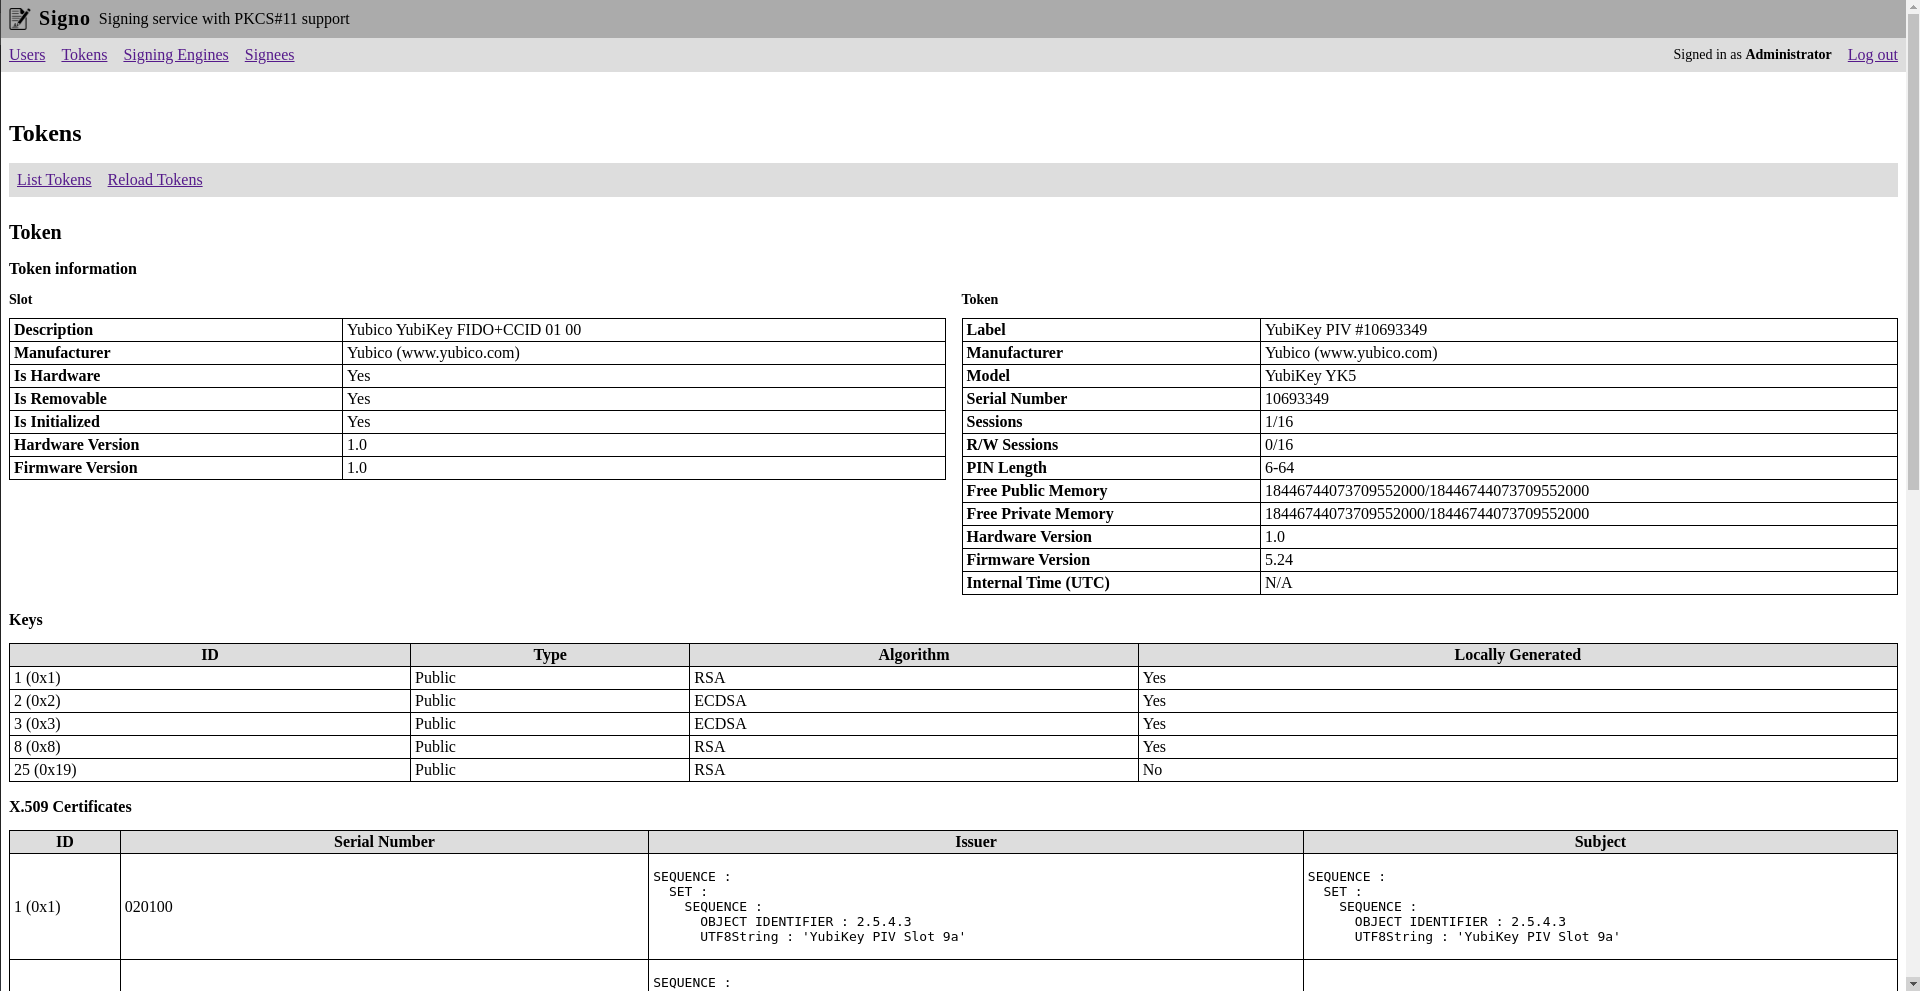
Signo will list all the detected PKCS#11 tokens. It will also show you the token information and the keys and certificates stored on the token.
Activating a token means manually entering the user PIN. To sign anything with a given token, it must be activated. This way you can prevent unauthorized signatures if a token is not meant to be used at a given time.
Signing Engines
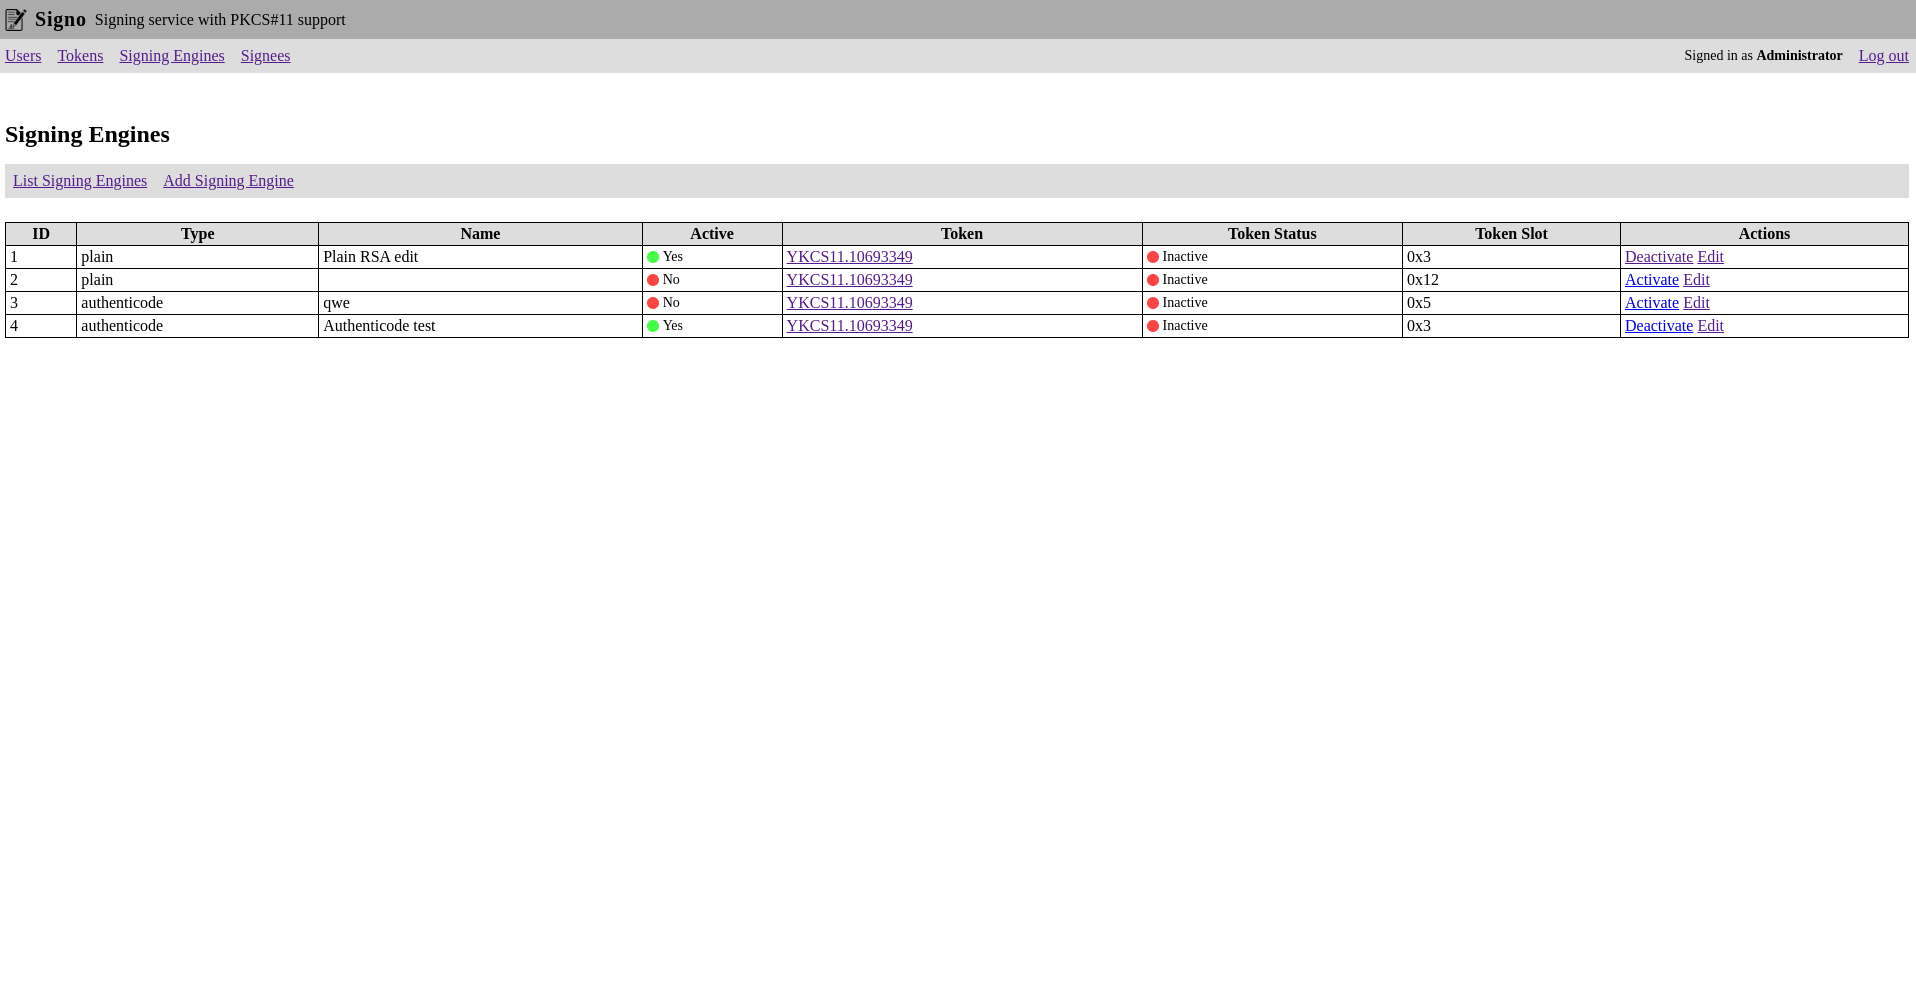
Signing engines are the signing configurations used to create the signatures.
Signees
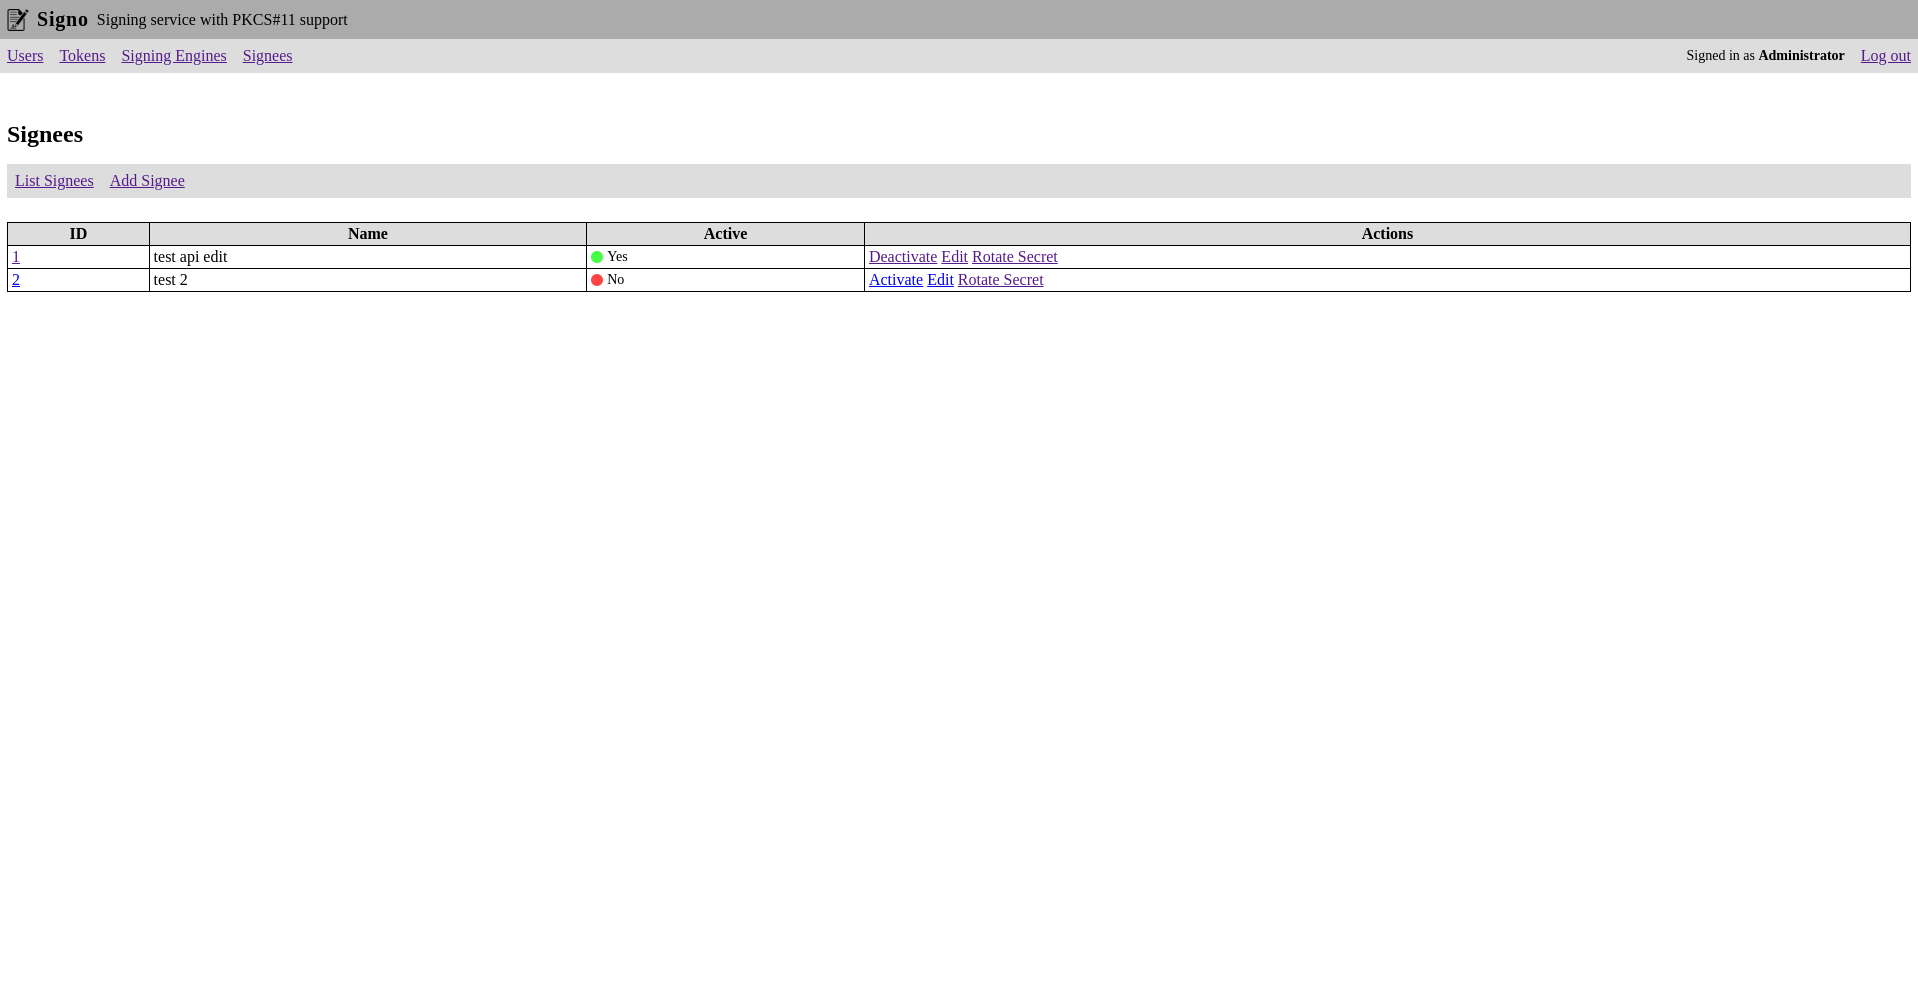
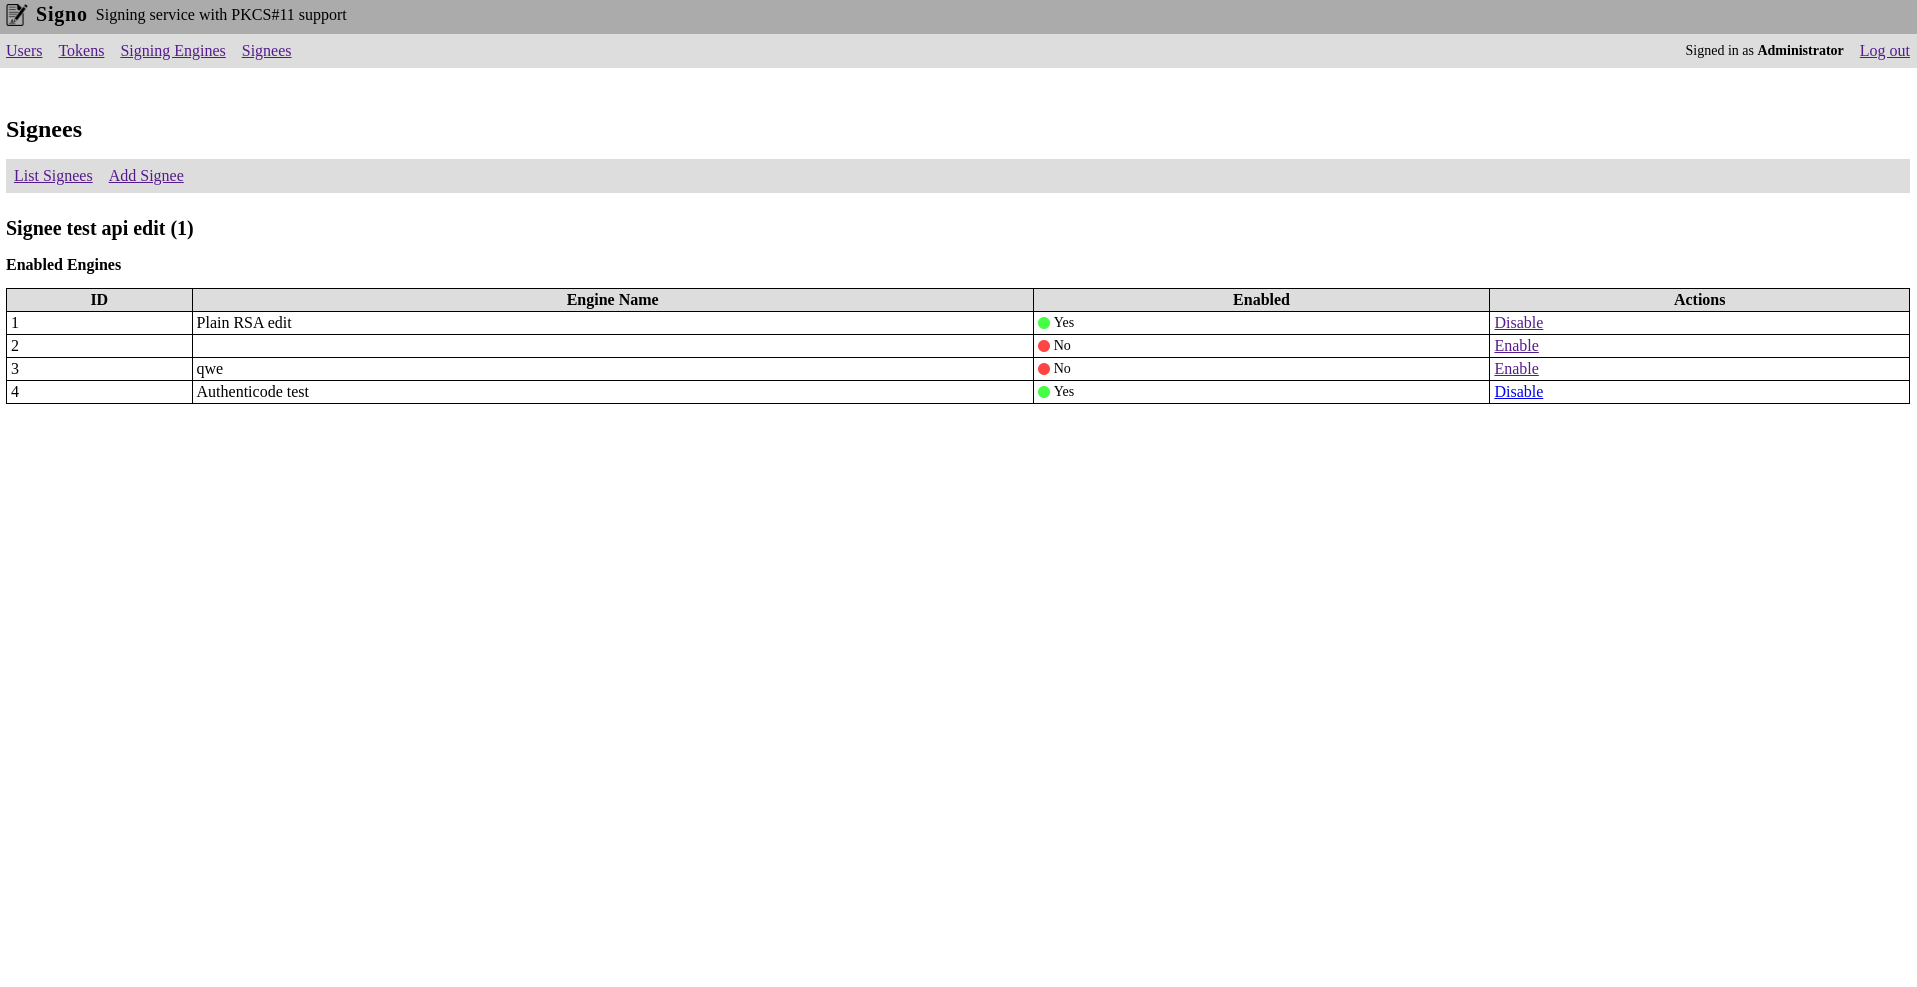
Signees are basically the API clients that can use the signing engines to create signatures. You can enable individual signing engines for each signee.
The API requests are HMAC signed.
Configuration
The configuration of signo is in YML format:
https:
  port: 3000 # port of the HTTPS server
  key: localhost.key # private key of the SSL certificate (path relative to the config file)
  cert: localhost.crt # SSL certificate (path relative to the config file)
  secret: "..." # secret used for sessions (use generate-secret command to generate)
  adminPassword: "..." # hashed password of the built-in administrator user (use hash command to generate)
database:
  type: mysql
  host: localhost # MySQL database host
  port: 3306 # MySQL database port
  database: signo # database name
  user: signo # database user
  password: signo # database password
# OR when using SQLite database:
database:
  type: sqlite
  database: signo.db # the path (relative to config file) to the sqlite database
pkcs11Modules:
  # list of pkcs11 modules in the format <name>: <path>
  YKCS11: /usr/local/lib/libykcs11.so # load pkcs11 module for Yubikey
Usage
Usage: signo [options] [command]

Signing server with PKCS#11 support

Options:
  --log-level <level>         log level (choices: "debug", "info", "warn", "error", "crypto", default:
                              "info")
  --log-format <format>       log format (choices: "text", "json", default: "text")
  --log-file <file>           rotated log file name (default: "signo.log")
  --crypto-log-file <file>    optional file to contain only the crypto log
  -h, --help                  display help for command

Commands:
  start [options]             start the service
  generate-secret [options]   generate secret for http sessions
  hash [options] <password>   hash an input password
  sign [options] <file>       sign file using signo server
  service [options] <action>  manage signo systemd service
  help [command]              display help for command
Commands
Start
Usage: signo start [options]

start the service

Options:
  -c, --config <config file>  location of the config file
  -h, --help                  display help for command
Generate Secret
Usage: signo generate-secret [options]

generate secret for http sessions

Options:
  -b, --bytes <number>  length of secret in bytes (default: 64)
  -s, --silent          only output the generated secret (default: false)
  -h, --help            display help for command
Hash
Usage: signo hash [options] <password>

hash an input password

Options:
  -s, --silent  only output the hash (default: false)
  -h, --help    display help for command
Sign
Usage: signo sign [options] <file>

sign file using signo server

Options:
  -s, --server <server>  endpoint of signo server (default: "https://localhost:3000/")
  --client <client>      ID of signee
  --secret <secret>      shared secret of signee
  --engine <engine>      engine to use for signing
  -o, --output <output>  save signature to file instead of outputting it as hex
  --unsafe               accept any https certificate
  -h, --help             display help for command
Service
Usage: signo service [options] <action>

manage signo systemd service

Arguments:
  action                 the action to execute (choices: "install", "remove", "start", "stop")

Options:
  --no-user              (during install) do not create system user for signo
  --password <password>  (during install) specify the administrator password (default: "admin")
  --remove-config        (during remove) remove the configuration files as well (default: false)
  -h, --help             display help for command
Using the API
You can refer to a sample implementation of the API client in the sign command. Or you can use signo-client.
The API endpoint is /api/sign/:signingEngineId
import fsp from 'fs/promises';
import hmac from '@opsvent/hmac';
import { FormDataEncoder } from 'form-data-encoder';
import { FormData, File } from 'formdata-node';
import { Readable } from 'stream';
import fetch from 'node-fetch';

// first of all you need to have your file loaded in a Buffer
const file = await fsp.readFile('some-file.txt');

// then you need to compute the SHA3-512 hash of the file
const fileHash = crypto.createHash('sha3-512').update(file).digest('hex');

// calculate the HMAC signature
const sig = hmac.sign(
	{
		method: 'POST',
		url: `/api/sign/1`,
		body: fileHash
	},
	{
		id: 'api_client_id',
		key: 'api_client_secret'
	}
);

// create the multipart formdata
const form = new FormData();
form.set(
	'file',
	new File([new Blob([file])], 'filename.txt', {
		type: 'application/octet-stream'
	})
);
const encoder = new FormDataEncoder(form);

// send the request
const resp = await fetch(endpoint.href, {
	method: 'POST',
	headers: {
		...encoder.headers,
		Authorization: sig
	},
	body: Readable.from(encoder.encode())
});

// check if the signing was successful
if (resp.status != 200 || !resp.body) {
	console.log('! Error !');
	console.log('Status code:', resp.status);
	console.log('Message:', resp.statusText);
	console.log('Body:', await resp.json());
	process.exit(1);
}

// convert the signed response to a buffer
const signature = Buffer.from(await resp.arrayBuffer());
Planned features
- Crypto log: cryptographically verifiable log of all the operations
- PDF signing
- Key and CSR generation
- Import certificates to tokens