React Native Share Extension
This is a helper module which brings react native as an engine to drive share extension for your app.
Installation
installation should be very easy by just installing it from npm.
npm install react-native-share-extension --saveSetup
the setup requires a little bit more work. I will try to describe as detail as possible. I would love to use rnpm so I will welcome pull request.
iOS
- click on your project's name
- click on
+sign
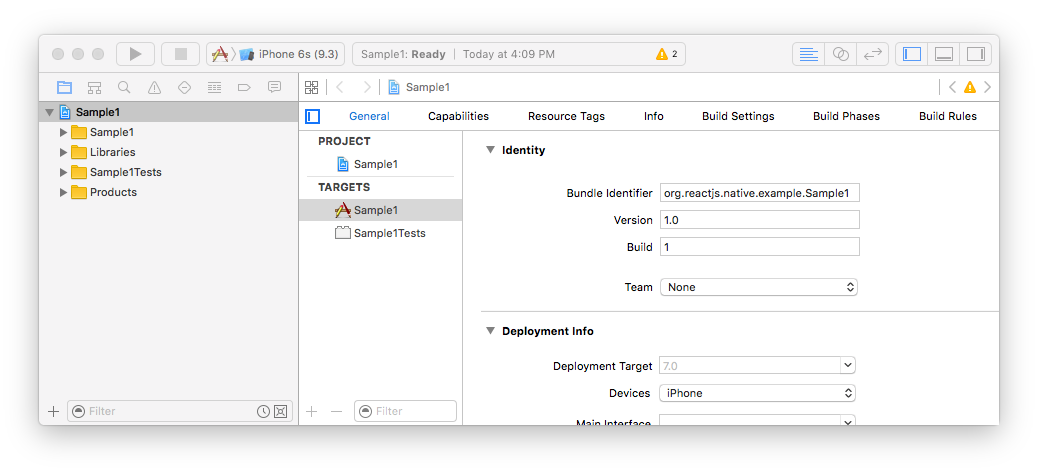
- select
Share ExtensionunderiOS > Application Extension

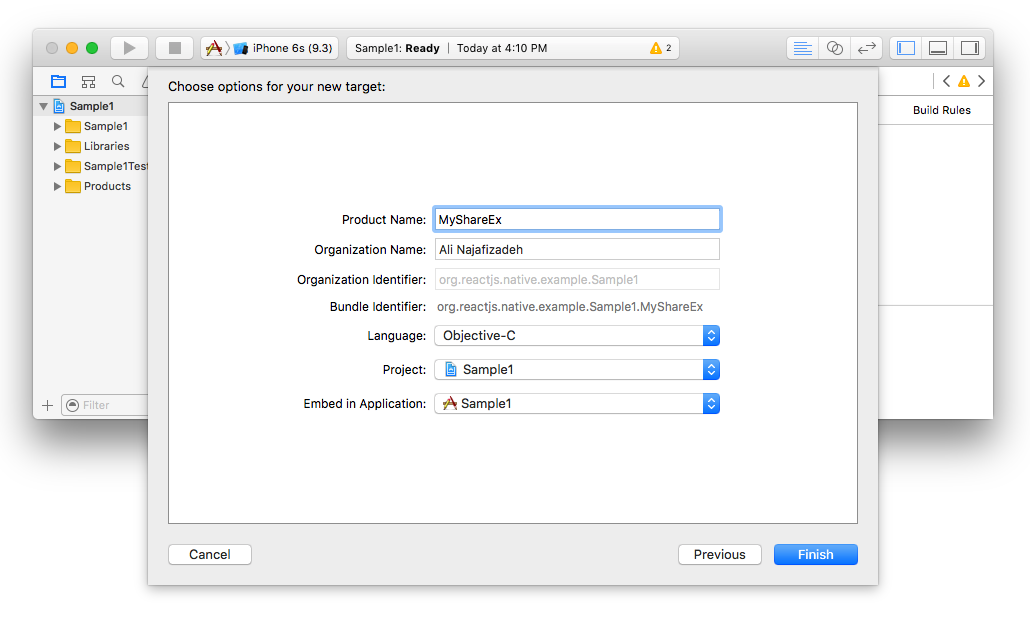
- select a name for your new share extension, in my case I chose
MyShareEx
- delete both
ShareViewController.handShareViewController.m. make sure to click onMove to Trashbutton during deletion.
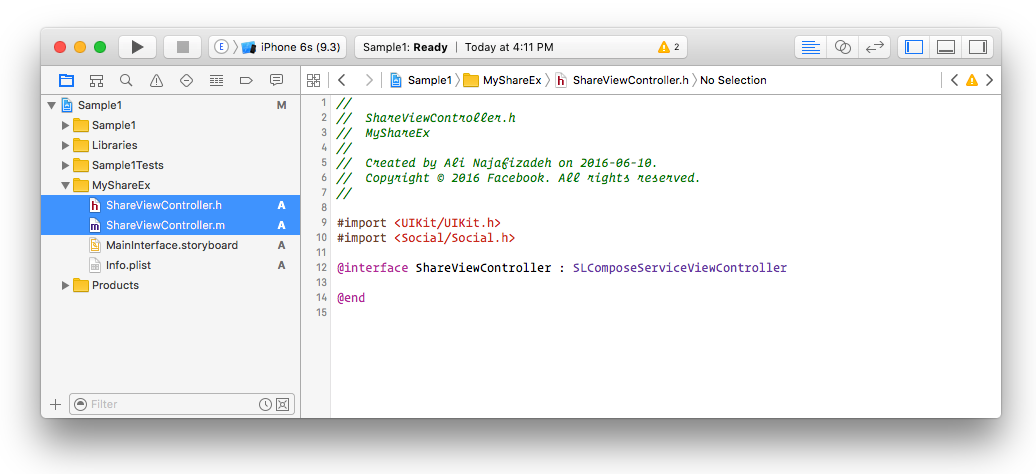
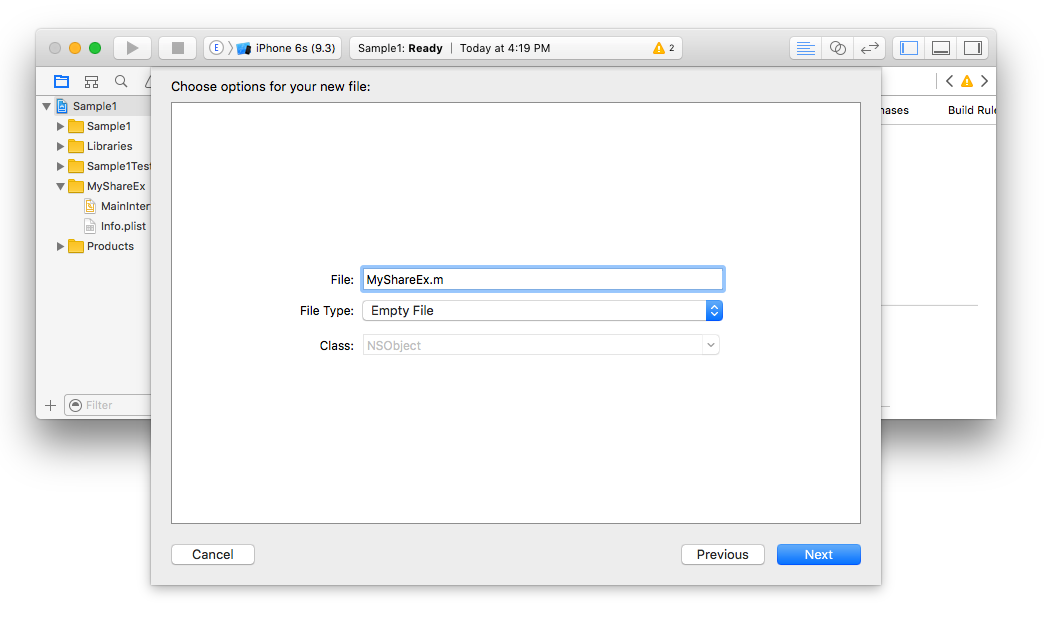
- create new file under your share extension group. in my case it was
MyShareEx
- make sure the type of that object is
Objective-c File, e.g. forMyShareExname itMyShareEx.m

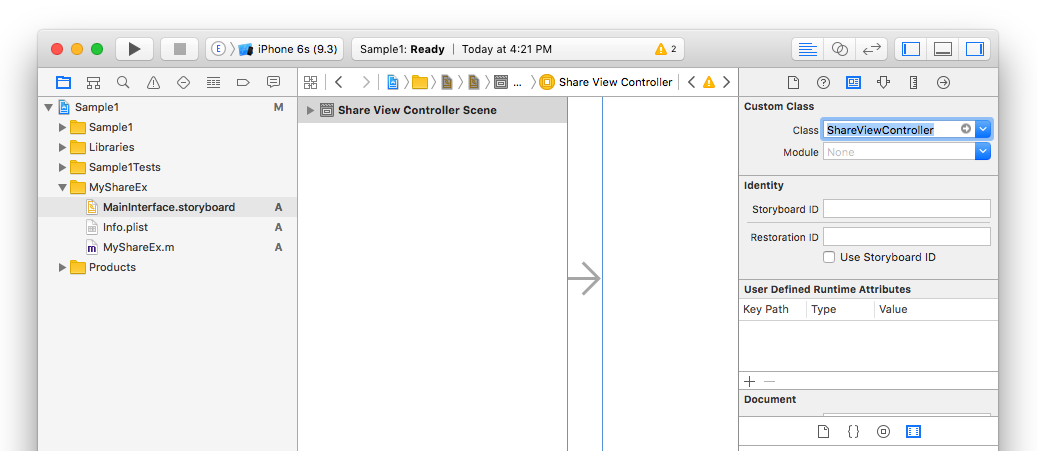
- since we deleted
ShareViewController.m, we need to tell the storyboard of your share extension where the view needs to be loaded. So click onMainInterface.storyboardand replace the class field fromShareViewControllerto whatever you chose above (in my caseMyShareEx)
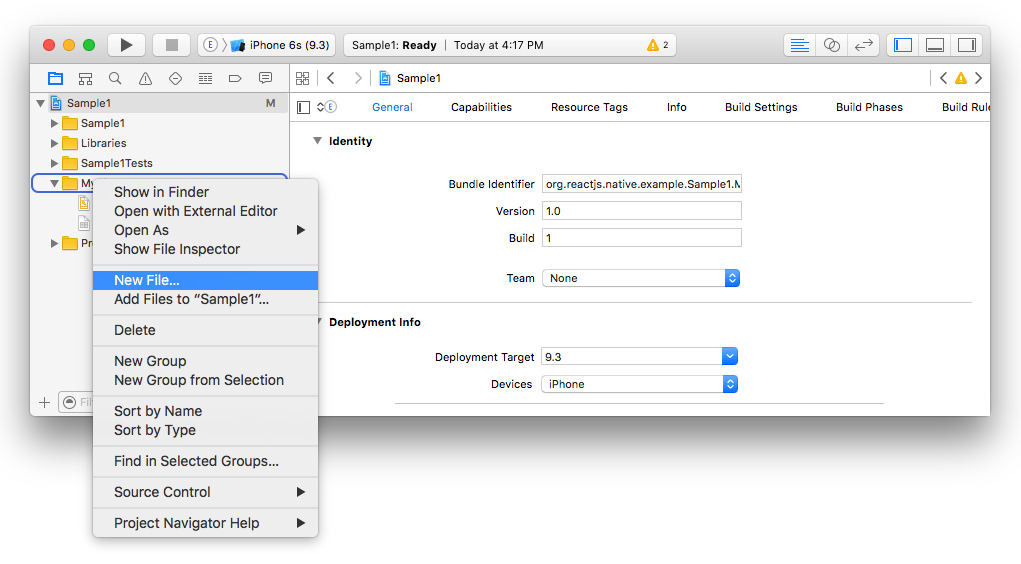
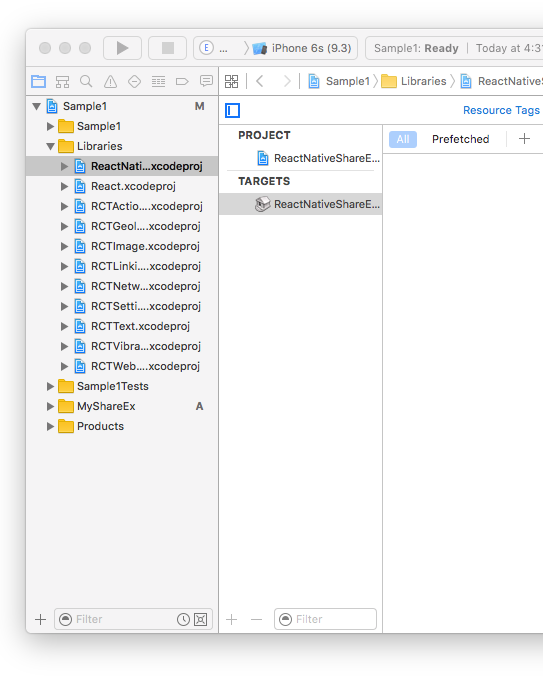
- now it's time to add our library. Right click on
Librariesgroup and selectAdd Files to "Sample1"...

- select
node_modules>react-native-share-extension>ios>ReactNativeShareExtension.xcodeproj
- now we need to tell the share extension that we want to read new header files. click on project name, in my case
Sample1then click on your extension name (in my caseMyShareEx). After that click on Build Settings and search forHeader Search Paths
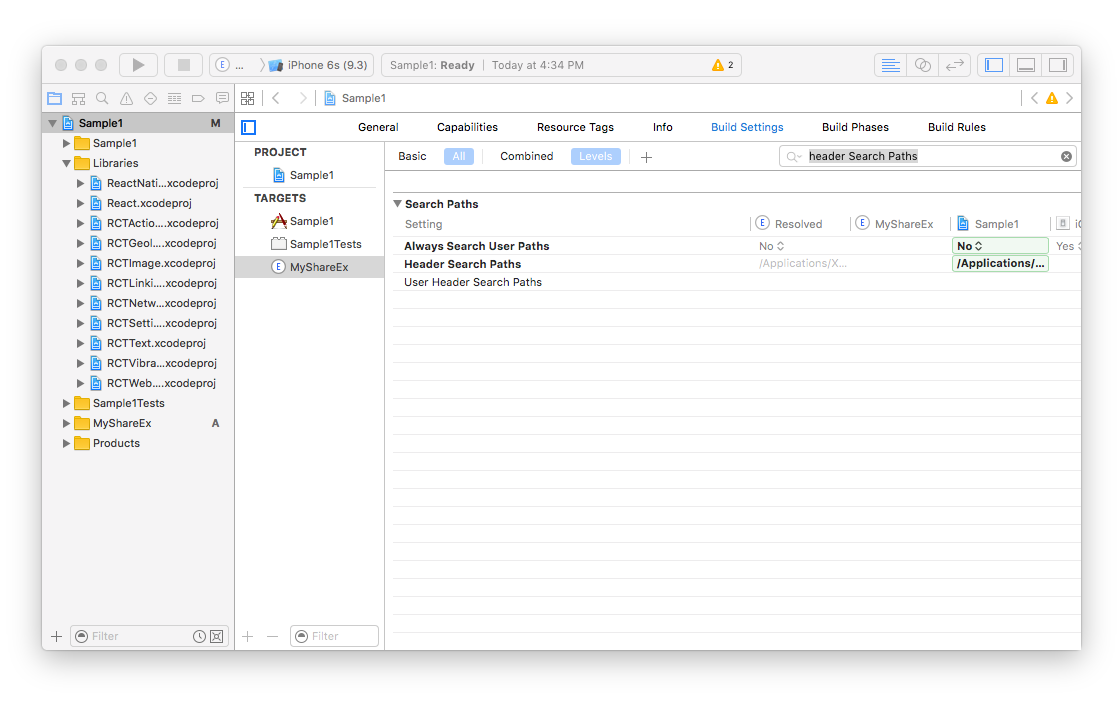
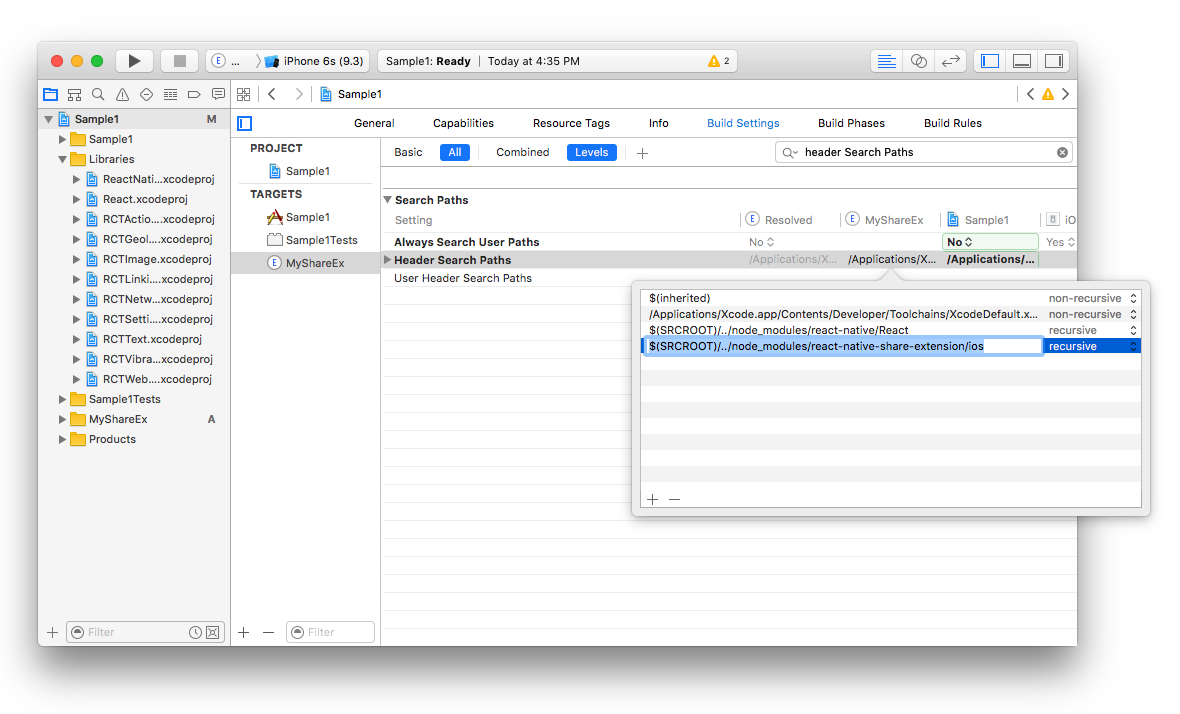
- add the new path
$(SRCROOT)/../node_modules/react-native-share-extension/ioswithrecursiveselected.
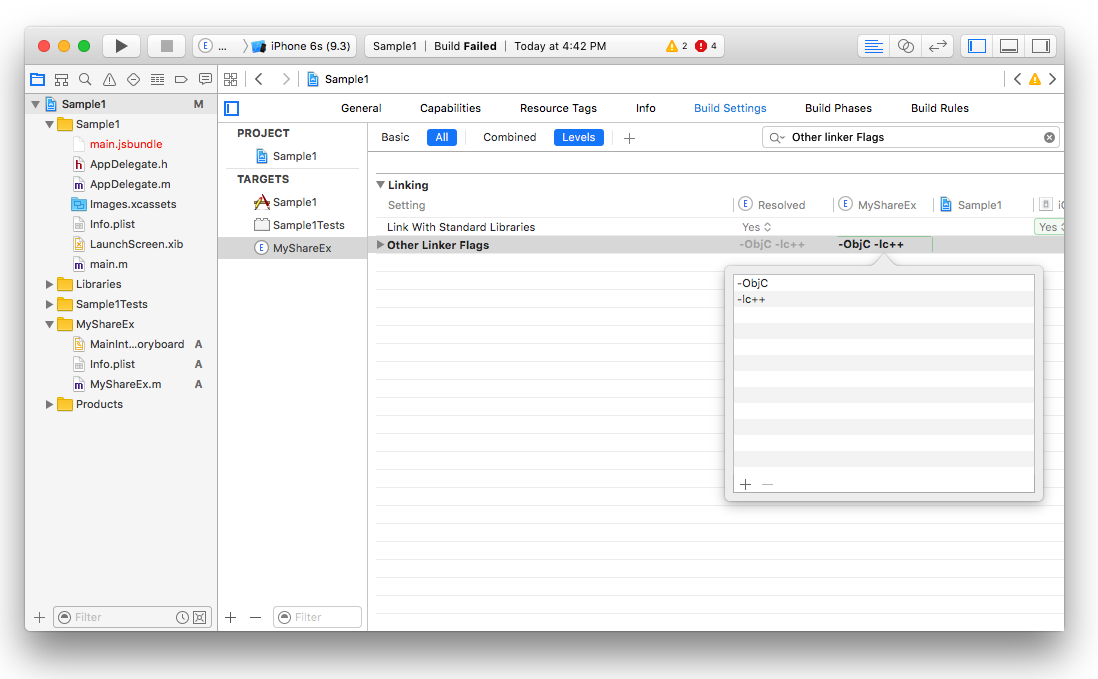
- we need to add some flags as well, so search for
Other Linker Flagsand add-ObjCand-lc++
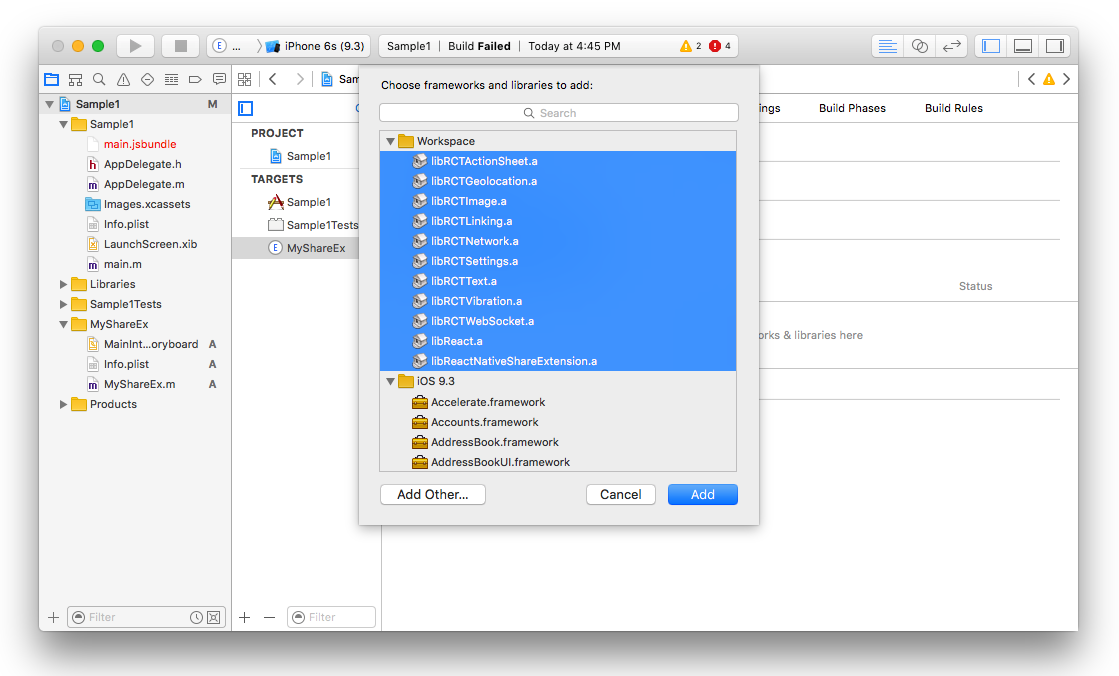
- we also need to add all the static libraries such as react and Share Extension. so select
Generaltab and underLinked frameworks and Librariesclick on+and add all of the selected static binaries there.
- we need to modify the
Info.plistinside the extension (e.g.MyShareEx/Info.plist) to make sure that our share extension can connect to internet. This is useful if you need your share extension connects to your api server or react-native remote server dev. For doing that we need toApp Transport Security SettingstoInfo.plist

- now go back to your extension file (in my case
MyShareEx.m) and paste the following code there being sure to substituteMyShareExin all three places for whatever you chose above
- now try to build the project. it should build successfully.
Android
- edit
android/settings.gradlefile and add the following
include ':app', ':react-native-share-extension'

project(':react-native-share-extension').projectDir = new File(rootProject.projectDir, '../node_modules/react-native-share-extension/android')
- edit
android/app/build.gradleand add the following line before react section in dependency
dependencies {
    ...
    compile project(':react-native-share-extension')
    compile "com.facebook.react:react-native:+"
}
-
create a folder called
shareunder your java project and create two files. Call themShareActivity.javaandShareApplication.java....just like your main project. -
ShareActivity should look like this
// define your share project, if your main project is com.sample1, then com.sample1.share makes sense.... // import ReactActivity - ShareApplication should look like this
// your package you defined in ShareActivity // import build config - MainApplication should look like this
// your package you defined in ShareActivity - edit
android/app/src/main/AndroidMainfest.xmland add the newactivityright afterdevSettingActivity.
// for sharing links include // for sharing photos include in this new activity I have used 2 variables @string/title_activity_share and @style/Theme.Share.Transparent. you can add those in res/values.
so in values/strings.xml
... MyShareExand in values/styles.xml
... @null @null true @android:color/transparent @null true true true @style/Share.Window - now you should be able to compile the code without error.
if you need to add more packages to your share extension do not overrides
getPackages. instead overridegetMorePackagesmethod underShareExActivity.
Share Component
so both share extension and main application are using the same code base, or same main.jsbundle file. So the trick to separate Share and Main App is registering 2 different Component entries with AppRegistry.registerComponent.
so in both iOS and android share extension we are telling react to load the extension component (in my case MyShareEx) from js.
so in index.ios.js and index.android.js we are writing the same code as
//index.android.js AppRegistryAppRegistry // TODO: Replace MyShareEx with my extension name//index.ios.js AppRegistryAppRegistry // TODO: Replace MyShareEx with my extension nameso the app.ios and app.android.js refers to main app and share.ios.js and share.android.js refers to share extension.
Share Extension APIs
data()is a function that returns a promise. Once the promise is resolved, you get two values,typeandvalue.
... const type value = await ShareExtensiondataclose()
it simply close the share extension and return the touch event back to application that triggers the share.
Test on Device without dev-server
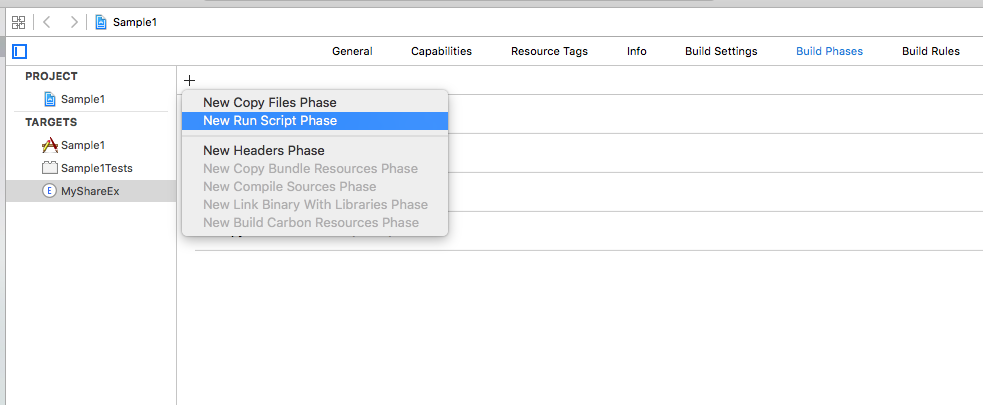
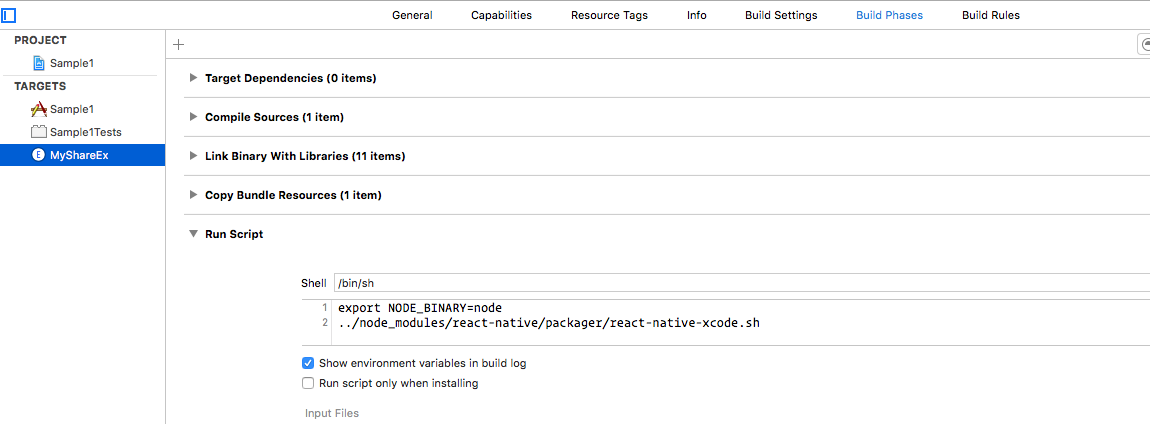
because share extension in ios devices are separate containers and the do not have access to main app folder, you have to build the script twice and package it inside the share extension container. The easiest way of doing this is create a New Script Phase in Build Phases of your share extension and copy the following line
export NODE_BINARY=node../node_modules/react-native/packager/react-native-xcode.sh
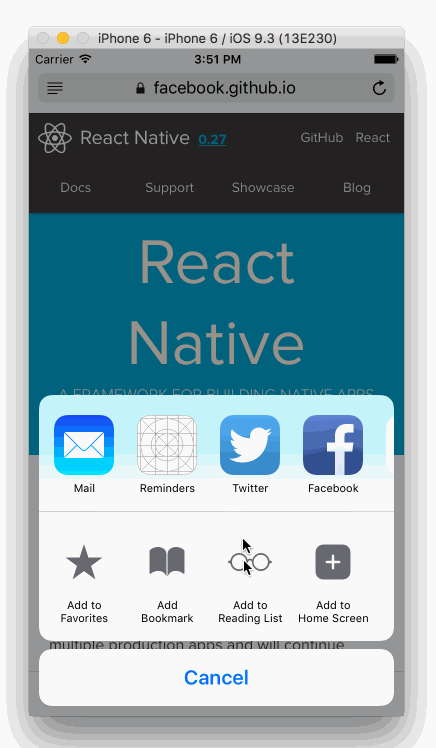
On iOS: Set the NSExtensionActivationRule key in your Info.plist
For the time being, this package only handles sharing of urls specifically from browsers. In order to tell the system to show your extension only when sharing a url, you must set the NSExtensionActivationRule key (under NSExtensionAttributes) in the share extension's Info.plist file as follows (this is also needed to pass Apple's reveiw):
<key>NSExtensionAttributes</key>
<dict>
  <key>NSExtensionActivationRule</key>
  <dict>
    <key>NSExtensionActivationSupportsWebURLWithMaxCount</key>
    <integer>1</integer>
  </dict>
</dict>

Note that while the above will prevent many apps from wrongly sharing using your extension, some apps (e.g., YouTube) will still allow sharing using your extension, which might cause your extension to crash. Check out this issue for details.
For reference about NSExtensionActivationRule checkout Apple's docs
Final note
I have used react-native-modalbox module to handle the showing and hiding share extension which makes the experience more enjoyable for the user.
Cheers