
kevast-gist.js


Installation
Node.js
Using yarn
yarn add kevast-gistUsing npm
npm install kevast-gistBrowser
Usage
Only access token given:
const Kevast = ;const KevastGist = ;const assert = ; const ACCESS_TOKEN = 'YOUR GITHUB ACCESS TOKEN'; async { const kevastGist = await KevastGist; // Gist id and filename will be generated automatically console; console; const kevast = kevastGist; await kevast; ;};Access token and gist id given:
const Kevast = ;const KevastGist = ;const assert = ; const ACCESS_TOKEN = 'YOUR GITHUB ACCESS TOKEN';const GIST_ID = 'GIST ID'; async { const kevastGist = await KevastGist; ; // Filename will be generated automatically console; const kevast = kevastGist; await kevast; ;};Access token, gist id and filename given:
const Kevast = ;const KevastGist = ;const assert = ; const ACCESS_TOKEN = 'YOUR GITHUB ACCESS TOKEN';const GIST_ID = 'GIST ID';const FILENAME = 'FILE NAME'; async { const kevastGist = await KevastGist; ; ; const kevast = kevastGist; await kevast; ;};How to get a GitHub Access Token
Click this link to generate a new GAT.
Steps:
- Description
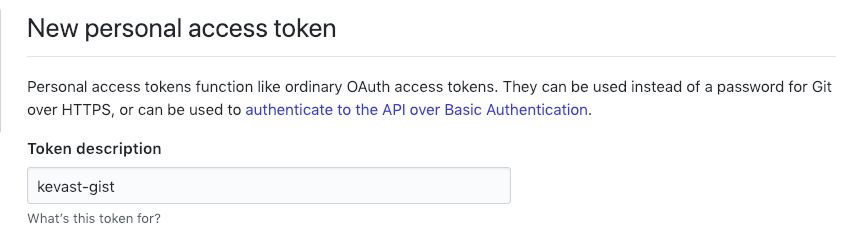
The description is arbitrary. You can fill in anything you like. But kevast-gist is recommended to remind you this GAT is being used by this kevast-gist.
- Scopes
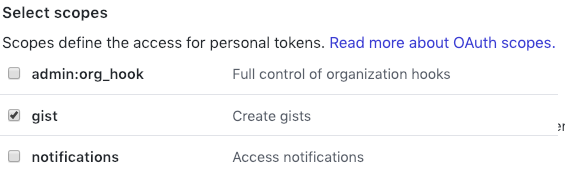
Kevast-gist only requires Gist scope, so please do not check other unnecessary permissions to ensure your account security.
- Generate
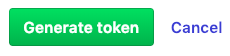
Click Generate button and you will see the newly created GAT.

ATTENTION: You won't be able to see it again. Please keep it properly, otherwise it can only be regenerated.