
This project was born inspired by the vscode extension [WordPress Post] and Scratchpad's article.
You can run a script or command to post your markdown files to wordpress.
In addition, we have prepared a function to detect broken links of image files in Markdown and images not used in Markdown in the folder where Markdown is placed.
I'm sorry, but when I updated to version 1.0.0, I refactored the method name. Mainly, we received information that there was confusion during implementation because there was no "Async" suffix even though it was an "asynchronous method", so we fixed it. If you are using an earlier version, updating may cause compilation errors.
Using npm:
$ npm install wp-post
Like WordPress Post, write the article title and publication status in the "Frontmatter" part as shown below.
---
title: post'title
status: draft
---
# title
test
<p>test1</p>
```java
public class Hoge{
}
```
The following is the folder and file structure.
post01
├── images
│   └── test-b.png
├── post01.md
└── post01.png
Similarly, if "slug" is not specified, the file name will be slug.
Convert the markdown file to HTML and post it to WordPress.
import { wppostAync } from "wp-post";

const docPath = "./post01/post01.md";

const apiUrl = "apiUrl"; // e.g https://example.com/wp-json/wp/v2
const authUser = "authUser";// e.g userName,mail
const authPassword = "authPassword";// e.g "xxxs xxxs xxxs xxxs xxxs xxxx"

//
const postId = await wppostAync(docPath, apiUrl, authUser, authPassword);
console.log(postId): // post id
getLinksAsync detects the link status of images in the markdown,
getFileReferencesAsync detects the link status of image files in the folder where the markdown is located.
import { getLinksAsync, getFileReferencesAsync } from "wp-post";

const docPath = "./post01/post01.md";
const results1 = await getLinksAsync(docPath);
console.log(results1): //  images that cannot be referenced in markdown.

const results2 = await getFileReferencesAsync(docPath);
console.log(results2): // A list of the referencing status of files.
getFileReferencesAsyncThe default file extensions to be targeted are ".png", ".jpg", and ".gif". They can be specified as a string array in the first argument, for example, [" .png", ".jpg", ".gif"].
The above process is defined in the following class: WPPost . It can also be used.
When using wppostAync()
import WPPost from "wp-post";
const wpost = new WPPost(docPath);

// If you want to change the config.
// Set up automatic conversion to a link card.
wpost.getConfig().useLinkCardHtmlGenerator = true; // default: false

// change APIUrl
// https://example.com/wp-json/wp/v2/posts -> https://example.com/wp-json/wp/v2/myposts
wpost.getConfig().apiPostUrl = "myposts"; // default: posts

// https://example.com/wp-json/wp/v2/media -> https://example.com/wp-json/wp/v2/mymedia
wpost.getConfig().apiMediaUrl = "mymedia";// default: media


//
const apiUrl = "https://example.com/wp-json/wp/v2";
const authUser = "userName or email";
const authPassword = "xxxs xxxs xxxs xxxs xxxs xxxx";
//
const postId = await wpost.postAsync(apiUrl, authUser, authPassword);
When using getLinksAsync() or getFileReferencesAsync() .
const wpost = new WPPost(docPath);

const results1 = await wpost.getLinksAsync();
const results2 = await wpost.getFileReferencesAsync();- change template Below we introduce the conversion of Markdown statements such as ```(code) and :::(container). Some of them can be customized in this version.
Here's an example using the detail template.
Placeholders are described with {{}}.
In the case of detail, the label value is embedded, so write {{label}} in the target location.
const wpost = new WPPost(docPath);
wpost.template.tplDetail= new Template(`<details><summary>!!{{label}}!!aaa</summary>`,`</details>`);
Specify the first argument of the Template class as the opening tag and the second argument as the closing tag.
Or you can override the tag generation logic itself to do your own thing. Here is a sample combined with the previous template. See this specification here markdown-it-container.
  const wpost = new WPPost(docPath);

  wpost.template.detail= (
    tokens: any, idx: any
  ) :string=>{

    var m = tokens[idx].info.trim().match(/^detail\s+(.*)$/);

    let label = "";
    if (Array.isArray(m) && m.length >= 2)
      label = MarkdownIt().utils.escapeHtml(m[1]);

    if (tokens[idx].nesting === 1) {
      return wpost.template.tplDetail.renderStart({ label: label });
    } else {
      return wpost.template.tplDetail.renderEnd();
    }

  }
Here are the embedded keys and values provided by each template.
-
detail
key value label summary' value default
 public tplDetail: Template = new Template(
  `<details ><summary>{{label}}</summary>`,
  `</details>`
);
-
detailOpen
key value label summary' value default
  public tplDetailOpen: Template = new Template(
  `<details  open="true"><summary>{{label}}</summary>`,
  `</details>`
);
-
note
key value type type: primaryinfoalert
wordpress cocoon'setting.default
  public tplNote: Template = new Template(
  `<div class="note {{type}}"><div class="note-body">`,
  `</div></div>`
);
-
sticky
key value type type: st-redst-bluest-yellowst-green
wordpress cocoon'setting.default
  public tplSticky: Template = new Template(
  `<div class="wp-block-cocoon-blocks-sticky-box blank-box block-box sticky {{type}}">`,
  `</div>`
);
-
label
key value title title string default
  public tplLabel: Template = new Template(
  `<div class="wp-block-cocoon-blocks-label-box-1 label-box block-box"><div class="label-box-label block-box-label box-label"><span class="label-box-label-text block-box-label-text box-label-text">{{title}}</span></div><div class="label-box-content block-box-content box-content">`,
  `</div></div>`
);
-
speech
key value name Name displayed under Avatar image Avatar image
Specify a file location that the img tag can accessposition sbp-r
If you specify "opposite": true and display it on the right side, the stringsbp-rwill be entered. This string is from wordpress cocoon style. It will be possible to change these strings in the next and subsequent versions.default
  public tplSpeech: Template = new Template(
  `<div class="wp-block-cocoon-blocks-balloon-ex-box-1 speech-wrap sb-id-1 sbs-stn {{position}} sbis-cb cf block-box">
      <div class="speech-person">
      <figure class="speech-icon">
      <img src="{{image}}" alt="{{name}}" class="speech-icon-image"/>
      </figure>
      <div class="speech-name">{{name}}</div>
      </div>
      <div class="speech-balloon">`,
  `</div></div>`
);
-
linkCard
key value url link href value title og title image og image description og description domain domain from url default
public tplLinkCard: Template = new Template(
    `<a href="{{url}}" title="{{title}}" class="blogcard-wrap internal-blogcard-wrap a-wrap cf">
          <div class="blogcard internal-blogcard ib-left cf">
            <div class="blogcard-label internal-blogcard-label">
              <span class="fa"></span>
            </div>
            <figure class="blogcard-thumbnail internal-blogcard-thumbnail">
              <img src="{{image}}" alt="" class=" internal-blogcard-thumb-image" width="160" height="90" loading="lazy" decoding="async" />
            </figure>
            <div class="blogcard-content internal-blogcard-content">
              <div class="blogcard-title internal-blogcard-title">
              {{title}}
              </div>
              <div class="blogcard-snippet internal-blogcard-snippet">
              {{description}}
              </div>
            </div>
            <div class="blogcard-footer internal-blogcard-footer cf">
              <div class="blogcard-site internal-blogcard-site">
                <div class="blogcard-favicon internal-blogcard-favicon">
                  <img src="https://www.google.com/s2/favicons?domain={{url}}" alt="" class="blogcard-favicon-image internal-blogcard-favicon-image" width="16" height="16" loading="lazy" decoding="async" />
                </div>
                <div class="blogcard-domain internal-blogcard-domain">
                {{domain}}
                </div>
              </div>
            </div>
          </div>
        </a>`
  );
-
code The code specifies the conversion process itself as a function.
This is simply a way to specify a fixed string. You can freely convert code tags (and their parent pre tags) to refer to the default implementation.
  wpost.template.code =  (
    _ch: cheerio.CheerioAPI,
    _code: cheerio.Element,
    _useLineNumbers: boolean
  ): string => {
    //
    return `<code>abcde</code>`;
  };
default
this.code = (
    ch: cheerio.CheerioAPI,
    code: cheerio.Element,
    useLineNumbers: boolean
  ): string => {
    //
    let className = ch(code).attr("class");
    let text = ch(code).text();
    let parent = ch(code).parent();
    let parent_tagName = parent.get(0)?.tagName.toLowerCase();
    //
    if (className == null) className = "";
    //
    let languages = className
      .replace("language-", "")
      .replace("diff-", "")
      .replace("diff_", "")
      .trim()
      .split(":");
    //
    let language = languages.length >= 1 ? languages[0] : null;
    let filePath = languages.length >= 2 ? languages[1] : null;

    if (parent_tagName === "pre") {
      // prism
      if (!!language) ch(parent).attr("data-label", filePath);
      //
      if (!!language) ch(parent).attr("data-lang", language);
      if (!!filePath) ch(parent).attr("data-file", filePath);
    }

    if (className.startsWith("language-mermaid")) {
      // WP mermaid
      className = "mermaid";
    } else if (className.startsWith("language-diff")) {
      // diff
      className = "language-diff";
      className += " diff-highlight";
      // linenumbers
      if (useLineNumbers) className += " line-numbers";
    } else {
      className = `language-${language}`;
      // linenumbers
      if (useLineNumbers) className += " line-numbers";
    }

    //
    return `<code class="${className}">${MarkdownIt().utils.escapeHtml(
      text
    )}</code>`;
  };
Like markdown-it, it can be extended with .use(plugin,...params).
const wpost = new WPPost(docPath);

wpost.use(require("<plugin"))Convert the markdown file to HTML and post it to WordPress.
Execute the command as follows:
$ wppost filePath -a <apiUrl> -u <userName> -p "<password>"

complete:😀  2294
After complete:😀, the POSTID that was posted will be displayed.
It is also possible to save it in the setting file and only specify the markdown file. The setting method is described below.
$ wppost config
Sets information interactively using Wordpress's REST API.
? What is your apiUrl? https://<apiUrl>
? What is your authUser ? authUser
? What is your authPassword ? xxx xxx xxx xxx xxx xxx
? What is your wp-api of Post(ex.'posts') ? (posts)
? What is your wp-api of Media(ex.'media') ? (media)
? Automatically convert a-tags into link cards? ? (y/N)

? Do you want to save these changes? Yes
Here are the changes you made:
apiUrl: https://<apiUrl>
authUser: authUser
authPassword: xxx xxx xxx xxx xxx xxx
apiPostUrl: posts
apiMediaUrl: media
automaticallyLinkCard: false

Configuration saved to C:\Users\user\AppData\Roaming\.wppost\config.json
After that, you will be able to post just by specifying the markdown file.
$ wppost ./post01/post01.md
complete:😀  2294
You can check the settings with wppost config -s or wppost config --show .
$ wppost config -s
Config file path: C:\Users\user\AppData\Roaming\.wppost\config.json
apiUrl: https://<apiUrl>
authUser: authUser
authPassword: xxx xxx xxx xxx xxx xxx
You can delete the settings with wppost config -d or wppost config --delete .
$ wppost  config --delete
? Are you sure you want to delete the current configuration? Yes
Configuration deleted.

$ wppost config -s
Configuration is not exists.
For option setting, give json as a string to -o or --option. json is single line and don't forget to enclose the elements in double quotes.
Below are the settings to generate line numbers and link cards.
$ wppost filePath -a <apiUrl> -u <userName> -p "<password>" -o "{\"useLineNumbers\":true,\"useLinkCard\":true }"
Detects broken links in image files in markdown, or images that are not used in markdown and are in the folder where markdown files are placed. Just add the -c or --check option.
Execute the command as follows:
$ wppost filePath -c
The following is the folder and file structure.
sample
├── images
│   ├── test-a.png
│   ├── test-b.png
│   └── test01.png
├── sample.md
└── sample.png
The markdown file is written as follows:
./sample/sample.md
# sample!

result:
$ wppost ./sample/sample.md -c
target:
./sample/sample.md
dir:
./sample

📄 markdown :🌱 2 ⚠️ 1 📥 workspace : 🌱 2 ⚠️ 2

📄 markdown
 🌱 sample\sample.png
 🌱 sample\images\test01.png
 ⚠️ sample\images\test02.png
📥 workspace
 ⚠️ sample\images\test-a.png
 ⚠️ sample\images\test-b.png
 🌱 sample\images\test01.png
 🌱 sample\sample.png
🌱 will be displayed for paths that exist correctly,
and
In addition to general markdown descriptions, the following are extended.
the current version sets the css class name according to the wordpress template: cocoon style, but we plan to make it customizable in a later version upgrade.
-
code
line-numbers is inserted below, but by default it is not inserted and line numbers are not displayed.
-
plane
```
$ cd ../
```
generated html.
<pre>
  <code class="language- line-numbers">$ cd ../
</code>
</pre>
like this.

-
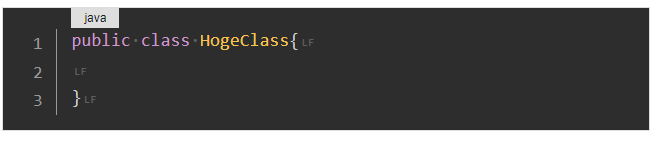
language
```java
public class HogeClass{
}
```
generated html.
<pre data-lang="java">
  <code class="language-java line-numbers">public class HogeClass{
}
</code>
</pre>
like this.
-
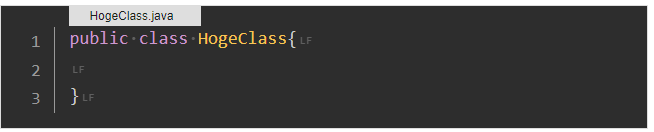
language with filepath
```java:HogeClass.java
public class HogeClass{

}
```
generated html.
<pre data-label="Java.java" data-lang="java" data-file="HogeClass.java">
  <code class="language-java line-numbers">public class Hoge{

}
</code></pre>
like this.
-
-
uml
-
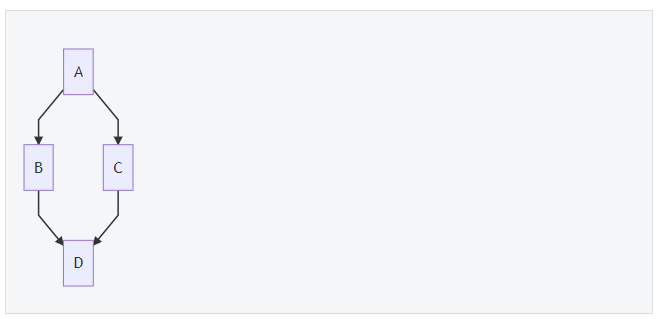
mermaid Requires WP Mermaid to be added to the plugin.
```mermaid
graph TD;
    A-->B;
    A-->C;
    B-->D;
    C-->D;
```
generated html.
<pre data-lang="mermaid"> <code class="mermaid">graph TD; A-->B; A-->C; B-->D; C-->D; </code> </pre>
like this.
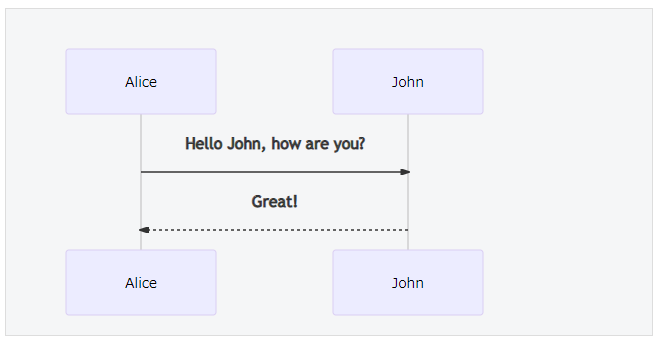
```mermaid
sequenceDiagram
    Alice->>John: Hello John, how are you?
    John-->>Alice: Great!
```
generated html.
<pre data-lang="mermaid"> <code class="mermaid">sequenceDiagram Alice->>John: Hello John, how are you? John-->>Alice: Great! </code> </pre>
like this.
-
-
container
-
detail
::: detail test1
here be dragons
:::
generated html.
<details><summary>test1</summary>
<p><em>here be dragons</em></p>
</details>
like this.

If you want the open state to be the initial state, specify
detail-open -
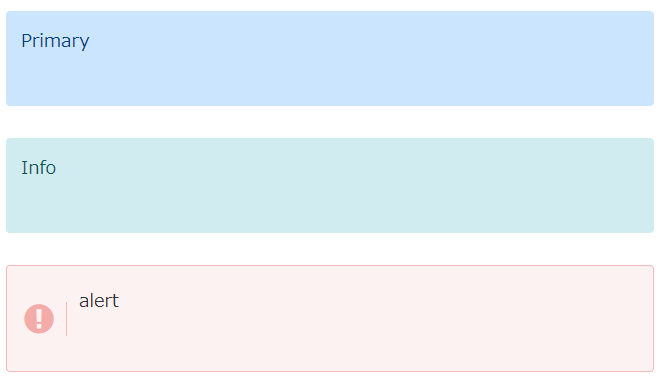
note
::: note primary
Primary
:::

::: note info
Info
:::

::: note alert
alert
:::
generated html.
<div class="note primary">
  <div class="note-body"><p>Primary</p></div>
</div>
<div class="note info">
  <div class="note-body"><p>Info</p></div>
</div>
<div class="note alert">
  <div class="note-body"><p>alert</p></div>
</div>
like this.
-
sticky
::: sticky st-blue
content
:::
generated html.
<div class="wp-block-cocoon-blocks-sticky-box blank-box block-box sticky st-blue">
  <p>sticky</p>
</div>
like this.

-
label
::: label title
content
:::
generated html.
<div class="wp-block-cocoon-blocks-label-box-1 label-box block-box">
  <div class="label-box-label block-box-label box-label">
    <span class="label-box-label-text block-box-label-text box-label-text">title</span>
  </div>
  <div class="label-box-content block-box-content box-content">
  <p>content</p>
  </div>
</div>
like this.

-
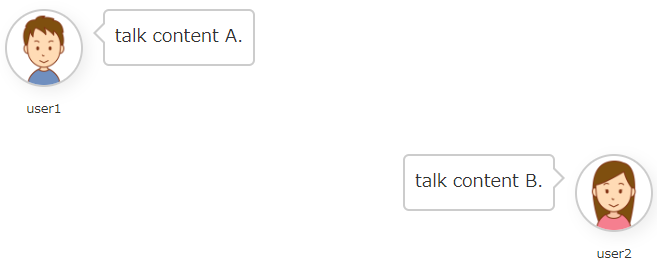
speech
::: speech {"image":"<imagePath>","name":"<name>"}
talk content A.
:::


::: speech {"image":"<imagePath>","name":"<name>","opposite":true}
talk content B.
:::
generated html.
<div class="wp-block-cocoon-blocks-balloon-ex-box-1 speech-wrap sb-id-1 sbs-stn sbp-l sbis-cb cf block-box">
  <div class="speech-person">
    <figure class="speech-icon"><img src="<imagePath>" alt="<name>" class="speech-icon-image"></figure>
    <div class="speech-name"><name></div>
  </div>
  <div class="speech-balloon">
    <p>talk content A.</p>
  </div>
</div>
<div class="wp-block-cocoon-blocks-balloon-ex-box-1 speech-wrap sb-id-1 sbs-stn sbp-r sbis-cb cf block-box">
  <div class="speech-person">
    <figure class="speech-icon"><img src="<imagePath>" alt="<name>" class="speech-icon-image"></figure>
    <div class="speech-name"><name></div>
  </div>
  <div class="speech-balloon">
    <p>talk content B.</p>
  </div>
</div>
like this.
-
-
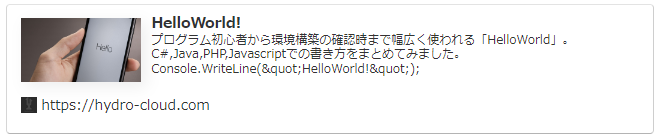
linkCard In the case of a link description with blank line breaks before and after, the html of the link card is generated.
By default, no link card is generated. Get the ogp tag of the link destination at the time of generation, and generate the link card with its contents.
In general, link cards are often created using javascript. (It will be developed as a wordpress plugin soon.)
link1
[link2](https://hydro-cloud.com/helloworld) <!-- not works-->

[link2](https://hydro-cloud.com/helloworld) <!--works-->
<p>link1 <a href="https://hydro-cloud.com/helloworld">link1</a></p> <p> <a href="https://hydro-cloud.com/helloworld" title="HelloWorld!" class="blogcard-wrap internal-blogcard-wrap a-wrap cf"> <div class="blogcard internal-blogcard ib-left cf"> <div class="blogcard-label internal-blogcard-label"> <span class="fa"></span> </div> <figure class="blogcard-thumbnail internal-blogcard-thumbnail"> <img src="https://hydro-cloud.com/wp-content/uploads/2018/07/iphone7hello_TP_V.jpg" alt="" class=" internal-blogcard-thumb-image" width="160" height="90" loading="lazy" decoding="async"> </figure> <div class="blogcard-content internal-blogcard-content"> <div class="blogcard-title internal-blogcard-title"> HelloWorld! </div> <div class="blogcard-snippet internal-blogcard-snippet"> プログラム初心者から環境構築の確認時まで幅広く使われる「HelloWorld」。C#,Java,PHP,Javascriptでの書き方をまとめてみました。Console.WriteLine(&quot;HelloWorld!&quot;); </div> </div> <div class="blogcard-footer internal-blogcard-footer cf"> <div class="blogcard-site internal-blogcard-site"> <div class="blogcard-favicon internal-blogcard-favicon"> <img src="https://www.google.com/s2/favicons?domain=https://hydro-cloud.com/helloworld" alt="" class="blogcard-favicon-image internal-blogcard-favicon-image" width="16" height="16" loading="lazy" decoding="async"> </div> <div class="blogcard-domain internal-blogcard-domain"> https://hydro-cloud.com </div> </div> </div> </div> </a> </p>
like this.


Thanks so much. Their great information was very helpful in development. And they helped me a lot.
- WordPress Post
- メモ置場のブログ: Scratchpad'blog