UI-Logon
An identification management solution implemented using Angular, Express, Passport, node-authorization, and JSON-On-Relations.
How to Use
UI-Logon contains 3 parts:
- "ui-logon-angular" is an Angular reusable component. You can use it to compose your logon page.
- "Identification Apps" contains various Apps which are used to maintain identification objects, which may include users, permissions, profiles, app, app category, and authorization objects.
- "ui-logon" is a NodeJS component which contains backend logic, like routes, authentication, and authorization.
You can leverage the 3 parts separately or in combinations.
UI-Logon-Angular
- Install it to your angular project:$ npm install ui-logon-angular --save
- In "app.module.ts", import the "LogonModule" from "ui-logon-angular":;
- In "app.component.html", add the "dk-logon" template:
- Run your Angular project. Hopefully, you will see following UI:
Change the Labels
The title and labels in the UI component can be changed. You can either do it in this way:
Or use the navigation data attribute:
;The second approach allows you to redirect to an Angular component.
Identification Apps
After git clone this project, following Angular Apps are in the folder /src/app:
- Manage Users -->
/user - Define Permission -->
/permission - Define Authorization Profile -->
/profile - Define App -->
/app - Define App Category -->
/app_category - Define Authorization Object -->
/auth_object
You run the command ng build in the project root to generate the static runnable in dist/identification.
In the NodeJS initiative file server.js, you can find following statements are used to expose the runnable
through ExpressJS:
const express = ;const app = ;// Static stuff before session is initializedconst path = ;app;app;
To run the Apps, you need to install MySQLs(5.6) and Redis. You should also refer JSON-On-Relations to populate the data into MySQL instance.
At last, execute command npm install and then node server.js to start the server.
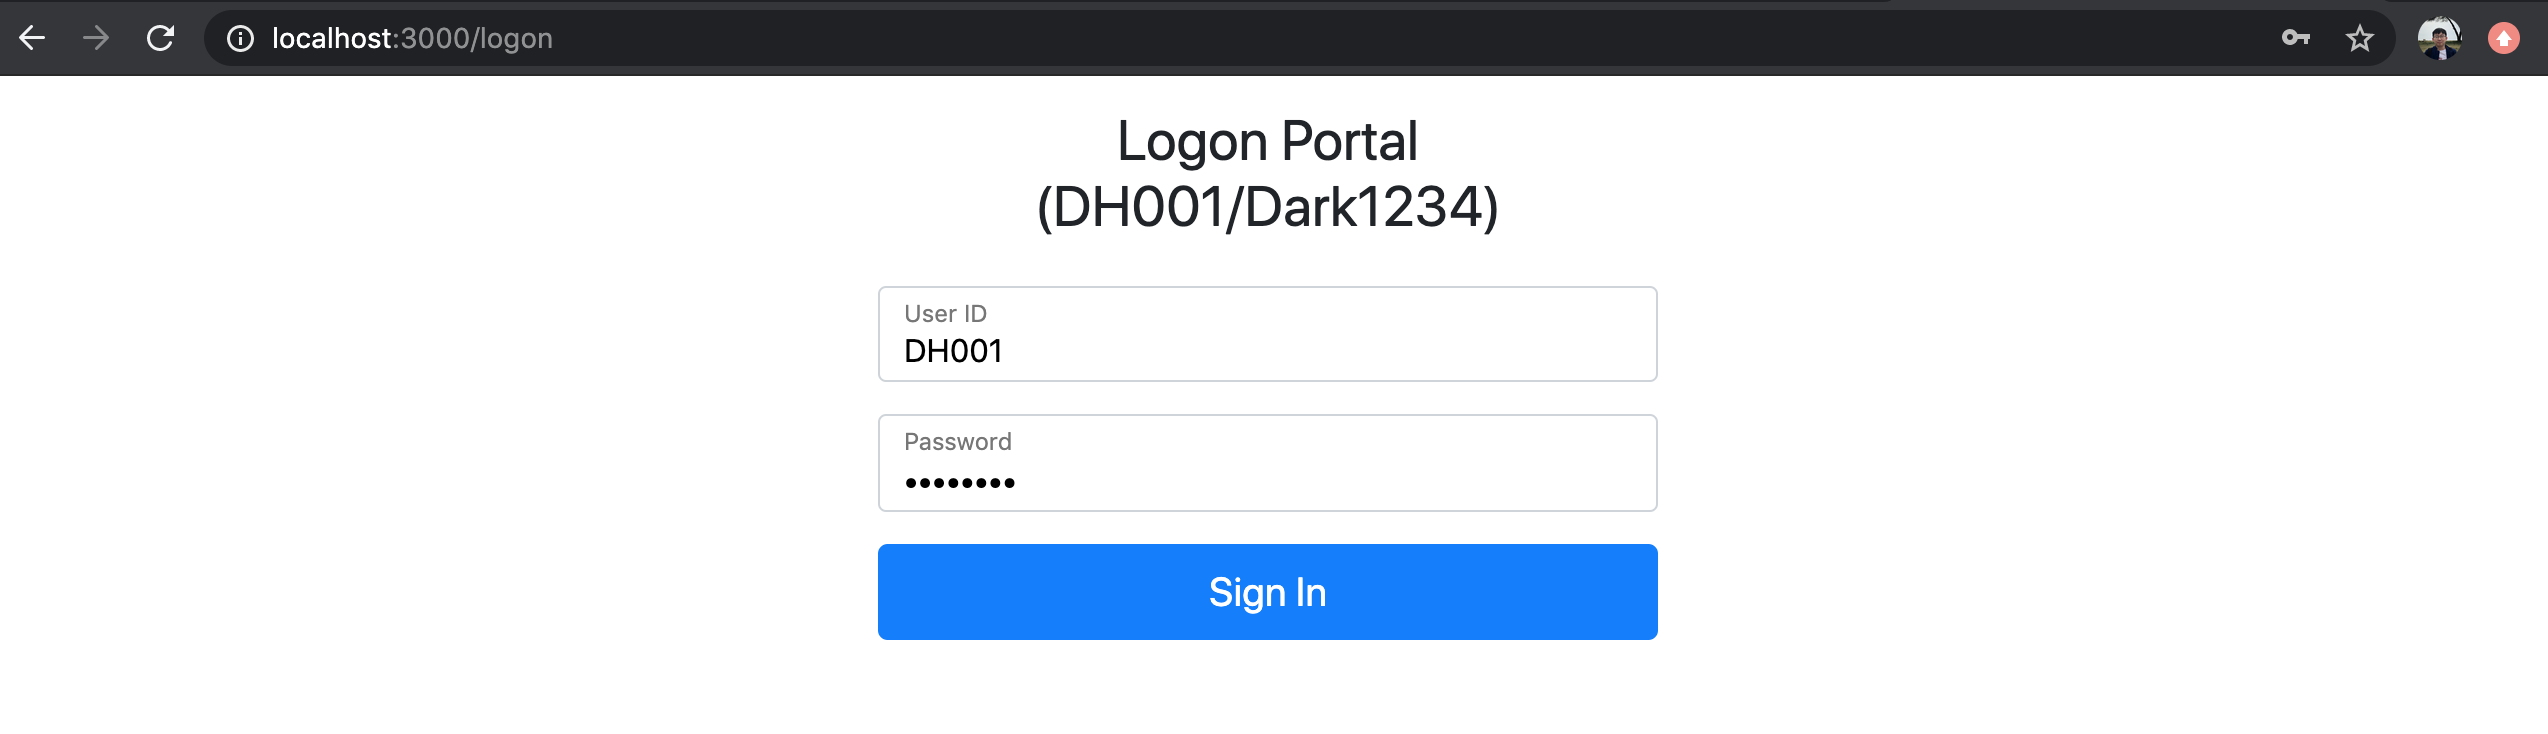
Logon
Access the URL: http://localhost:3000/logon. You use user name 'DH001' and password 'Dark1234' to logon.
After successfully logon, you can check the session data in the landing page:
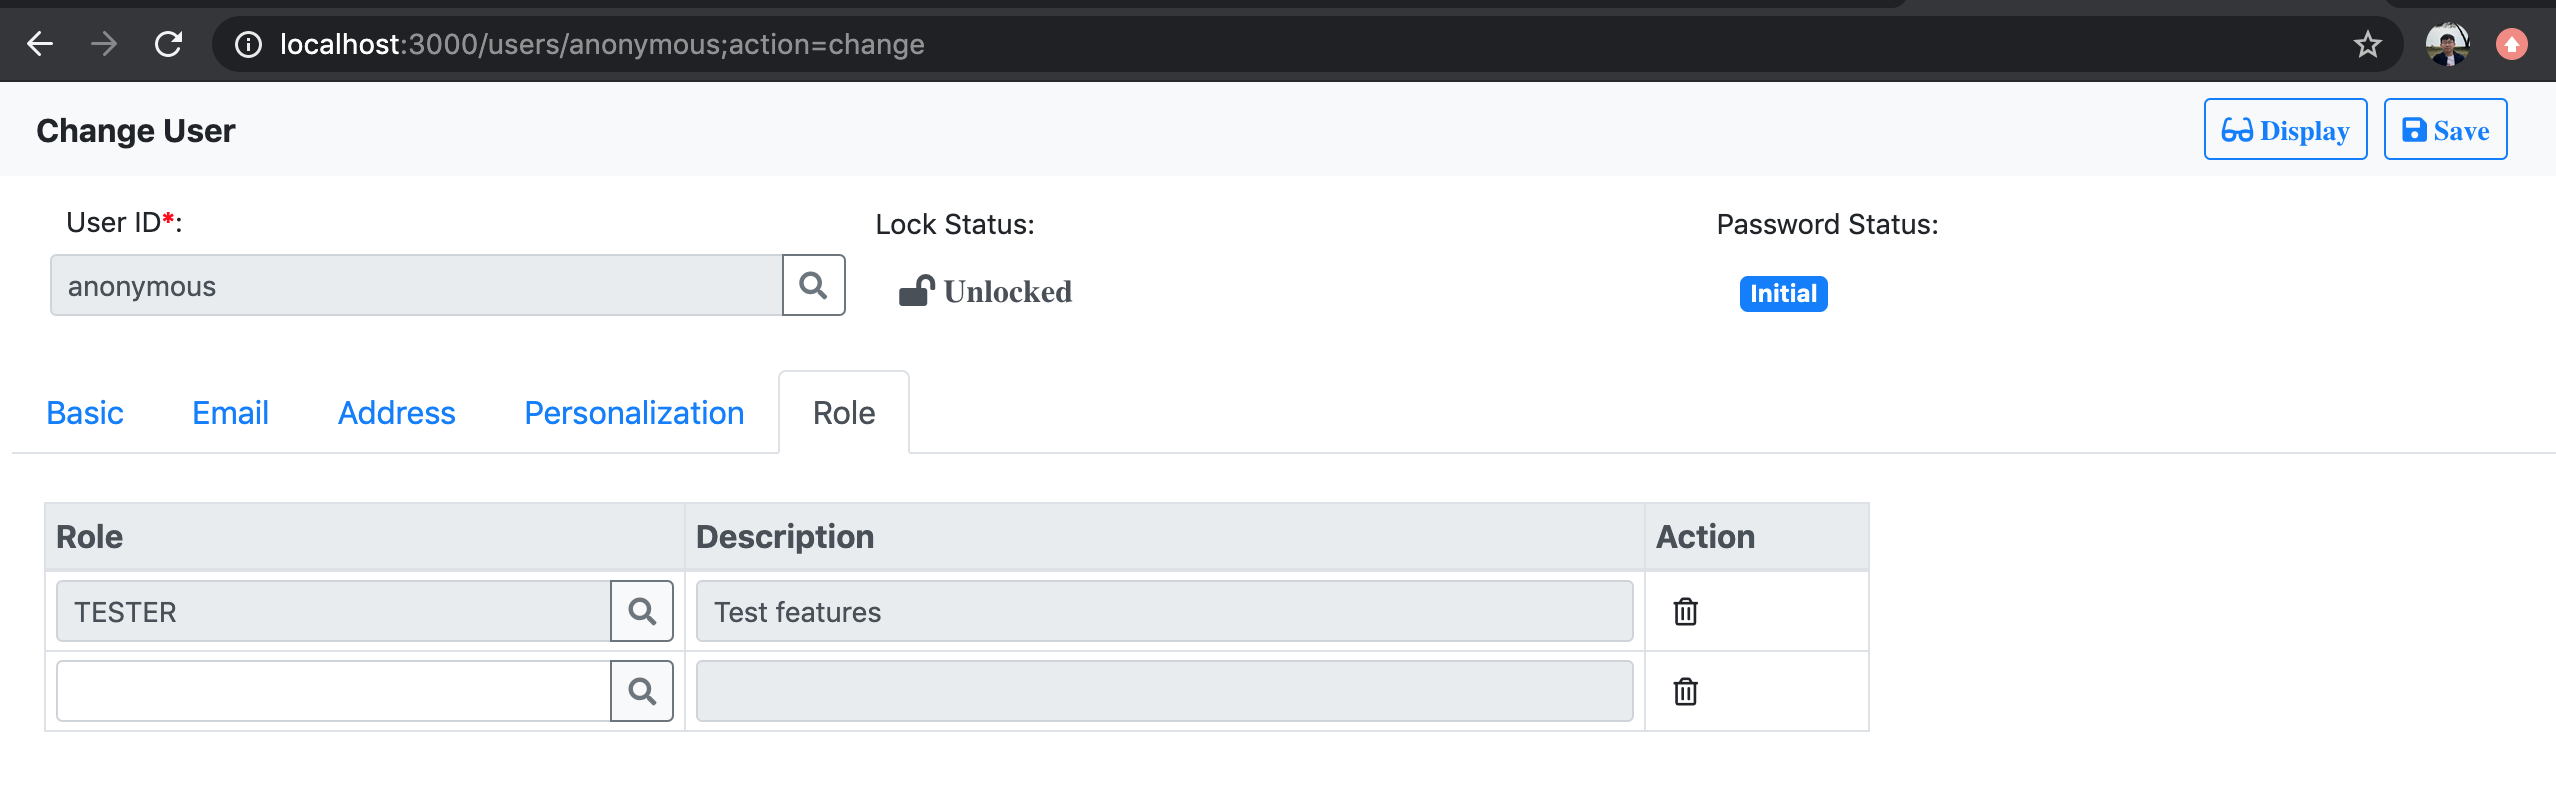
User
Access the URL: http://localhost:3000/users. You can search users using using 'user ID' and 'user name'
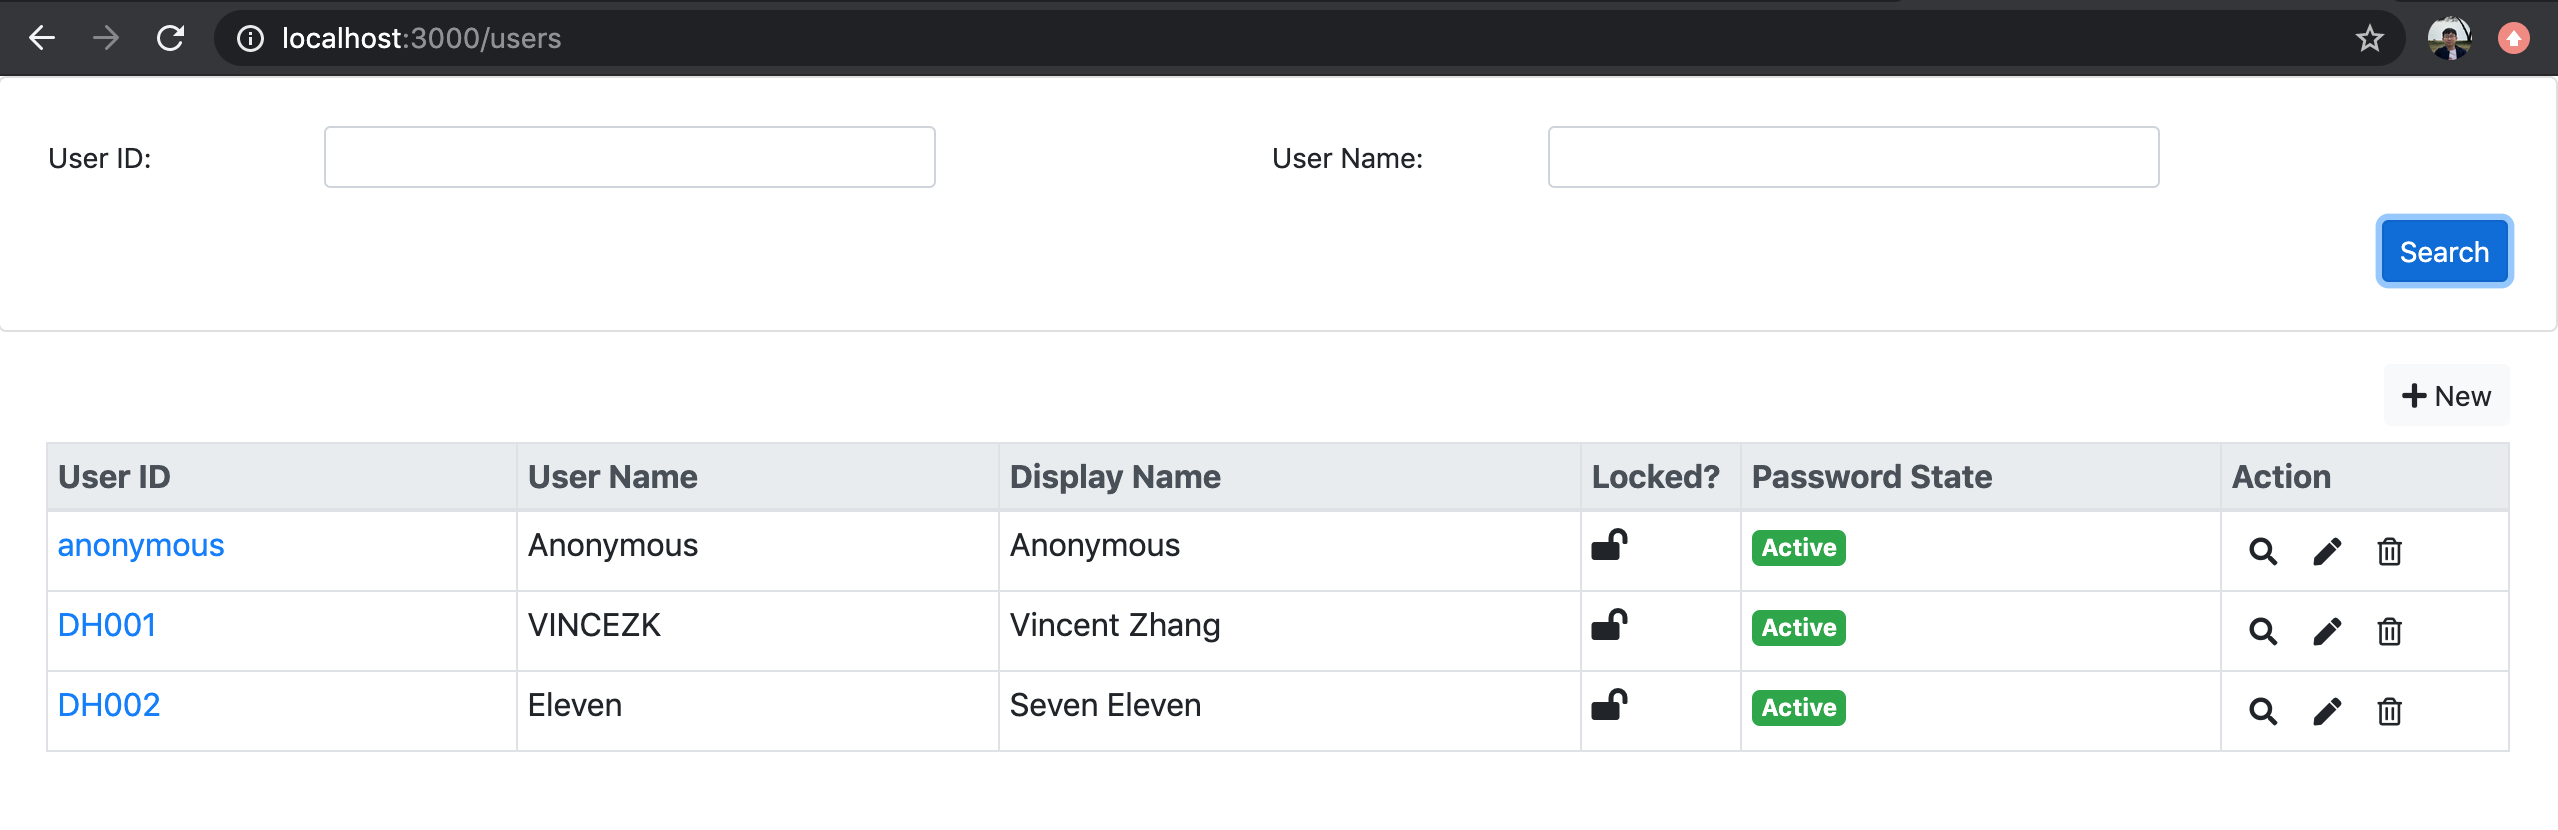
You can assign roles(permission) to a user:
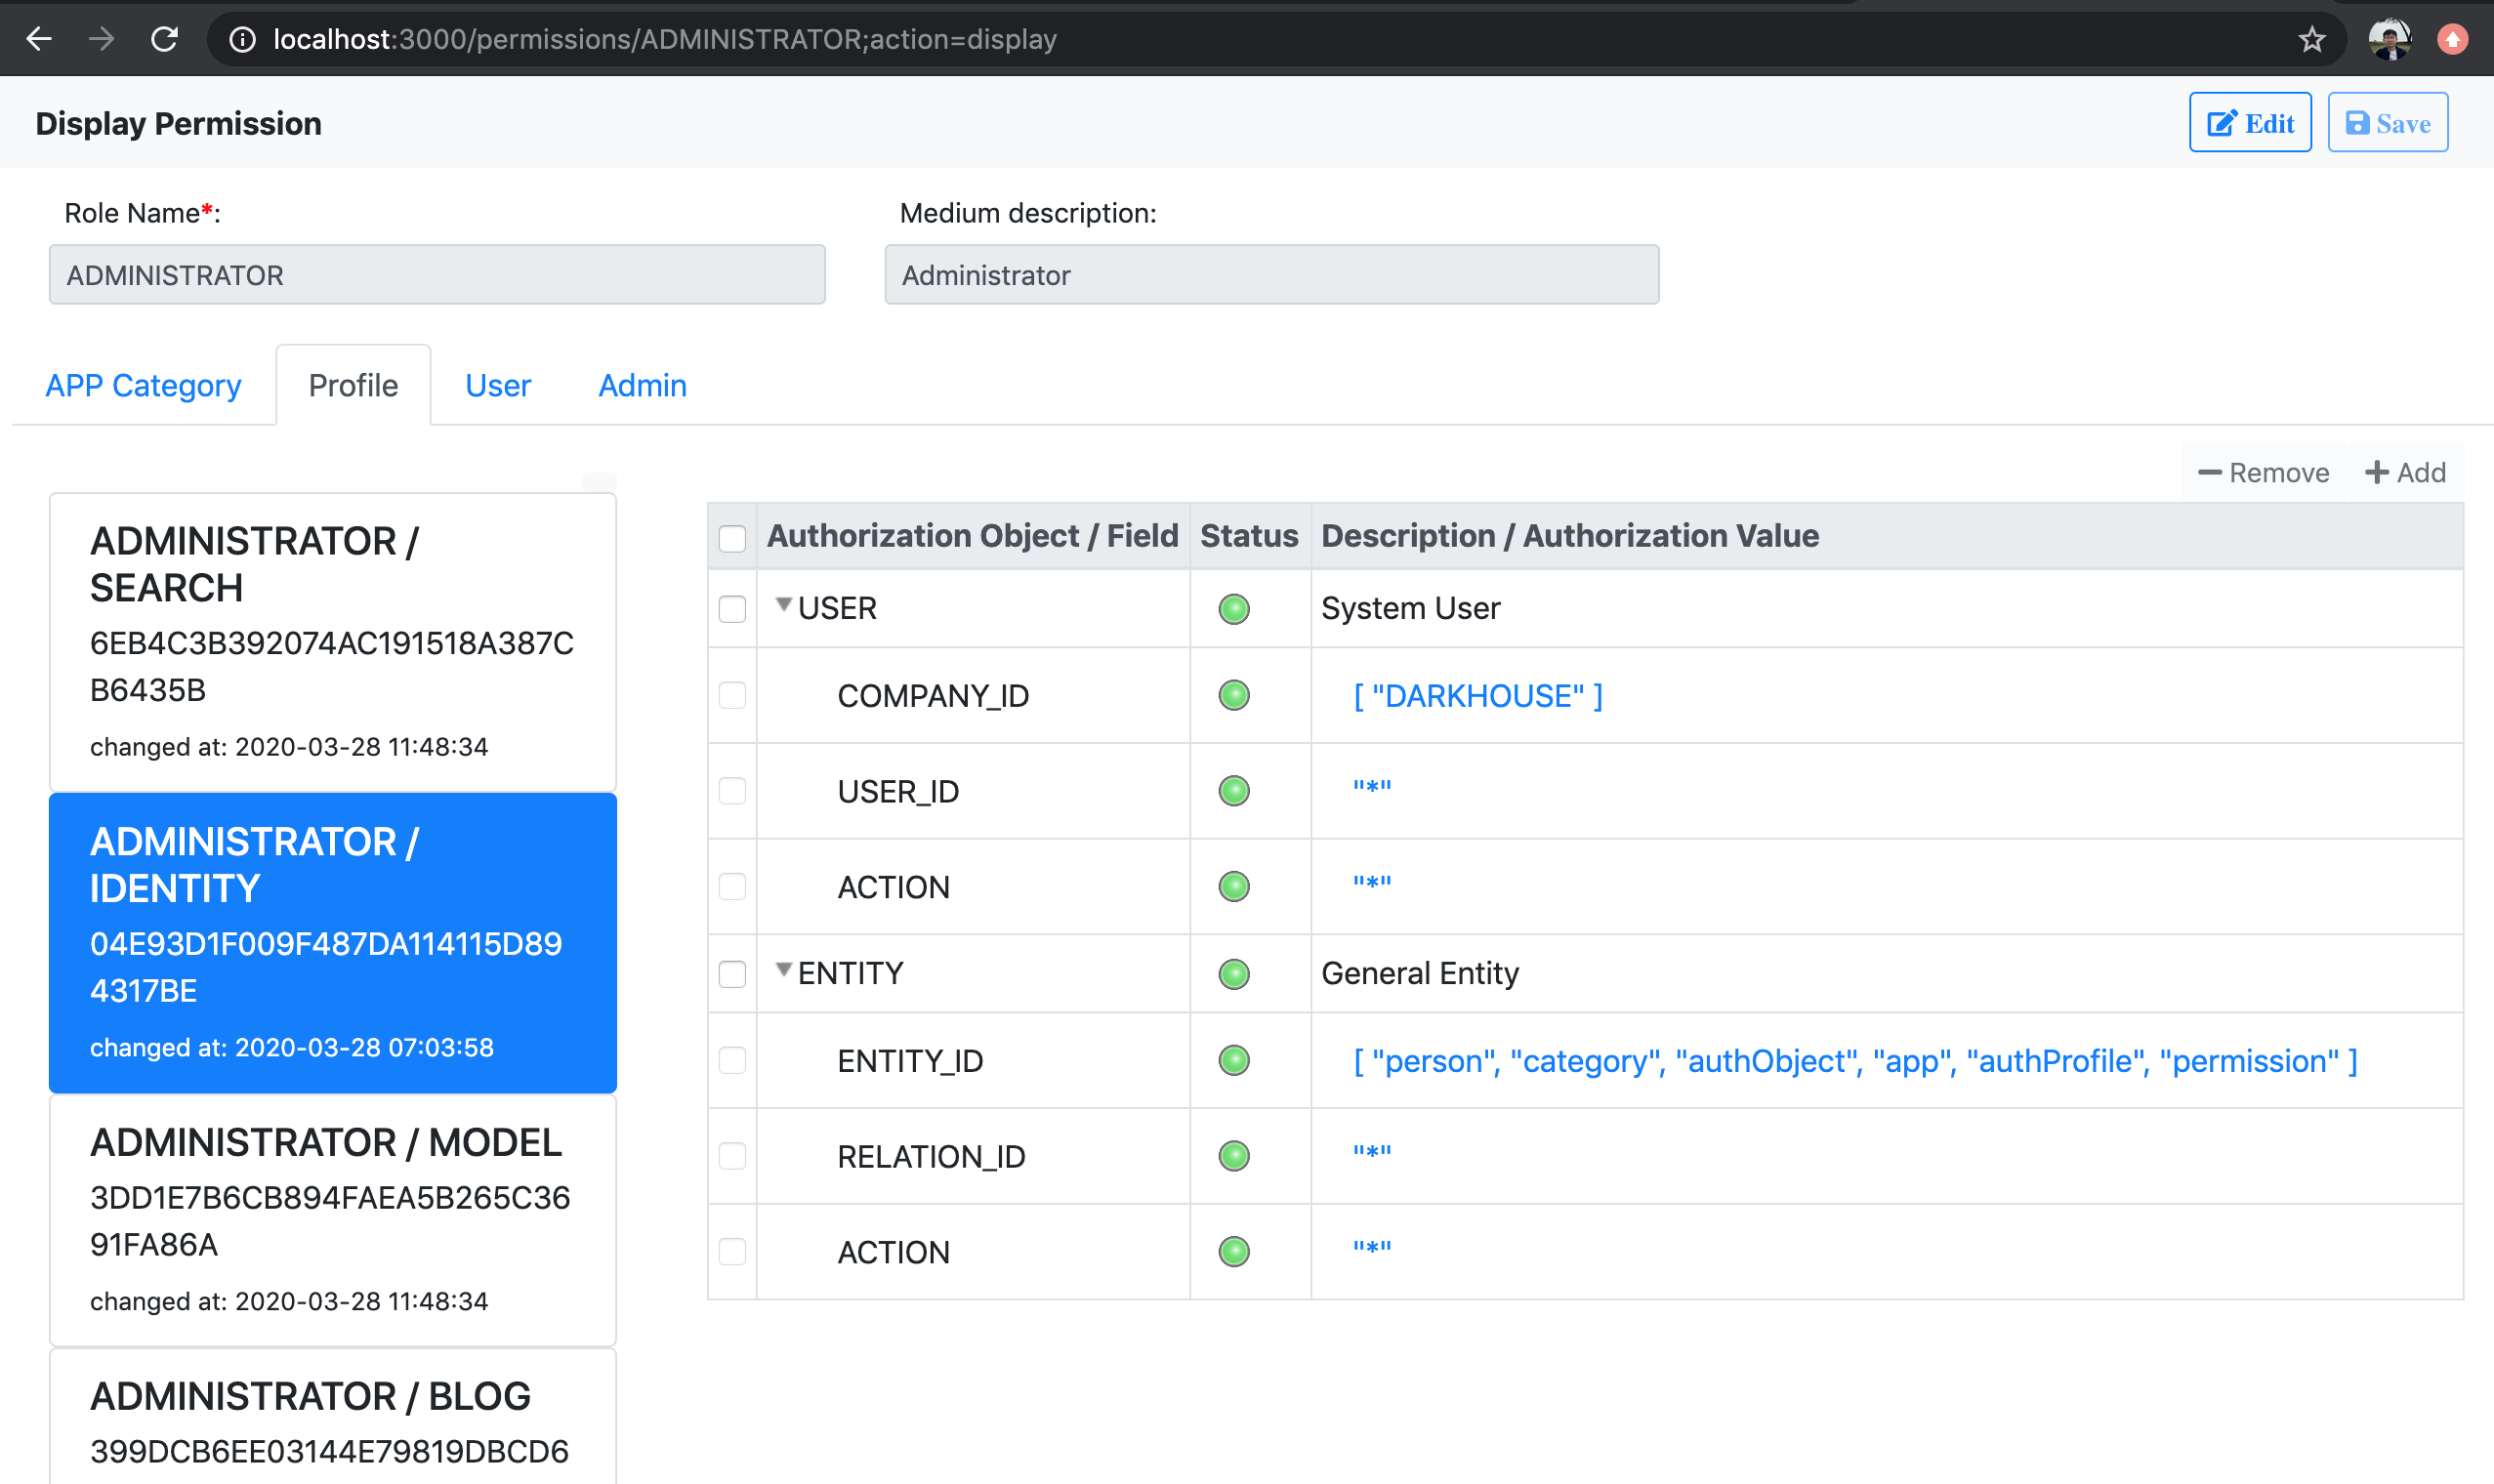
Permission
Access the URL: http://localhost:3000/permissions.
Permission is equivalent to role, and can be assigned to a user.
Permission is maintained by first assigning App categories.
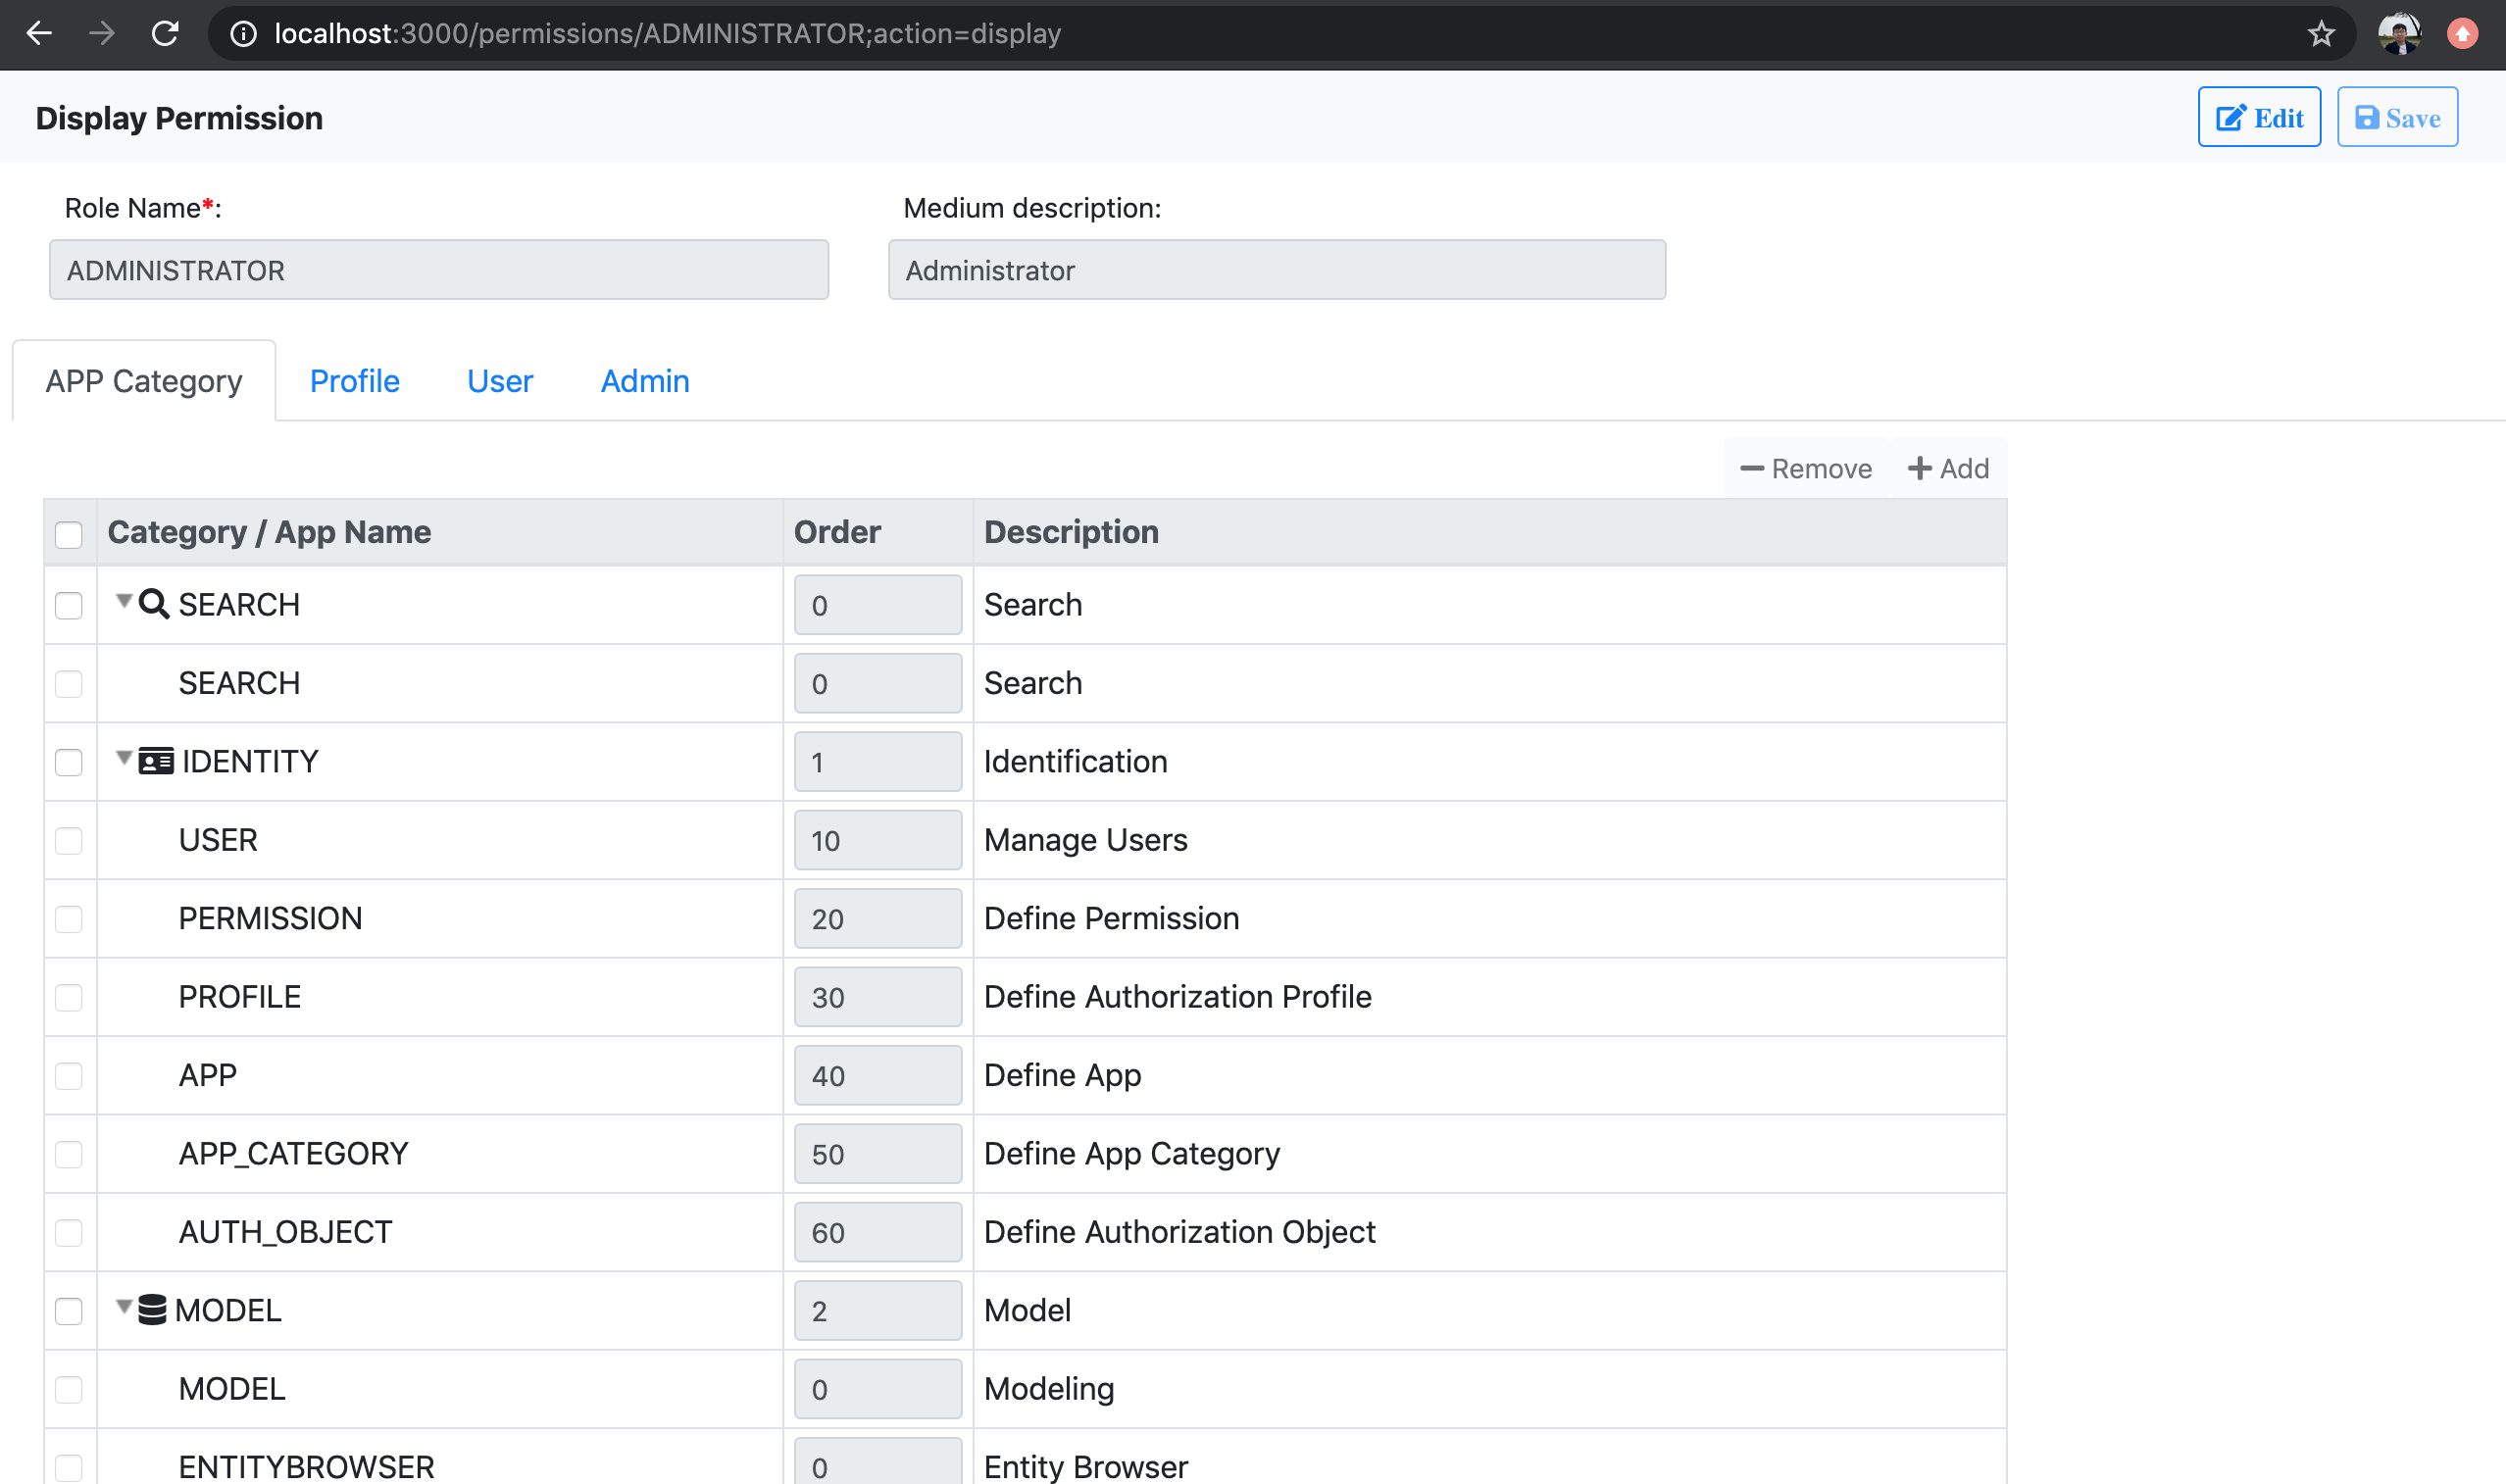
Profiles are then generated per app category. In the profile, you can maintain detail authorizations:
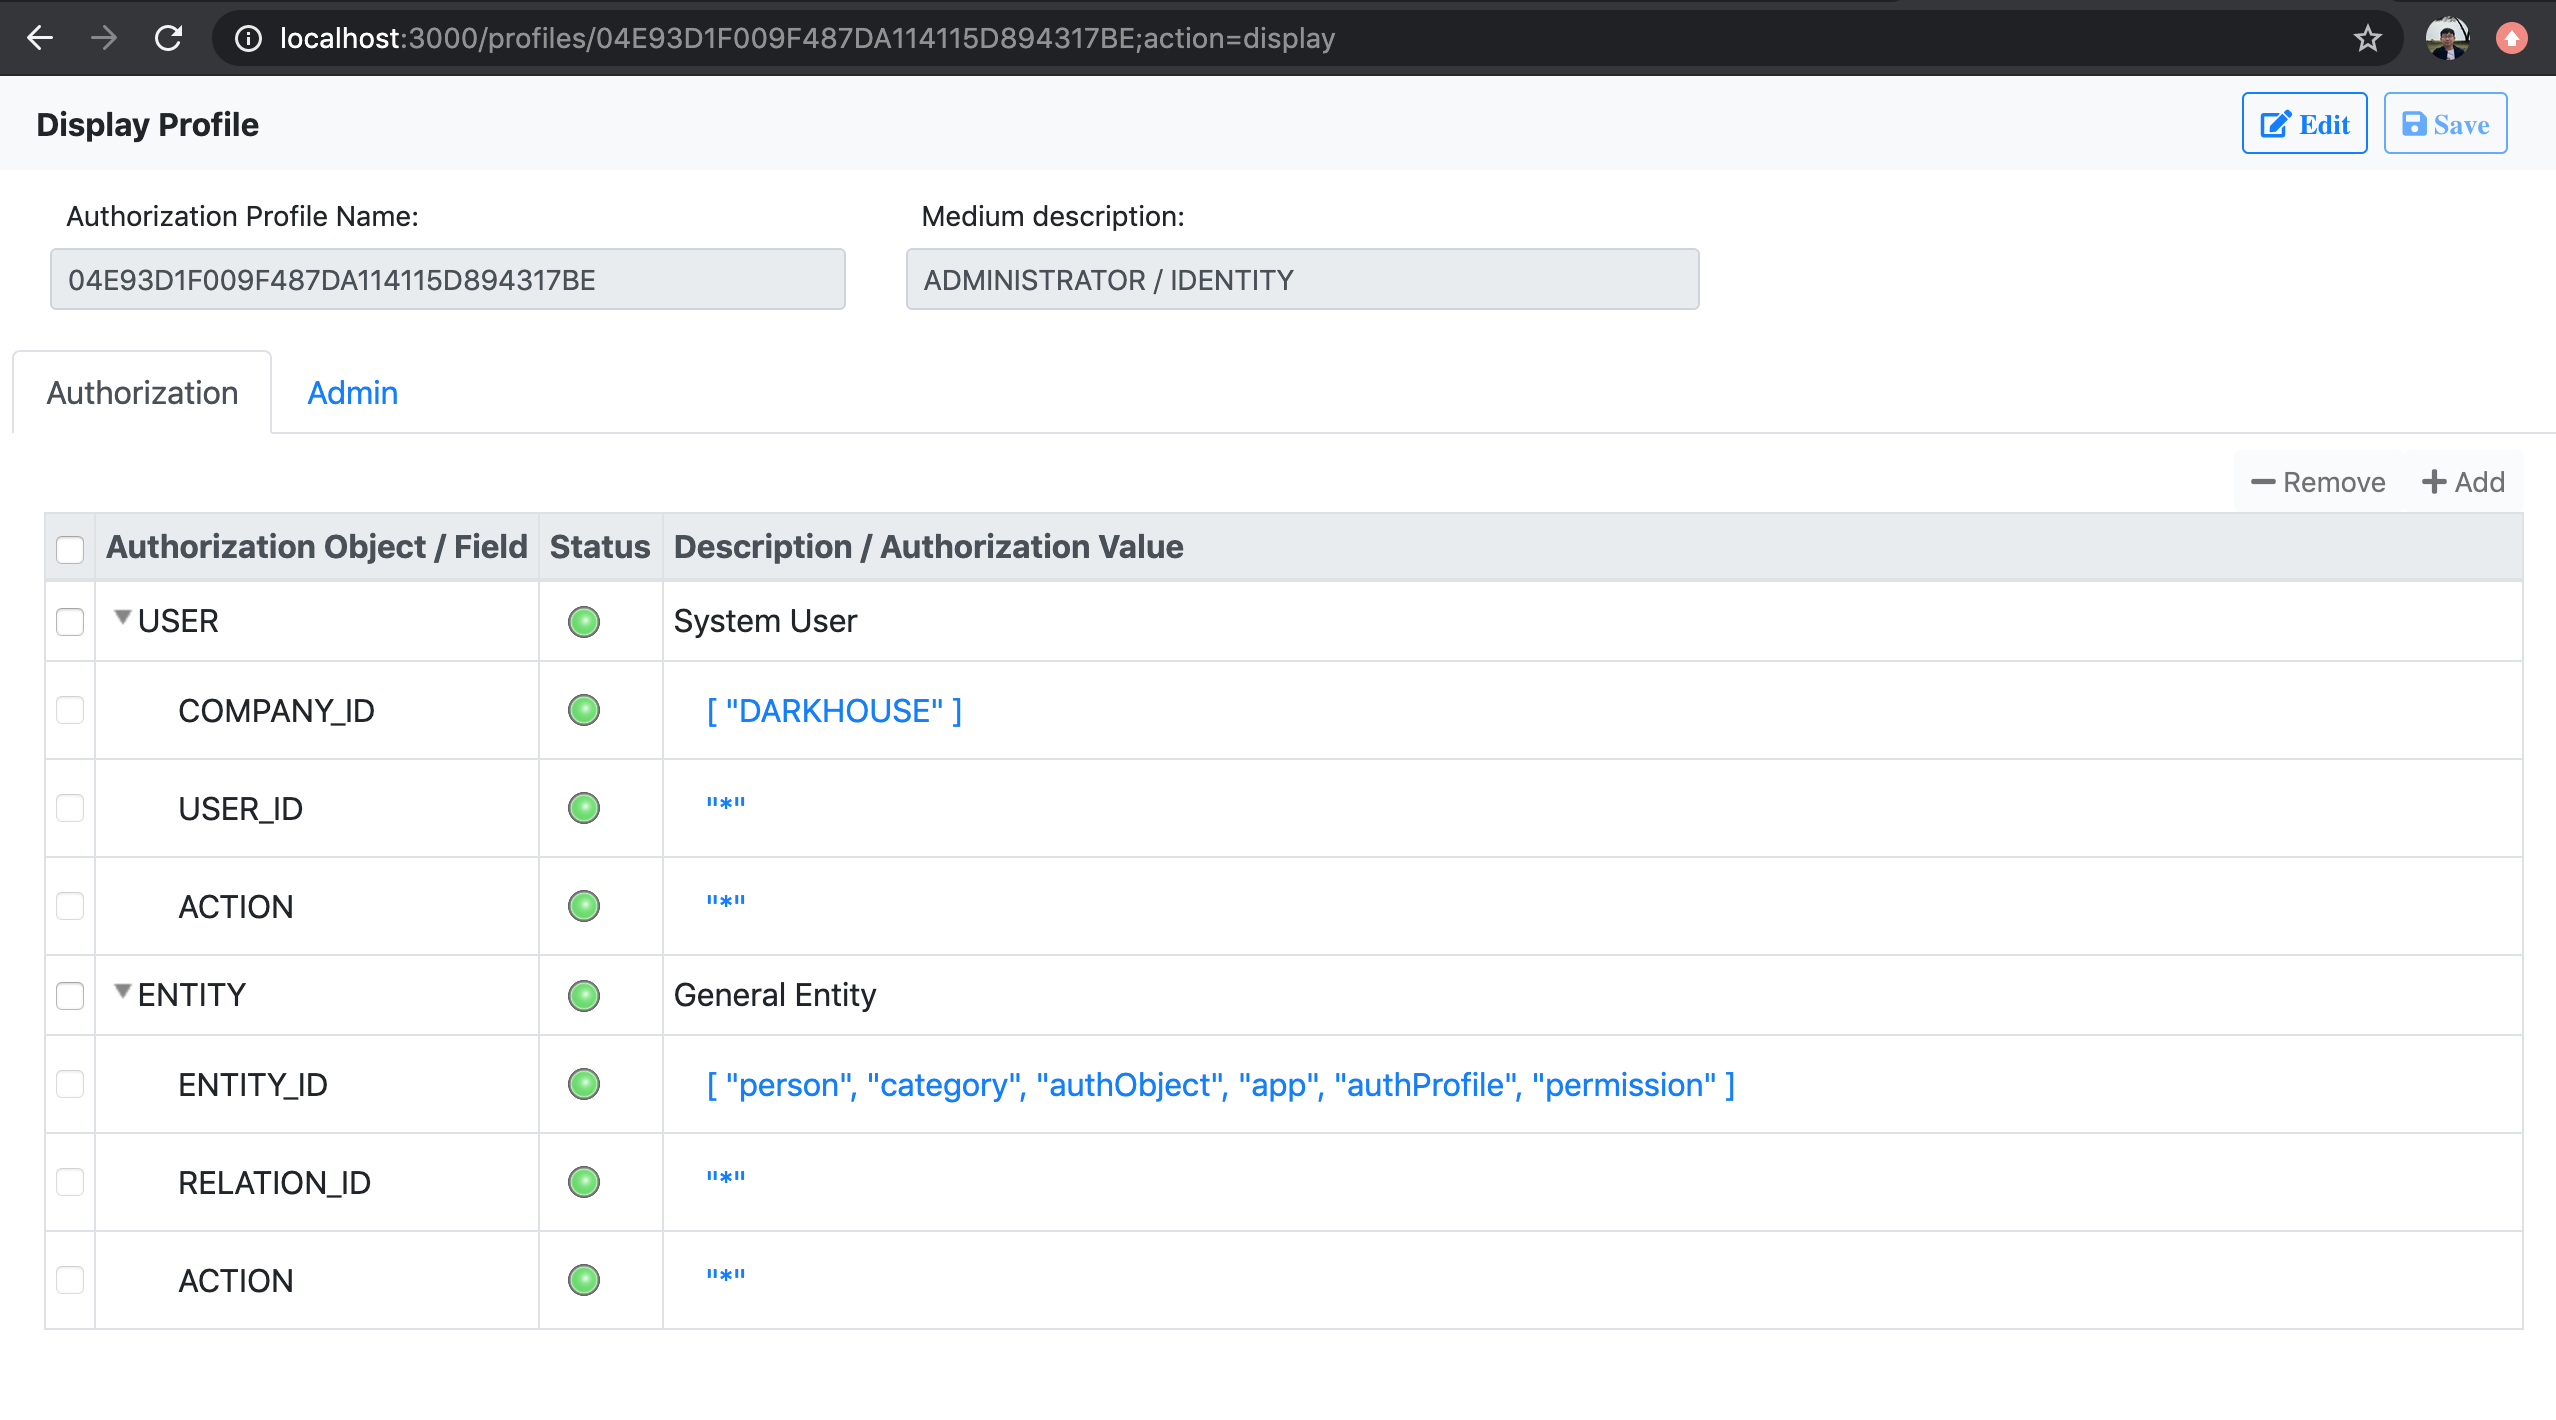
Profile
Access the URL: http://localhost:3000/profiles.
Profiles are either generated during the permission creation, or manually created.
The manual created ones can be directly assigned to technique users who don't require UI access,
like background job users or communication users.
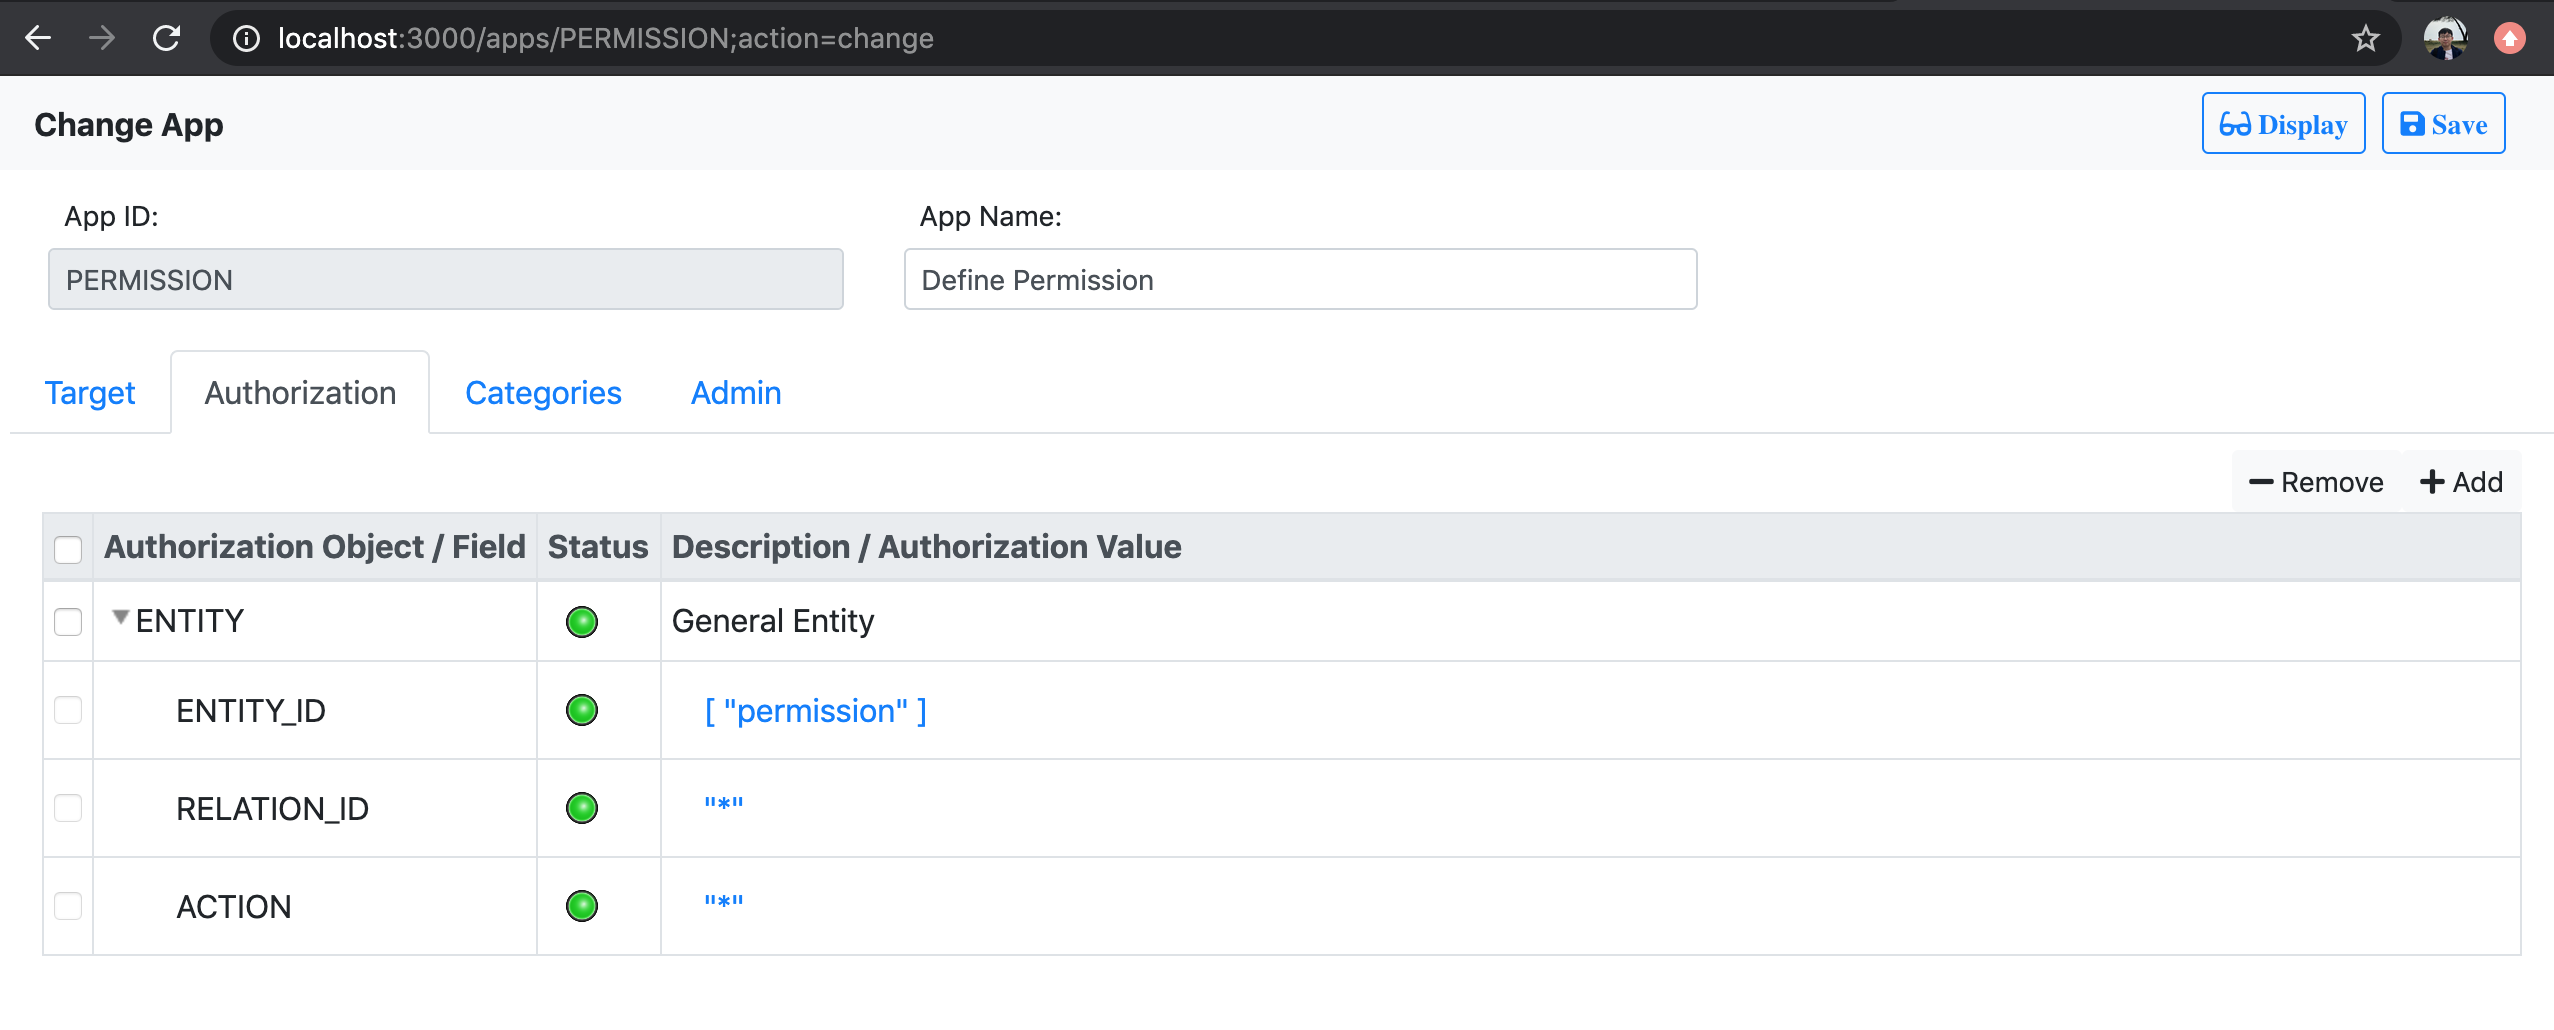
App
Access the URL: http://localhost:3000/apps.
You can register Apps in the system. An App is registered by giving an URL, either an absolute one or a relative one.
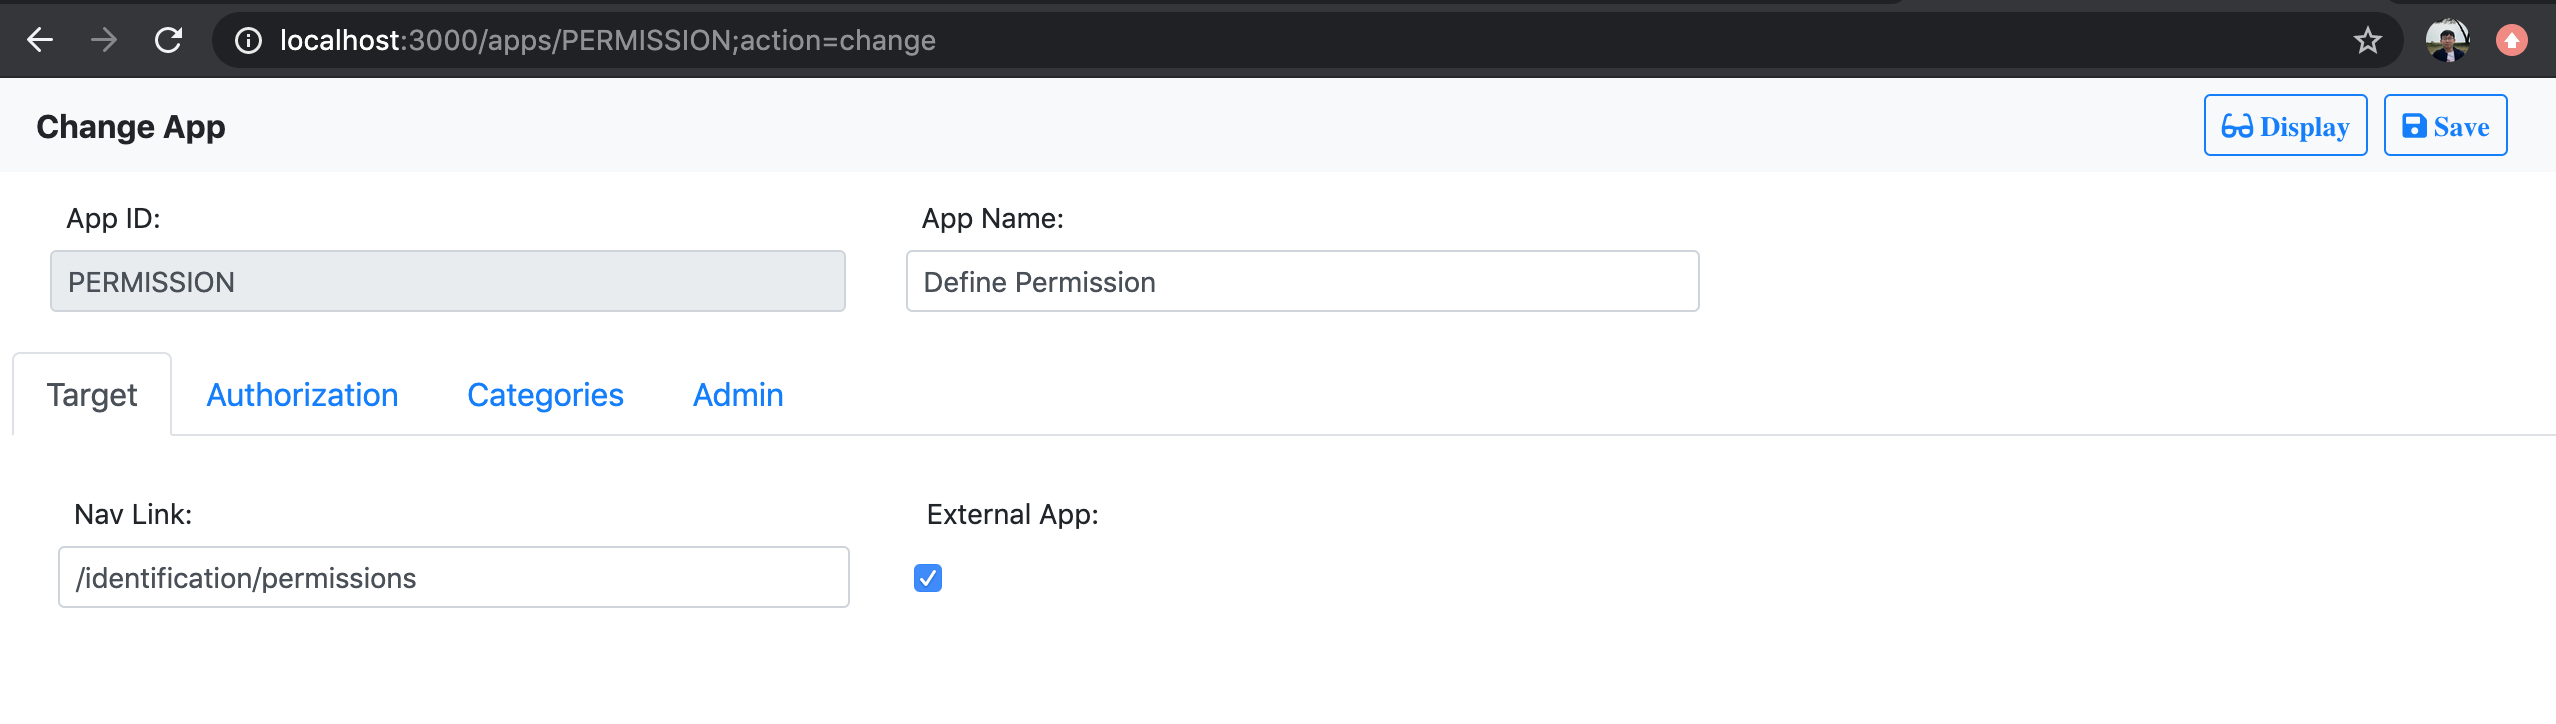
You can also maintain default authorizations for the App.
This is very helpful when the App is assigned to a Permission through an App category.
The default authorizations will be brought to the Permission for easy maintenance.
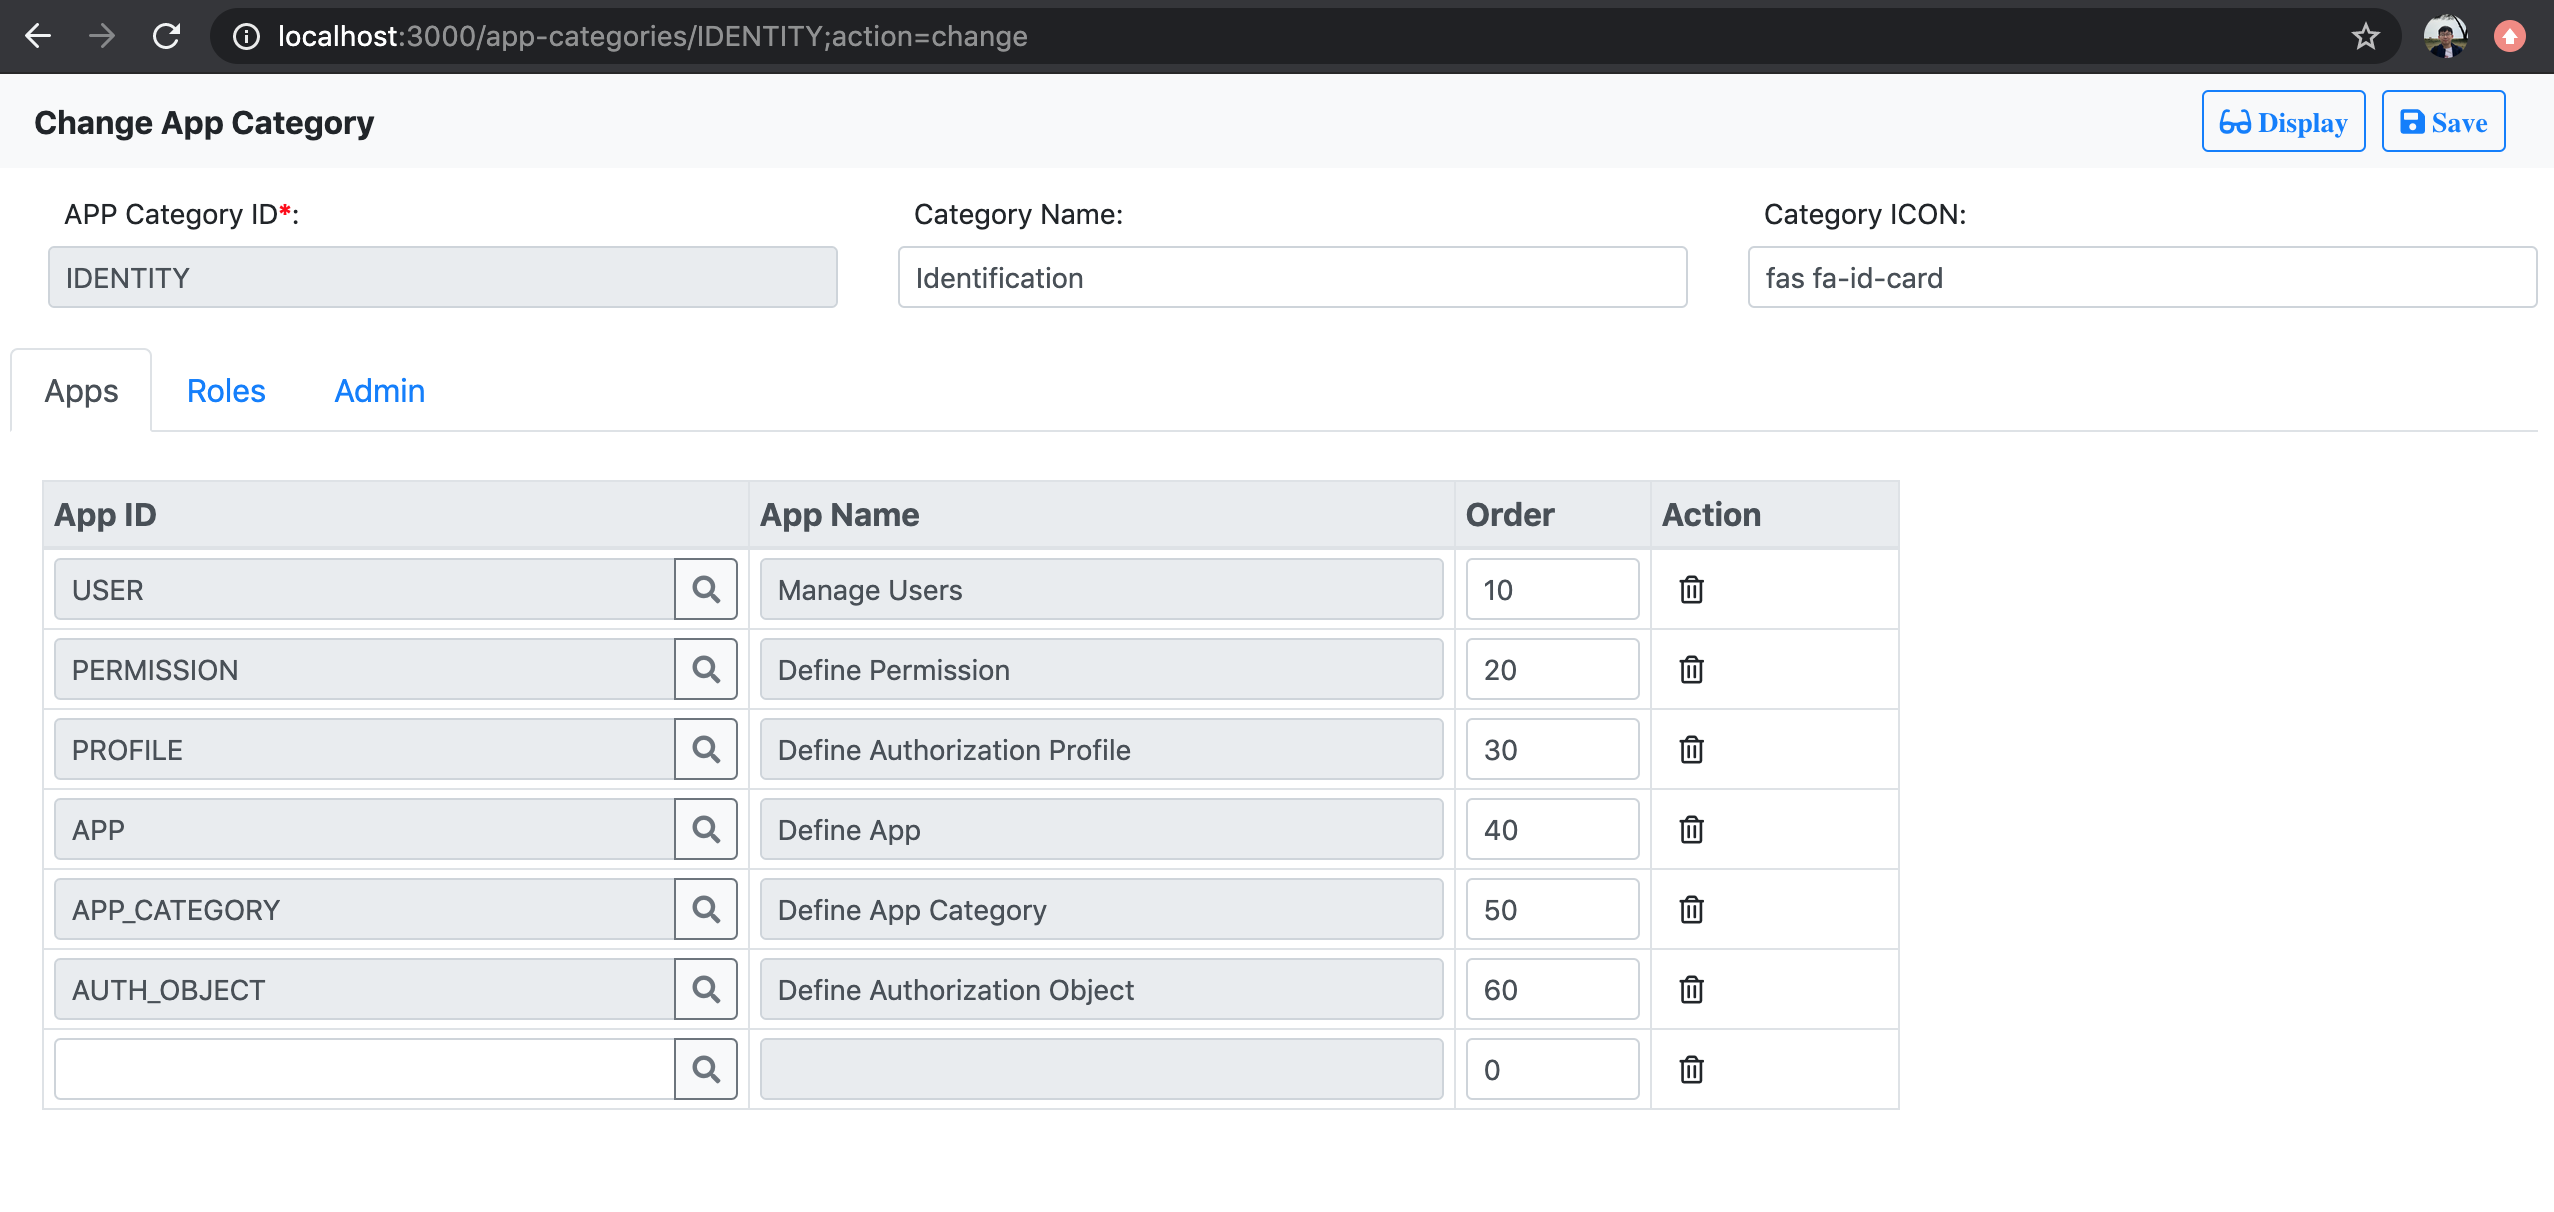
App Category
Access the URL: http://localhost:3000/app-categories.
You create App categories to group relative Apps together as an assignment unit.
When an App category is assigned to a Permission, a corresponding Profile is generated.
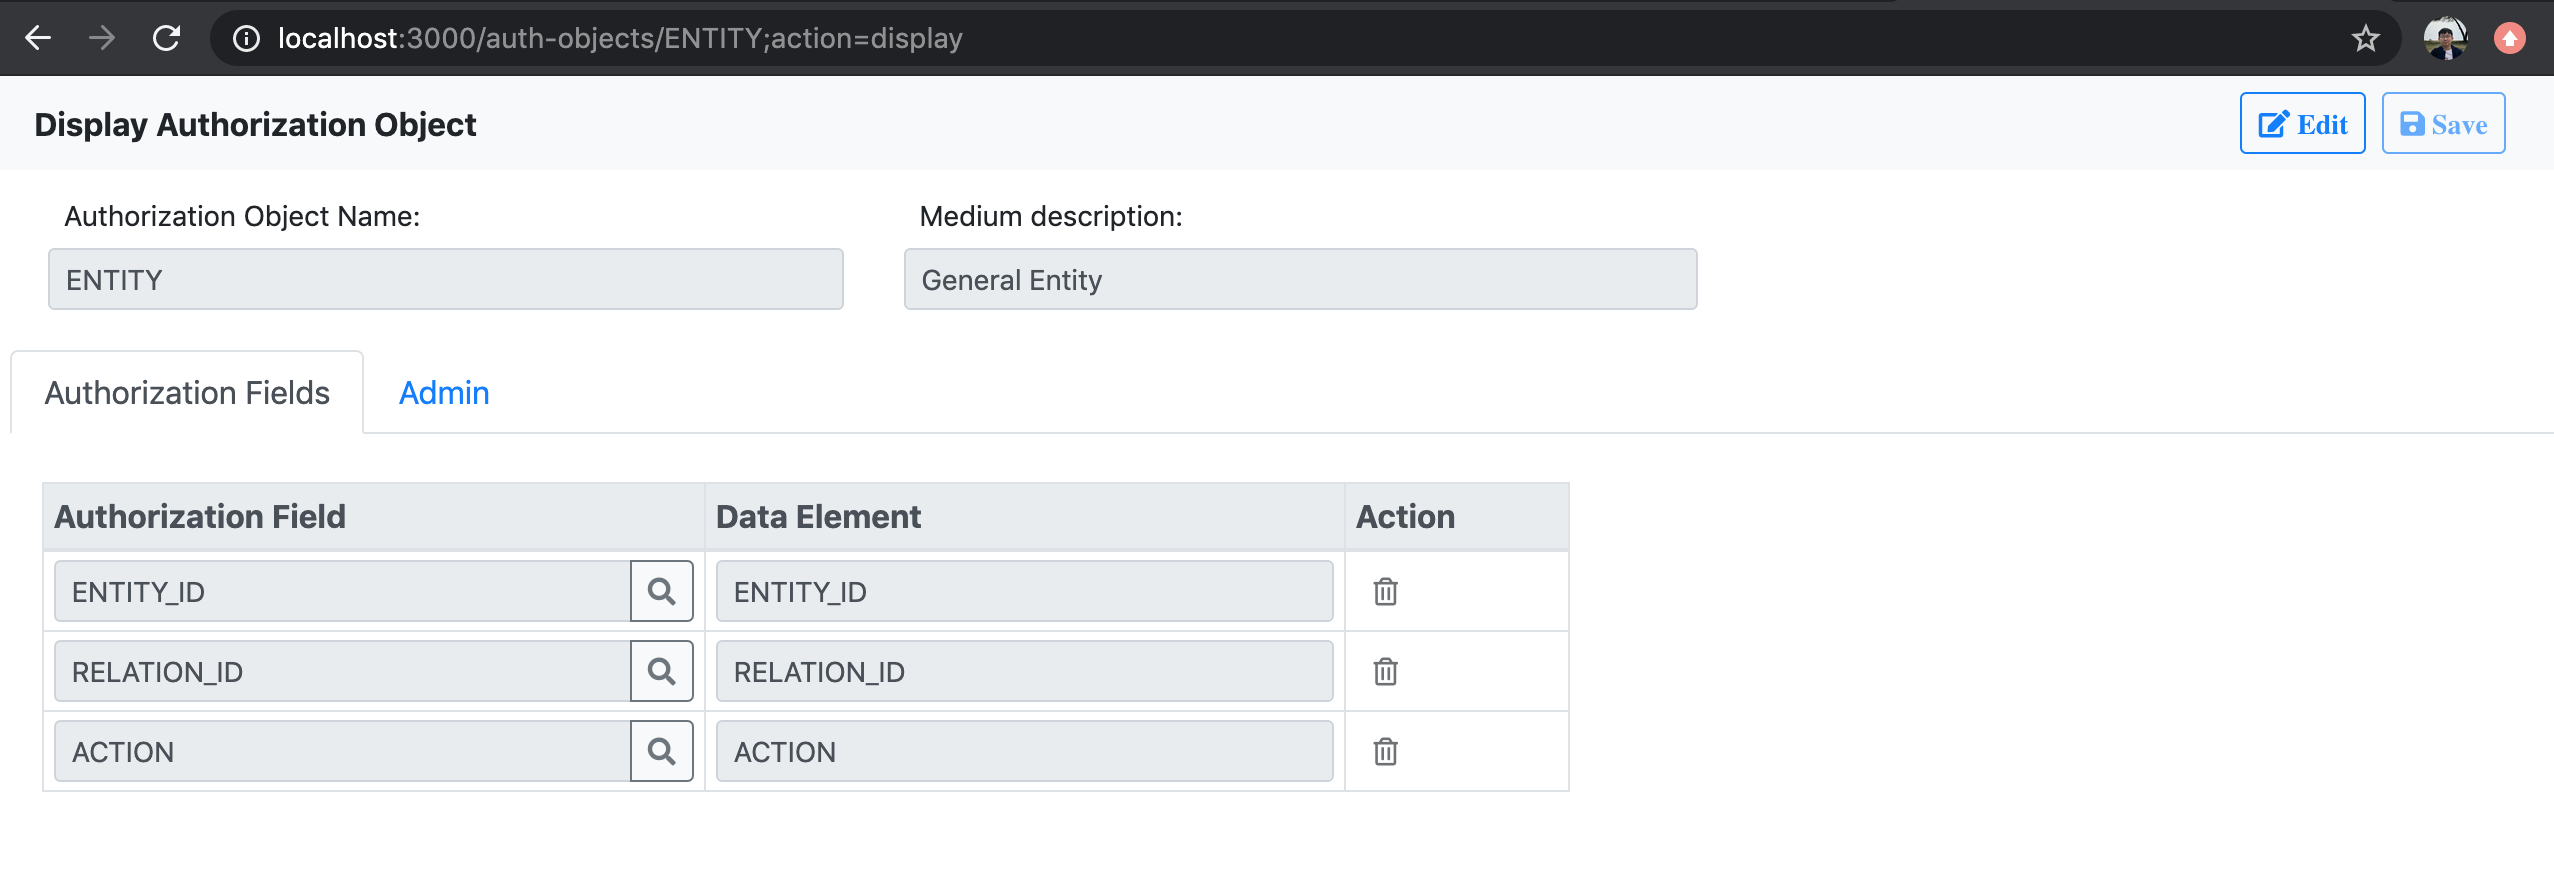
Authorization Object
Access the URL: http://localhost:3000/auth-objects.
You define authorization object to represent a permission unit.
An authorization object can map to a business object, or an abstract object only for permission control.
It contains authorization fields to compose the authorization schema and value.
UI-Logon
The "ui-logon" is the server-end component. It provides the routes, authentication, authorization logic, as well as the data storage. If you want to leverage the complete identification solution, you should setup "ui-logon". The component depends on following modules:
Check the package.json for other related modules.
"ui-logon" uses redis as the session store for PassportJS. So you have to install the redis server. Please refer the quick guide for how to install redis.
JSON-On-Relations depends on MySql(5.6). Please refer the set-up guide on JSON-On-Relations on how to populate the data in MDB.
After get the above prerequisites done. You can now follow the steps below to setup the server:
-
Install it to your node project:
$ npm install ui-logon --save -
Refer
ui-logon\server.jsto create your own entry file in the root of your Node project: -
Now you can start the node server and test the logon page:
$ node server.jsTest with the link: http://localhost:3000
Define Logon Strategy
PassportJS already provides a flexible way to let use different authentication strategies.
Since we mainly use the basic user&password strategy, so just register a LocalStrategy is enough.
The default implementation is given in ui-logon/server/Authentication.js:
It uses JSON-On-Relations(JOR) to retrieve user information from the database. The function "getInstancePieceByID" is called to ask for the information from relation "r_user" with USER_ID equals to the requested username. Please refer https://github.com/VinceZK/json-on-relations/wiki/Internal-Functions for the API details.
After the user information is retrieved, it compares the password values. If they are identical, then attach the user information to the "identity" object. Besides the basic user information, the "identity" is also attached with authorization derived from the assigned permission. It is then use node-authorization to utilize authorization checks.
You can write your own logon logic and register it with "passport.use()" function.
The Default Routes
The default router(server/router.js) is created as following.
Auth.ensureAuthenticated is used to protect endpoints which need to pass the authentication.
You can import the default router into your route table const router = require('ui-logon').Router.
// Basic login with username & passwordrouter;router; // Ensure all the APIs bellow are under authentication.routerall'/api/*' AuthensureAuthenticated; // Identity APIsrouter;router;