
React Native ImageBackground is useful. But you know what's even more useful?
ImageBackground with overlay. This is exactly it.
Get Started
Installation
$ npm install --save react-native-image-overlayUsage
; { return <ImageOverlay source= uri:"http://example.com/img/cool.jpg" /> <ImageOverlay source= /> }Props
| Prop | Description | Type | Default |
|---|---|---|---|
blurRadius |
The blur radius of the blur filter added to the image | Number | undefined |
containerStyle |
Additional styling for the component | ViewStyle | undefined |
contentPosition |
Position of title text or child component (if any). |
String ("top","center" or "bottom") |
"center" |
height |
The height of the whole component | Number | 300 |
overlayColor |
The color to be used for the overlay on top of the image | String | "#000000" |
overlayAlpha |
Opacity value of the overlay. From 0 to 1 |
Number | 0.5 |
rounded |
Value for borderRadius to be applied to the component |
Number | undefined |
source |
The image source (either a remote URL or a local file resource). | ImageSource | |
title |
Text to be displayed over the image | String | undefined |
titleStyle |
Additional styling for the title text | TextStyle | undefined |
Example
1. Simple overlay color
The most basic use-case of this module is to add colored overlay on top of your image.
<ImageOverlay source= uri:"http://example.com/img/cool.jpg" />Default overlay is color is #000000 with 0.5 opacity. You can customize it to any color
<ImageOverlay source= uri:"http://example.com/img/cool.jpg" overlayColor="cyan" overlayAlpha=08 />2. Overlay with title text
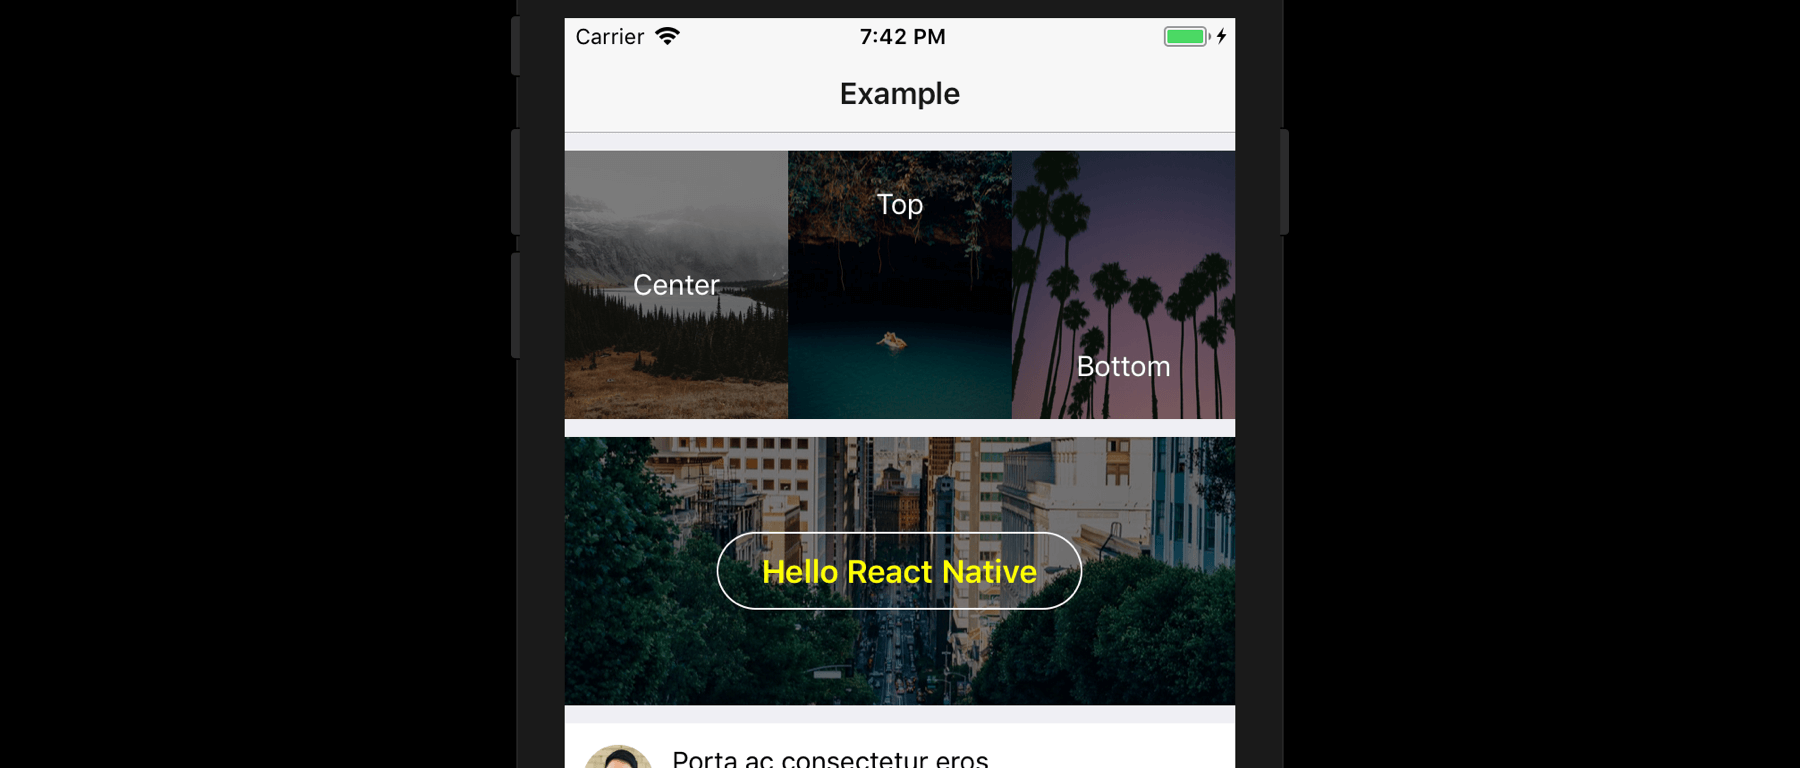
If you want to display a simple white text on top of the image, you can use the title prop.
<ImageOverlay source= uri:"http://example.com/img/cool.jpg" title="This is the title" />The title will be center-ed by default. You can move it to the top or bottom using the contentPosition prop
<ImageOverlay source= uri:"http://example.com/img/cool.jpg" title="This is the title" contentPosition="bottom" />Additionally, you can change the styling by passing the titleStyle along
<ImageOverlay source= uri:"http://example.com/img/cool.jpg" title="This is the title" titleStyle= color: 'yellow' fontWeight: 'bold' />3. Overlay with child component

You can pass extra components to be displayed on top of your image.
<ImageOverlay source= uri:"http://example.com/img/cool.jpg" height=07 * height contentPosition="bottom"> <View> <Image style=stylesavatar source=uri:"http://example.com/user/avatar.png" /> <Text style=stylesname>Amelia Edwards</Text> <Text style=styleslocation>Kuala Lumpur Malaysia</Text> <Button text="Follow me" /> </View></ImageOverlay>Note: When you are using child component,
titleprop will be ignored.