![]()
![]()
pulsar-express
Simple Web Interface for Apache Pulsar

Install
There are several ways to use pulsar-express:
- By cloning the projet and running it locally (see
Developmentsection) - By running a docker image:
docker run -it -p 3000:3000 bbonnin/pulsar-express- You can set a connection url in the command:
docker run -it -p 3000:3000 -e PE_CONNECTION_URL=http://host.docker.internal:8080 bbonnin/pulsar-express - Important: the calls to the Pulsar API are done on server side (i.e. from the container), so your Pulsar must be reachable from the container (do not use localhost :)). A solution: you can add
--network=hostto the command line (but, it's only working on Linux...)
- You can set a connection url in the command:
- By installing it using
npm
# Install it globally $ npm install pulsar-express -g # Start it $ pulsar-express ╭────────────────╮ │ PULSAR EXPRESS │ ╰────────────────╯ => Open http://localhost:3000 # Start it on a specific port $ PORT=8000 pulsar-express ╭────────────────╮ │ PULSAR EXPRESS │ ╰────────────────╯ => Open http://localhost:8000 If you want to configure connections (to be available to all users), you can:
- Create a json file with the connections:
- and set the env variable
PE_CONFIG_FILE
export PE_CONFIG_FILE=/path/to/my/config.json- Or you can also set a connection URL
export PE_CONNECTION_URL=http://pulsar-host:8080 # Without a name, the url will be used (hostname:port), # Or you can set a name: export PE_CONNECTION_NAME=my-pulsar # A token if needed: export PE_CONNECTION_TOKEN=<YOUR_TOKEN>From there, you can connect with your browser to the url above !
Quick start
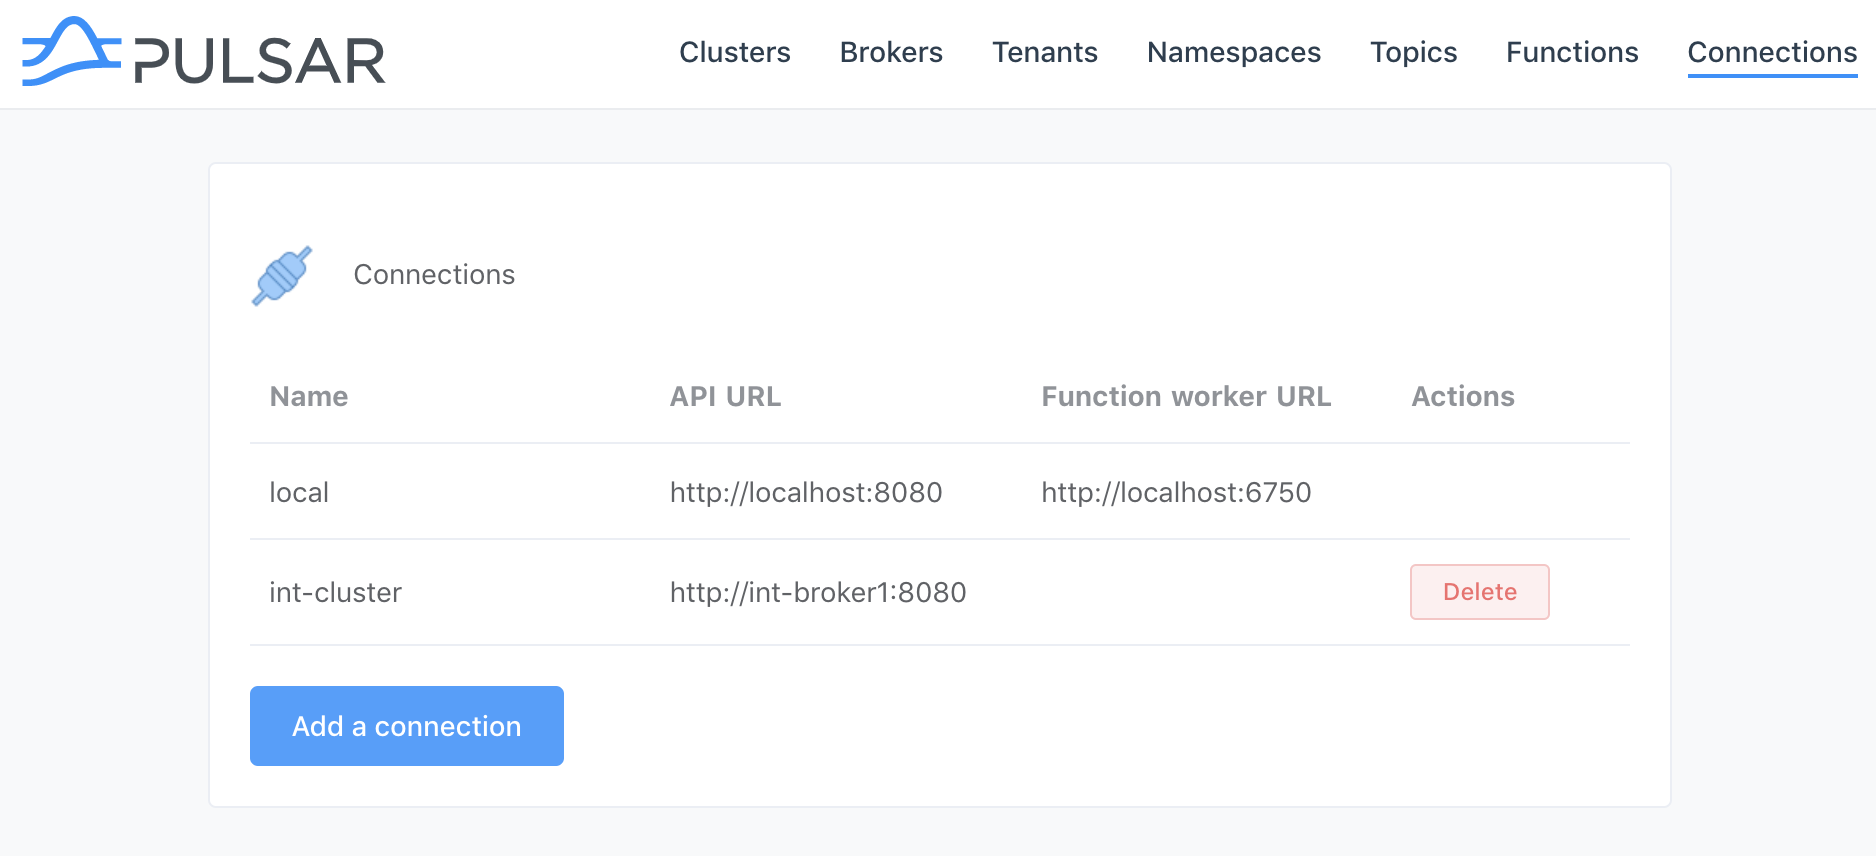
If you haven't defined a connection, the first step is to go the
Connectionspage and add a new connection. These connections are stored on client side (localstorage of your browser)
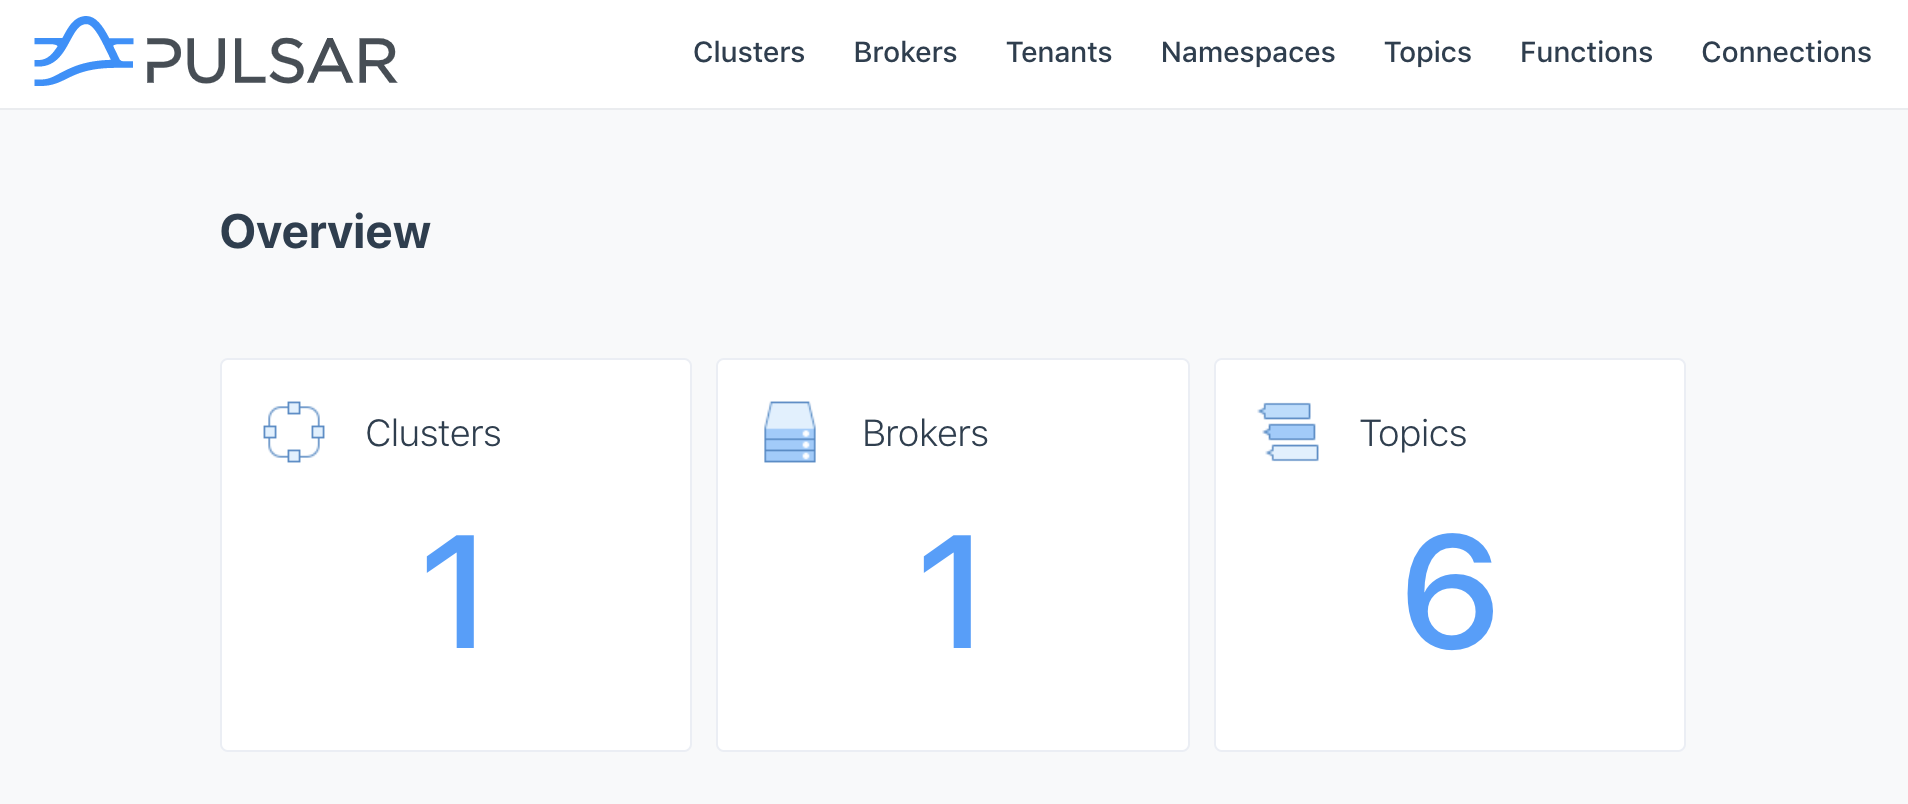
Overview
In this page, you can see some basic informations about your clusters.
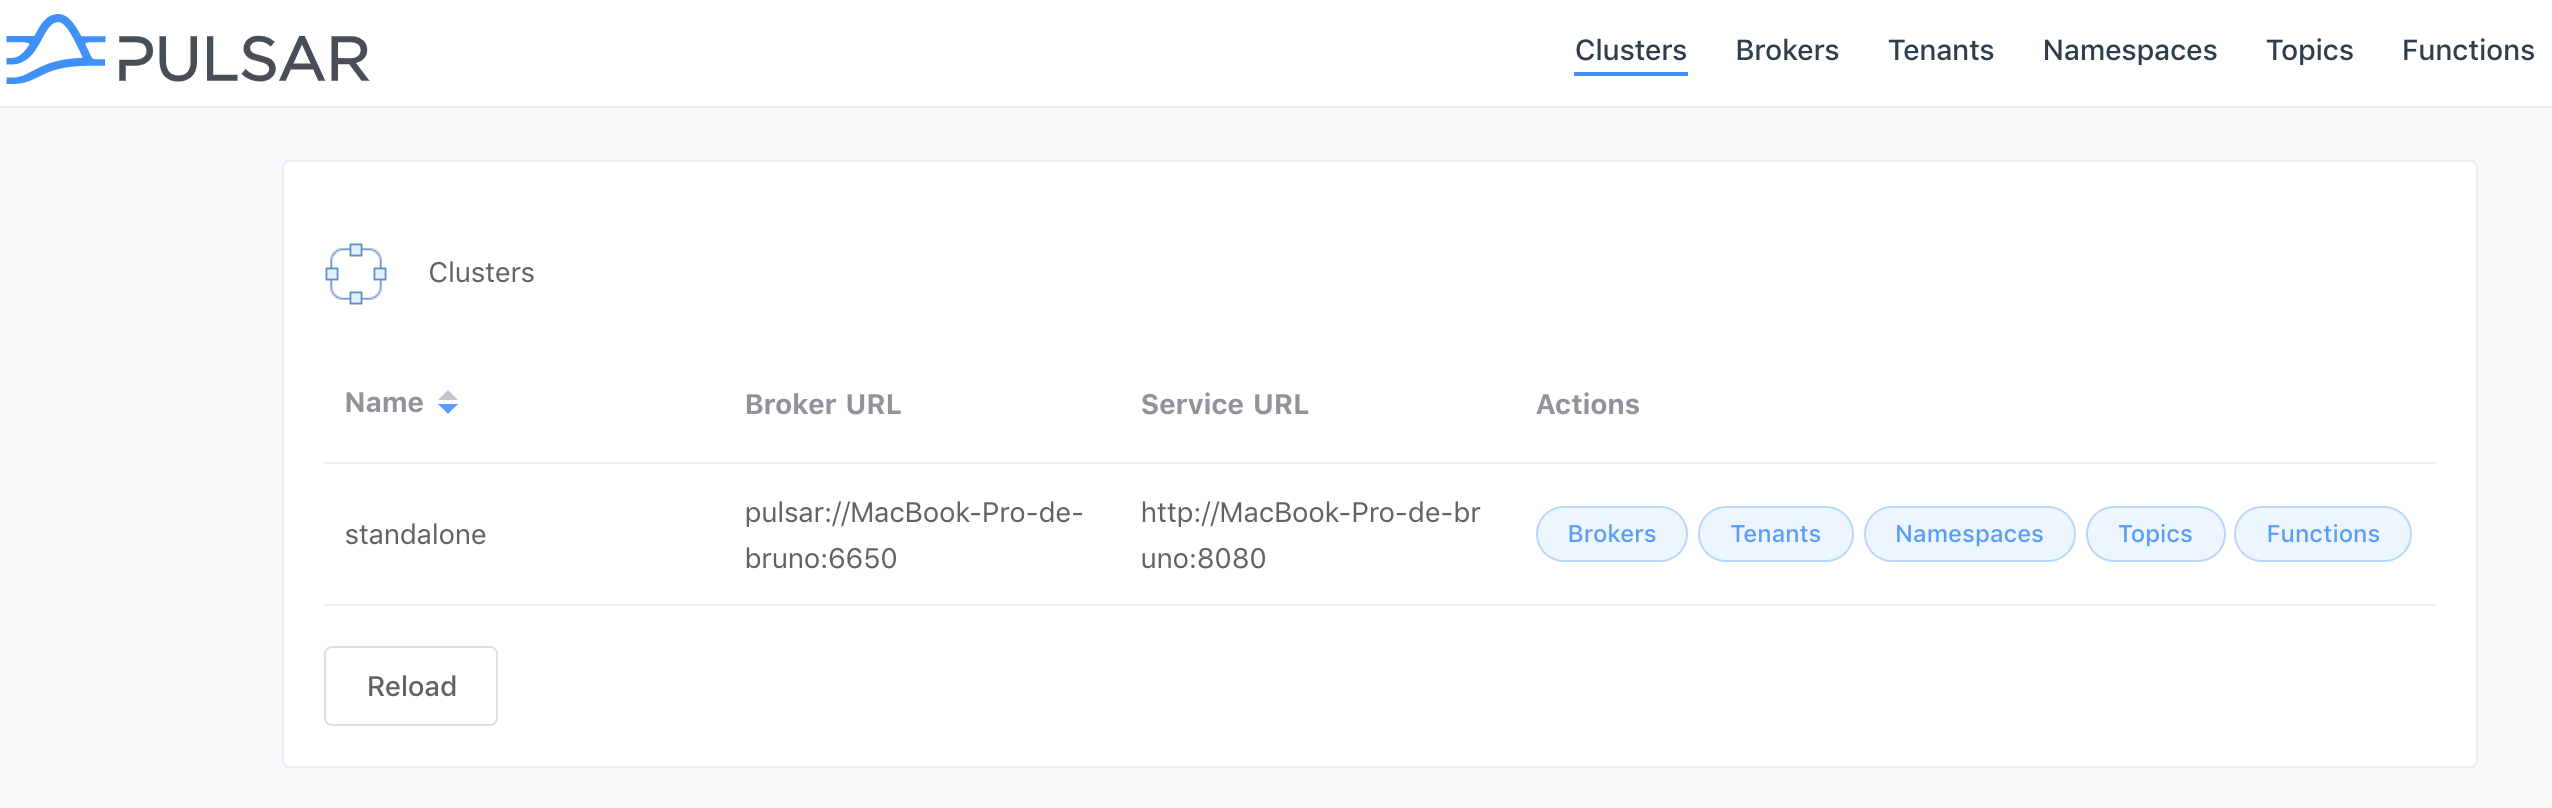
Clusters
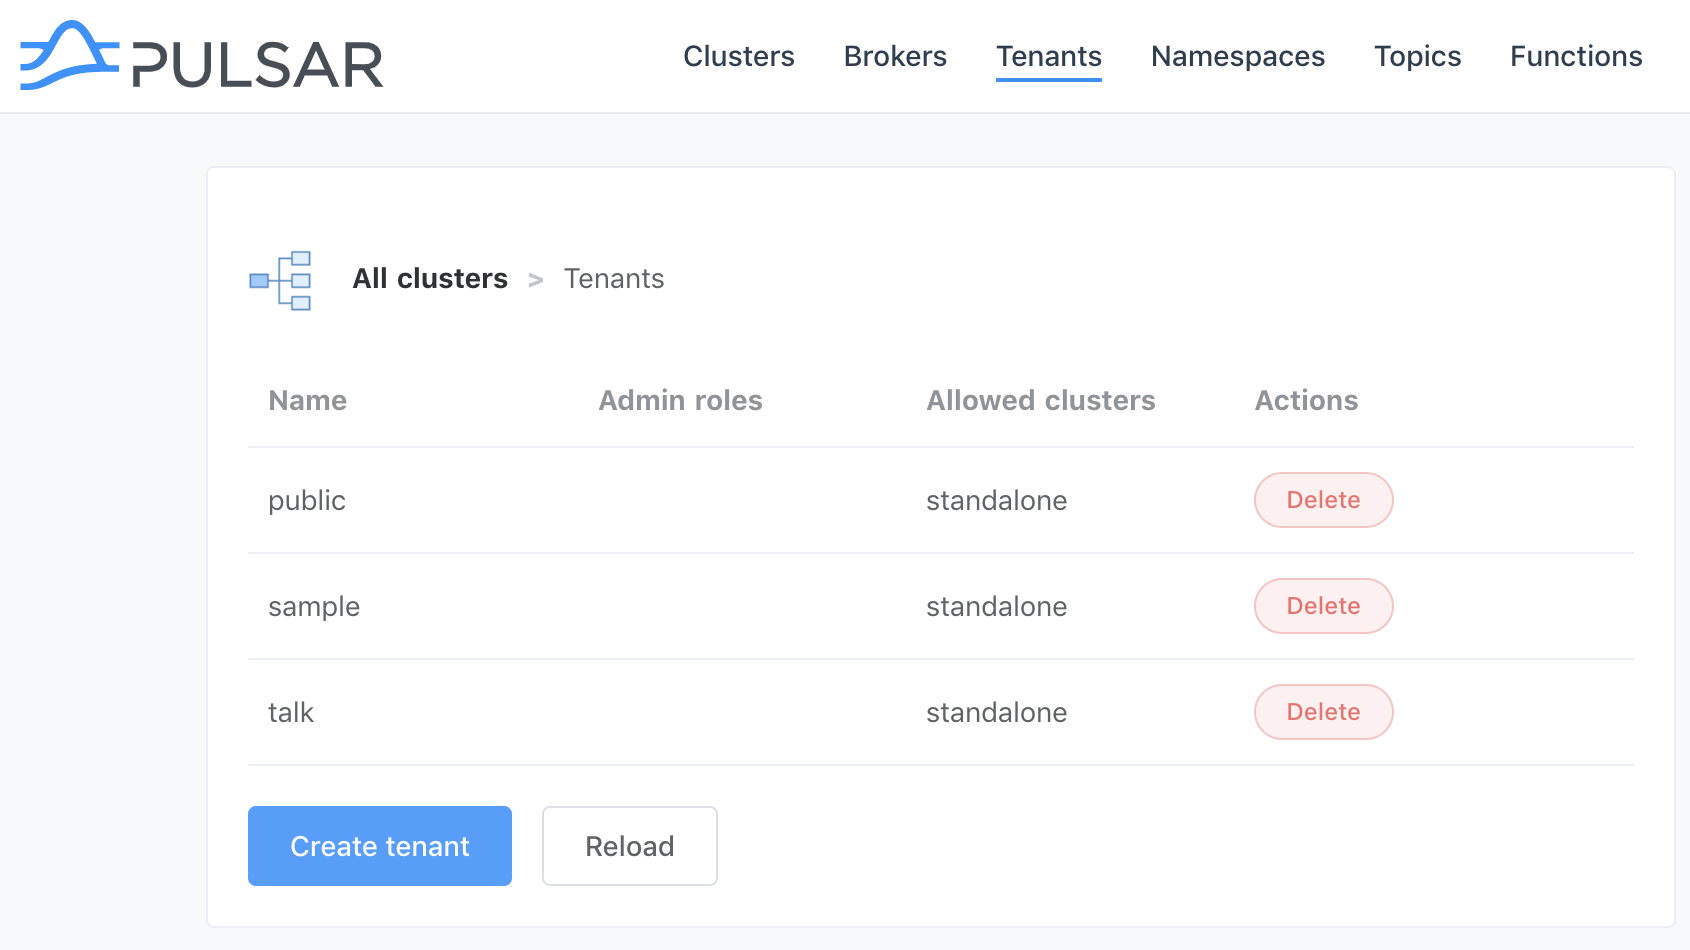
Tenants
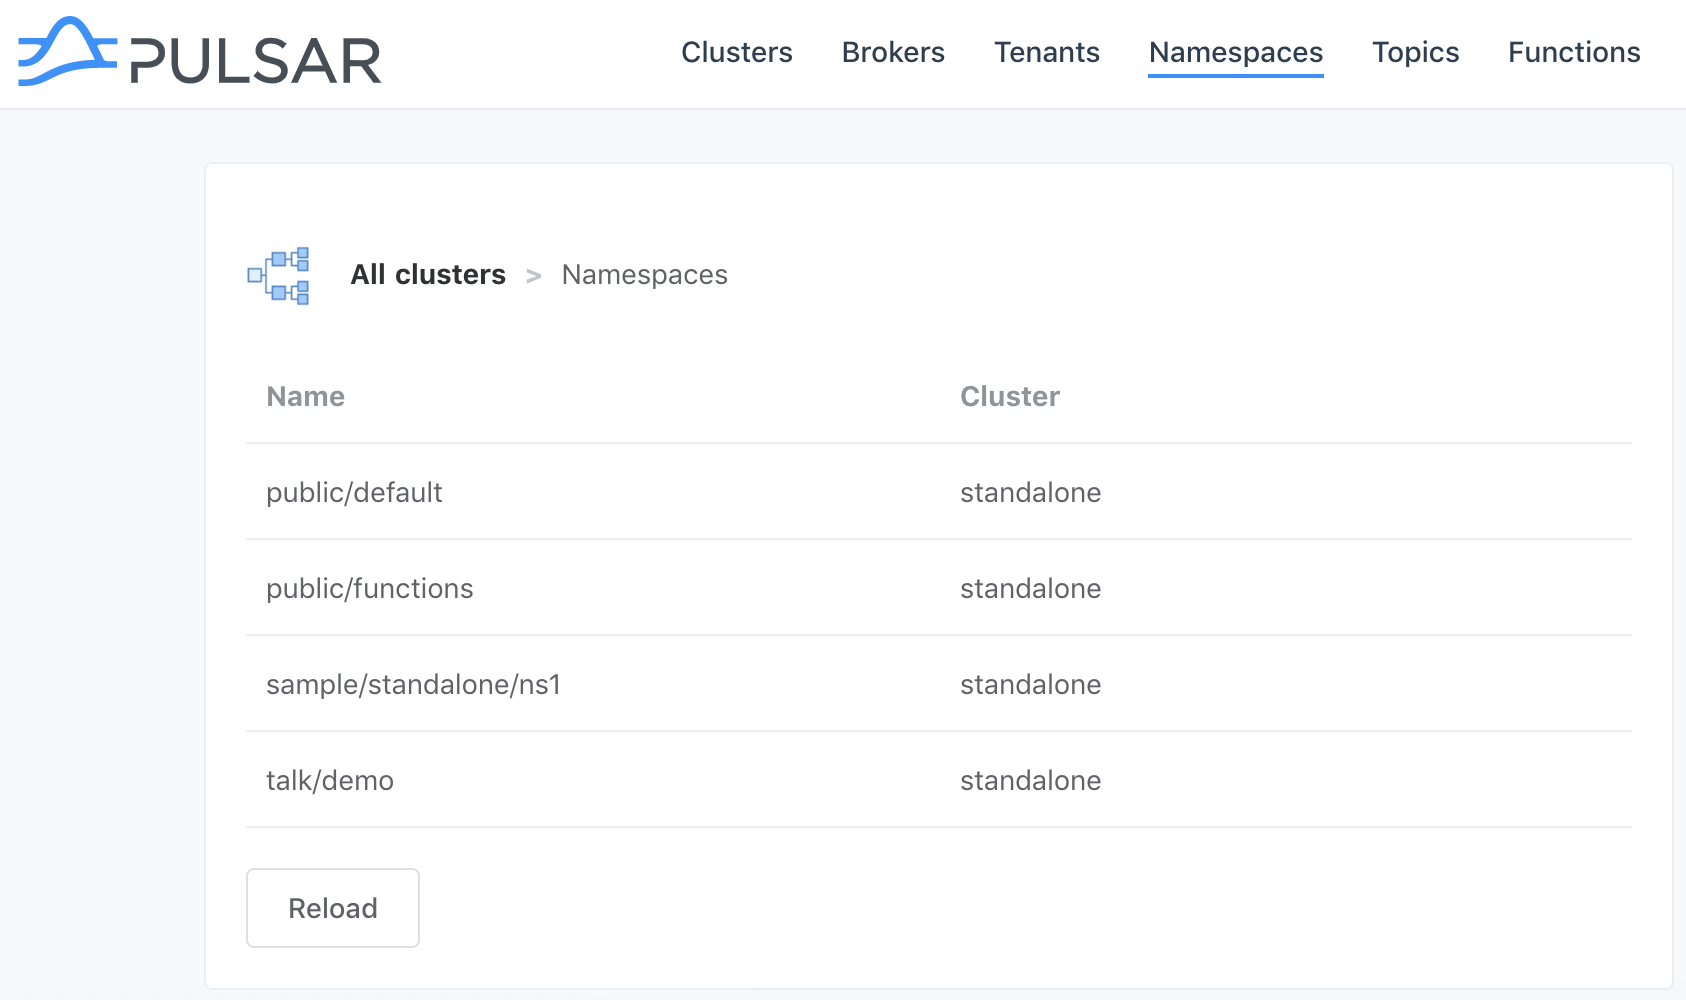
Namespaces
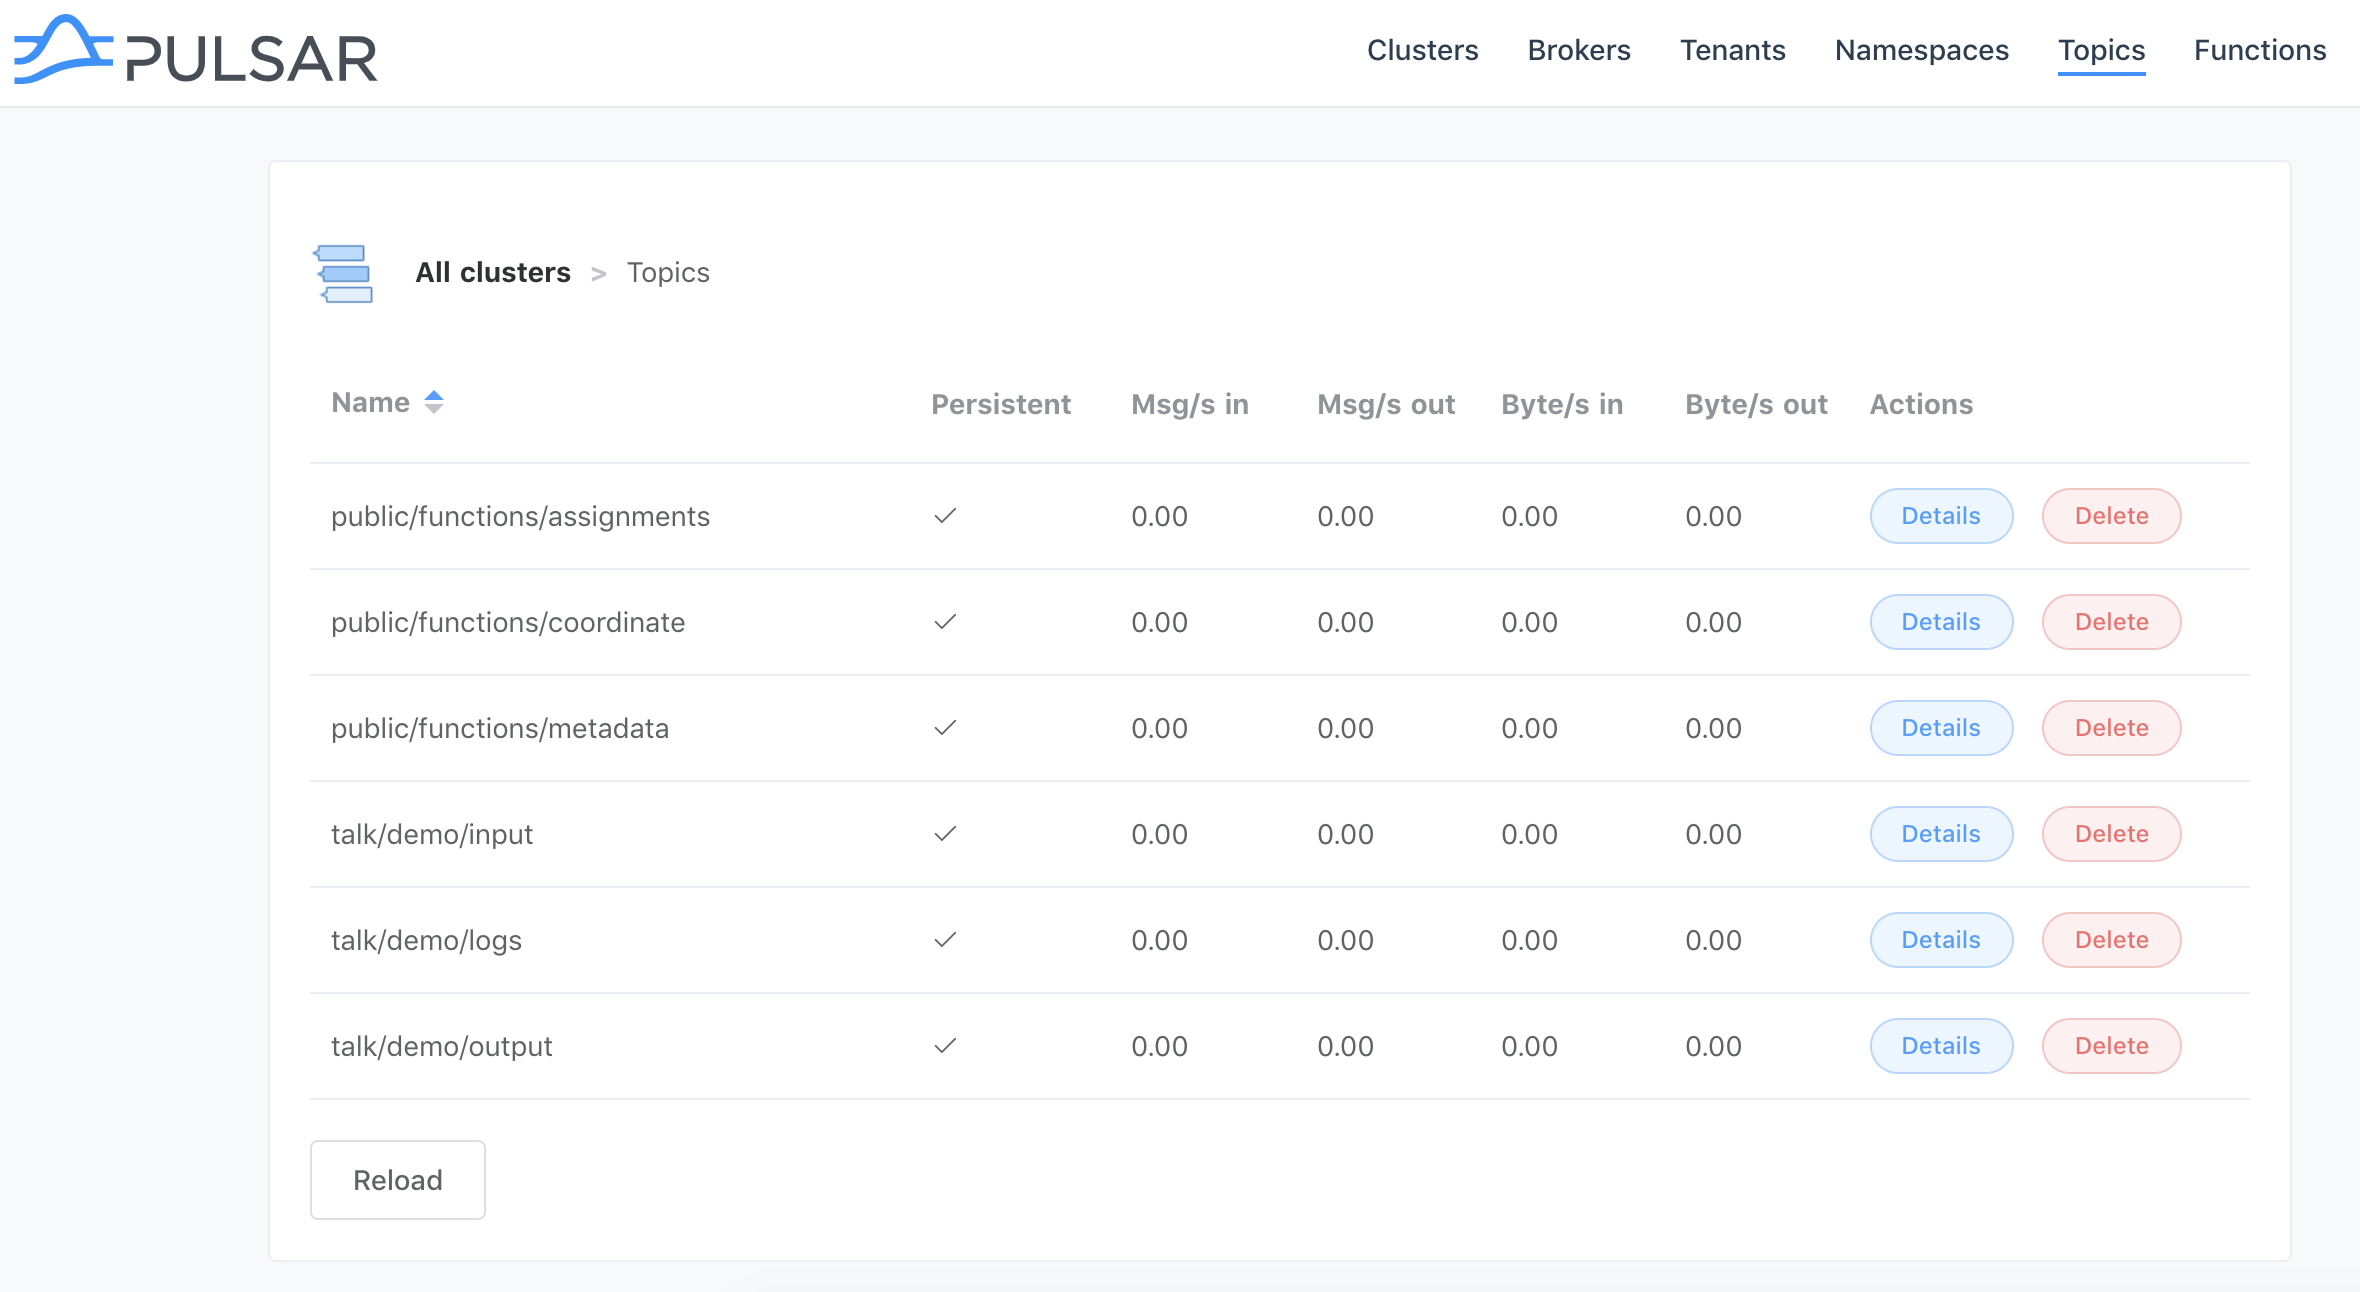
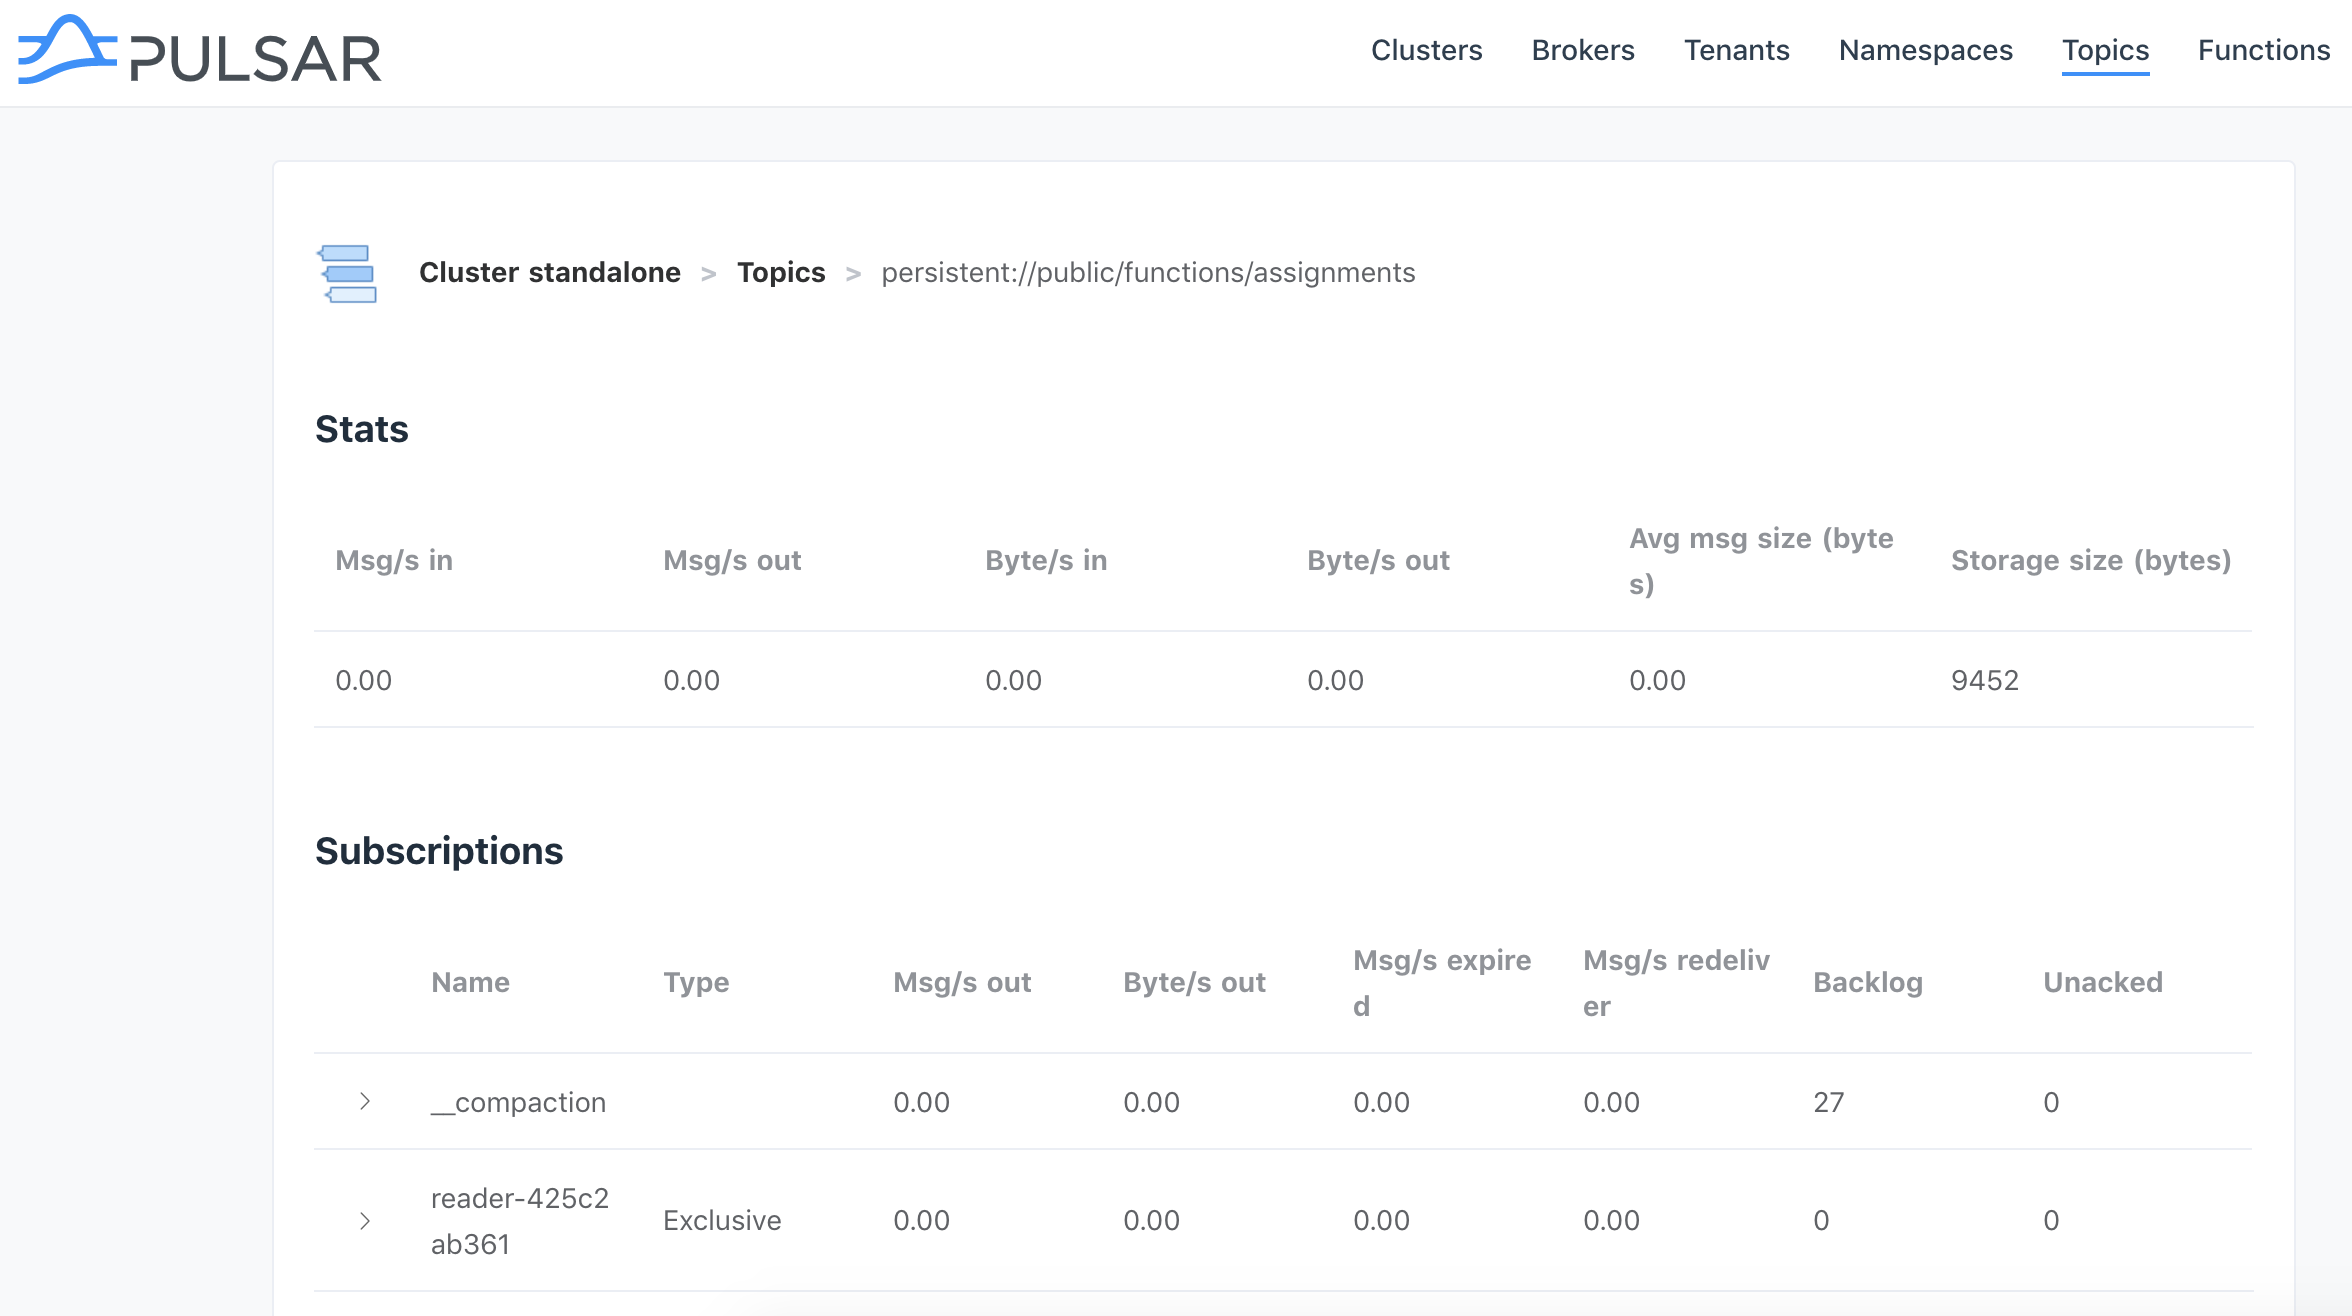
Topics
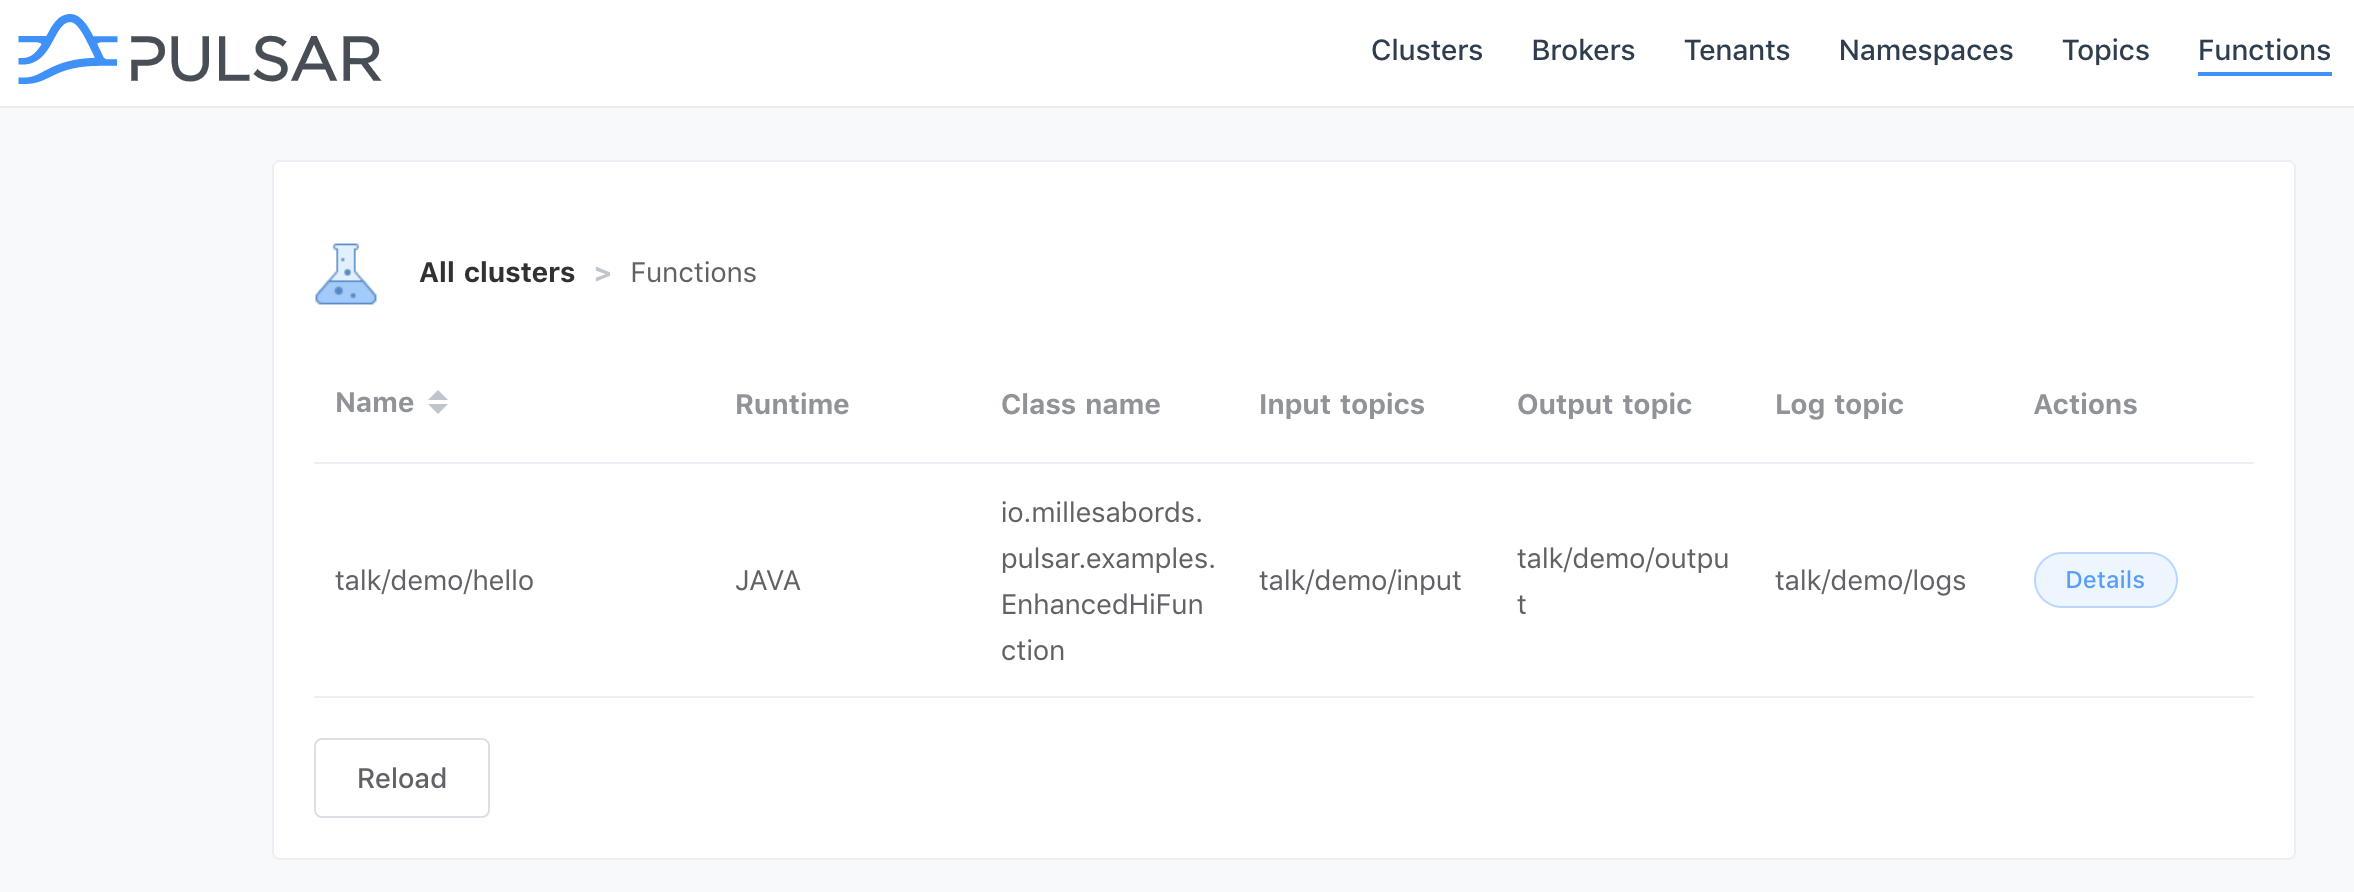
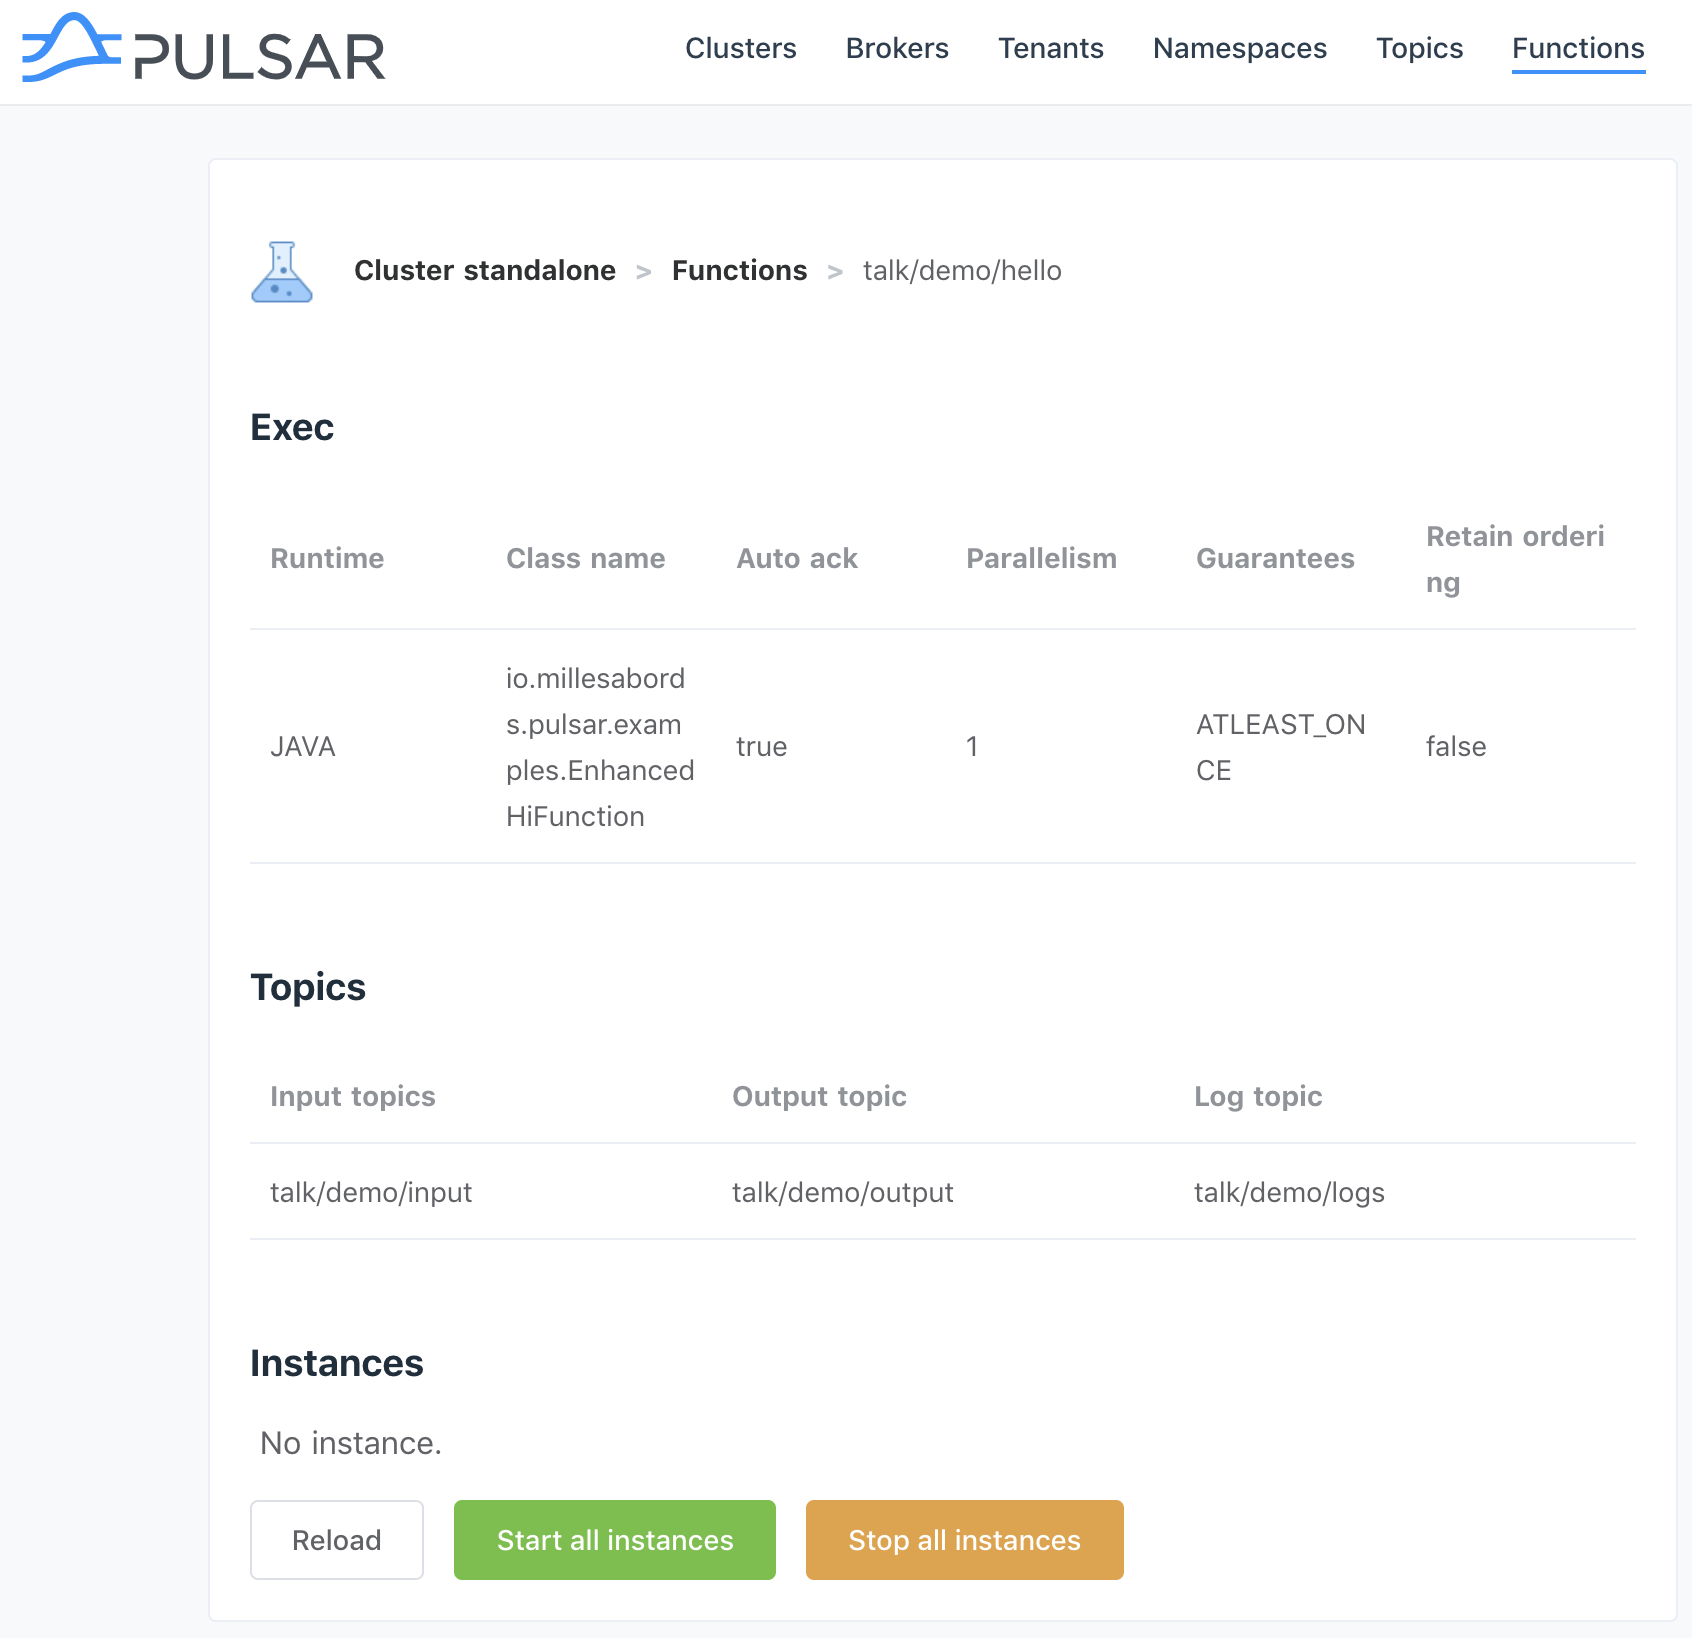
Functions
Security
To enable security in Pulsar, please read https://pulsar.apache.org/docs/en/security-overview/.
For example, with token authentication with a secret key (more details, https://pulsar.apache.org/docs/en/security-token-admin/),
- Create a secret key:
pulsar tokens create-secret-key --output my-secret.key --base64- Create a token for pulsar-express
pulsar tokens create --secret-key file:///path/to/my-secret.key \ --subject pulsar-express- Configure your broker (
conf/broker.conforconf/standalone.conf)
authenticationEnabled=trueauthorizationEnabled=trueauthenticationProviders=org.apache.pulsar.broker.authentication.AuthenticationProviderTokensuperUserRoles=pulsar-expresstokenSecretKey=file:///path/to/my-secret.key- Configure your workers (
conf/functions_worker.yml)
clientAuthenticationPlugin: "org.apache.pulsar.client.impl.auth.AuthenticationToken"clientAuthenticationParameters: "token:<YOUR_TOKEN>" authenticationEnabled: trueauthorizationEnabled: trueauthenticationProviders: - org.apache.pulsar.broker.authentication.AuthenticationProviderTokenproperties: tokenSecretKey: "file:///path/to/my-secret.key"superUserRoles: - pulsar-express- Test a call to the API (you should get a 401 response without the token):
curl localhost:8080/admin/v2/clusters -H "Authorization: Bearer <YOUR_TOKEN>" ["standalone"]Development
This app has been developed with Nuxt.js.
# install dependencies$ npm install# serve with hot reload at localhost:3000$ npm run dev# build for production and launch server$ npm run build$ npm start
For detailed explanation on how things work, checkout Nuxt.js docs.
For Docker:
- Build:
npm run docker-build - Test locally:
npm run docker-run - Tag:
docker tag pulsar-express USER/pulsar-express:VERSION - Publish:
docker push USER/pulsar-express:VERSION
To do
A lot of things of course :), but the main step is to change the architecture and add a backend instead of making the queries from the browser. This backend could provide api, cache, better management of configuration, ...
- Clusters
- connections to clusters (configured on server and client side)
- list clusters
- get config of a cluster
- manage clusters
- Tenants
- list the tenants
- create a tenant (simple way)
- delete a tenant
- get config of a tenant
- update config of a tenant
- Namespaces
- list the namespace
- create a namespace
- delete a namespace
- get config of a namespace
- update config of a namespace
- any other features (persistence policies, messages ttl, backlog quotas...)
- Topics
- list the topics
- create a topic
- create a partitioned topic
- delete a topic
- get stats about a topic
- get subscriptions of a topic
- manage subscriptions
- manage partitioned topics
- any other features (reset cursor, expire messages, ...)
- peek messages
- Functions
- list the functions
- get config of a function
- start/stop instances
- manage functions (deploy ? delete ? create ? simple python function for test purpose ?)
- Connections
- update a connection
Misc
Icons: https://icones8.fr/