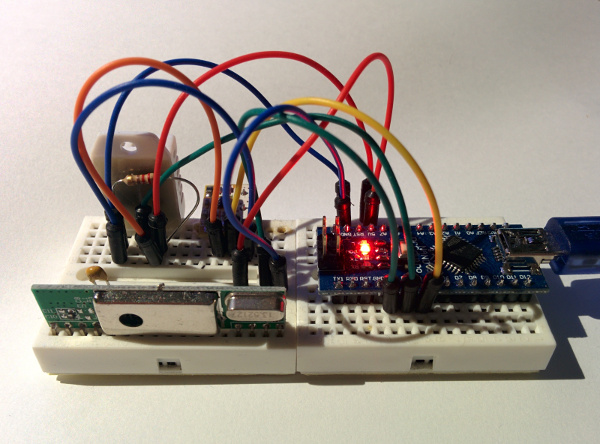
Plugin for using various 433mhz devices and sensors with a connected arduino with
homeduino sketch or directly with capable hardware like the Raspberry Pi.
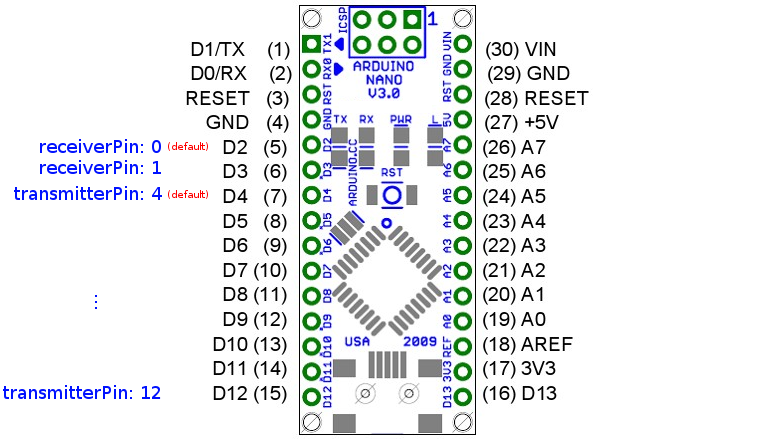
The pin numbers are arduino pin numbers. The receiverPin must be either 0 (INT0) or 1 (INT1).
The transmitterPin can must bq a digitial pin between 2 (D2) and 13 (D13) .
B. Raspberry Pi with ATTiny45 / 85 Prefilter
You can load the plugin by editing your config.json to include:
Devices must be added manually to the device section of your pimatic config.
A list with all supported protocols and protocol-options can be found here.
weather-station sensor example:
This is the basic sensor with only temperature and humidity
{
"id":"rftemperature",
"name":"Temperature",
"class":"HomeduinoRFTemperature",
"protocols":[{
"name":"weather2",
"options":{
"id":42,
"channel":1
}
}]
}
For weather stations like the Alecto WS-4500 you should use the weatherstation device
{
"id":"weatherstation",
"name":"Weather Data",
"class":"HomeduinoRFWeatherStation",
"protocols":[
{
"name":"weather5",
"options":{
"id":120
}
}
],
"values":[
"rain",
"temperature",
"humidity"
]
},
It supports different values to display
rain, temperature, humidity, windGust, windDirection and avgAirspeed
The order of the listed values define the order of the displayed values.
For protocol options see:
switch example:
{
"id":"rfswitch",
"name":"RFSwitch",
"class":"HomeduinoRFSwitch",
"protocols":[{
"name":"switch1",
"options":{
"id":42,
"unit":0
}
}]
}
A switch (and other devcies) can be controled or send to outlets with multiple protocols. Just
add more protocols to the protocols array. You can also set if a protocols
is used for sending or receiving. Default is true for both.
Multi protocol switch example:
{
"id":"switchmp",
"name":"Multi Switch",
"class":"HomeduinoRFSwitch",
"protocols":[
{
"name":"switch1",
"options":{
"id":9509718,
"unit":0
},
"send":true,
"receive":true
},
{
"name":"switch1",
"options":{
"id":9509718,
"unit":1
},
"send":false,
"receive":true
}
]
}
DHT11/22 sensor example:
{
"id":"homeduino-temperature",
"name":"DHT",
"class":"HomeduinoDHTSensor",
"type":22,
"pin":13
}
DST Dallas DS18B20 sensor example:
{
"id":"homeduino-temperature-dst",
"name":"DST",
"class":"HomeduinoDSTSensor"
}
PIR sensor example:
{
"id":"homeduino-pir",
"name":"PIR",
"class":"HomeduinoRFPir",
"protocols":[{
"name":"pir1",
"options":{
"unit":0,
"id":17
}
}],
"resetTime":6000
}
Contact sensor example:
{
"id":"homeduino-contact",
"name":"Contact",
"class":"HomeduinoRFContactSensor",
"protocols":[{
"name":"contact1",
"options":{
"unit":0,
"id":42
}
}]
}
Some contact only emit an event on open, For this you can set autorReset to true:
{
"id":"door-contact",
"name":"door-Contact",
"class":"HomeduinoRFContactSensor",
"protocols":[
{
"name":"contact2",
"options":{
"id":43690
}
}
],
"autoReset":true,
"resetTime":3000
}
Shutter sensor example:
Can use switch protocols.
{
"id":"homeduino-contact",
"name":"Shutter Controller",
"class":"HomeduinoRFShutter",
"protocols":[{
"name":"switch1",
"options":{
"unit":0,
"id":42
}
}]
}
Generic RF Sensor with arduino sender
{
"id":"homeduino-generic-sensor",
"name":"RFGenericSensor",
"class":"HomeduinoRFGenericSensor",
"protocols":[{
"name":"generic",
"options":{
"id":42
}
}],
"attributes":[
{
"name":"temperature",
"type":3,
"decimals":2,
"baseValue":0,
"unit":"°C",
"label":"Temperature"
}
]
}
Buttons Device example:
{
"id":"homeduino-buttons",
"name":"Buttons",
"class":"HomeduinoRFButtonsDevice",
"buttons":[
{
"id":"test-button",
"text":"test",
"protocols":[{
"name":"switch1",
"options":{
"unit":0,
"id":42,
"state":true
}
}]
}
]
}
Dimmer device example:
{
"id":"dimmer",
"name":"Dimmer",
"class":"HomeduinoRFDimmer",
"protocols":[
{
"name":"dimmer1",
"options":{
"id":7654321,
"unit":0
},
"send":true,
"receive":true
}
]
},
pin switch example:
Only works with an arduino. pin: 13 = digital pin 13 (LED on arduino nano).
{
"id":"pin-switch",
"name":"Pin Switch",
"class":"HomeduinoSwitch",
"inverted":false,
"pin":13
}
AnalogSensor example:
A AnalogSensor can read analog pins of the arduino and display there value.
An optional preprocessing can be applied. Pin numbering starts at 14 (A0)
for the first analog pin.
{
"id":"homeduino-analog-sensor",
"name":"AnalogSensor",
"class":"HomeduinoAnalogSensor",
"attributes":[
{
"name":"voltage",
"unit":"V",
"label":"Voltage",
"pin":14,
"interval":5000,
"processing":"($value / 1023) * 5"
}
]
}
The analog value is between 0 and 1023 and can be preprocessed by an expression. In this example
the value is scale to a value between 0 and 5.