
node-windows
Tweet me (@goldglovecb) if you need me.
Sponsors (as of 2020)
 |
node-windows
This library can be used to install/start/stop/uninstall Node scripts as Windows background services for production environments. This is not a tool for developing applications, it is a tool for releasing them.
See node-mac and node-linux if you need to support those operating systems.
Overview
The following features are available in node-windows:
- Service Management: Run Node.js scripts as native Windows services. Includes monitoring.
- Event Logging: Create logs in the Event log.
-
Commands:
- Elevated Permissions: Run a command with elevated privileges (may prompt user for acceptance)
-
Sudo: Run an
execcommand as a sudoer. - Identify Administrative Privileges: Determines whether the current user has administrative privileges.
- List Tasks: A method to list running windows tasks/services.
- Kill Task: A method to kill a specific windows service/task (by PID).
Installation
The recommended way to install node-windows is with npm, using the global flag:
npm install -g node-windows
Then, in your project root, run:
npm link node-windows
However; it is possible to use node-windows without the global flag (i.e. install directly into the project root). More details regarding why this is not the recommended approach are available throughout this Readme.
NO NATIVE MODULES
Using native node modules on Windows can suck. Most native modules are not distributed in a binary format.
Instead, these modules rely on npm to build the project, utilizing node-gyp.
This means developers need to have Visual Studio (and potentially other software) installed on the system,
just to install a native module. This is portable, but painful... mostly because Visual Studio
itself is over 2GB.
node-windows does not use native modules. There are some binary/exe utilities, but everything needed to run more complex tasks is packaged and distributed in a readily usable format. So, no need for Visual Studio... at least not for this module.
Windows Services
node-windows has a utility to run Node.js scripts as Windows services. Please note that like all Windows services, creating one requires administrative privileges. To create a service with node-windows, prepare a script like:
var Service = require('node-windows').Service;

// Create a new service object
var svc = new Service({
  name:'Hello World',
  description: 'The nodejs.org example web server.',
  script: 'C:\\path\\to\\helloworld.js',
  nodeOptions: [
    '--harmony',
    '--max_old_space_size=4096'
  ]
  //, workingDirectory: '...'
  //, allowServiceLogon: true
});

// Listen for the "install" event, which indicates the
// process is available as a service.
svc.on('install',function(){
  svc.start();
});

svc.install();
The code above creates a new Service object, providing a pretty name and description.
The script attribute identifies the Node.js script that should run as a service. Upon running
this, the script will be visible from the Windows Services utility.

The Service object emits the following events:
- install - Fired when the script is installed as a service.
- alreadyinstalled - Fired if the script is already known to be a service.
- invalidinstallation - Fired if an installation is detected but missing required files.
- uninstall - Fired when an uninstallation is complete.
- alreadyuninstalled - Fired when an uninstall is requested and no installation exists.
- start - Fired when the new service is started.
- stop - Fired when the service is stopped.
- error - Fired in some instances when an error occurs.
In the example above, the script listens for the install event. Since this event
is fired when a service installation is complete, it is safe to start the service.
Services created by node-windows are similar to most other services running on Windows.
They can be started/stopped from the windows service utility, via NET START or NET STOP commands,
or even managed using the sc
utility.
Command-line Options
It may be desired to specify command-line switches to your script. You can do this by setting the scriptOptions within the service config:
var svc = new Service({
  name:'Hello World',
  description: 'The nodejs.org example web server.',
  script: 'C:\\path\\to\\helloworld.js',
  scriptOptions: '-c C:\\path\\to\\somewhere\\special -i'
});
Environment Variables
Sometimes you may want to provide a service with static data, passed in on creation of the service. You can do this by setting environment variables in the service config, as shown below:
var svc = new Service({
  name:'Hello World',
  description: 'The nodejs.org example web server.',
  script: 'C:\\path\\to\\helloworld.js',
  env: {
    name: "HOME",
    value: process.env["USERPROFILE"] // service is now able to access the user who created its' home directory
  }
});
You can also supply an array to set multiple environment variables:
var svc = new Service({
  name:'Hello World',
  description: 'The nodejs.org example web server.',
  script: 'C:\\path\\to\\helloworld.js',
  env: [{
    name: "HOME",
    value: process.env["USERPROFILE"] // service is now able to access the user who created its' home directory
  },
  {
    name: "TEMP",
    value: path.join(process.env["USERPROFILE"],"/temp") // use a temp directory in user's home directory
  }]
});
Node Executable Path
There are times when you may want to specify a specific node executable to use to run your script. You can do this by setting the execPath in the service config, as shown below:
var svc = new Service({
  name:'Hello World',
  description: 'The nodejs.org example web server.',
  script: 'C:\\path\\to\\helloworld.js',
  execPath: 'C:\\path\\to\\specific\\node.exe'
});
User Account Attributes
If you need to specify a specific user or particular credentials to manage a service, the following attributes may be helpful.
The user attribute is an object with three keys: domain,account, and password.
This can be used to identify which user the service library should use to perform system commands.
By default, the domain is set to the local computer name, but it can be overridden with an Active Directory
or LDAP domain. For example:
app.js
var Service = require('node-windows').Service;

// Create a new service object
var svc = new Service({
  name:'Hello World',
  script: require('path').join(__dirname,'helloworld.js'),
  //, allowServiceLogon: true
});

svc.logOnAs.domain = 'mydomain.local';
svc.logOnAs.account = 'username';
svc.logOnAs.password = 'password';
...
Both the account and password must be explicitly defined if you want the service module to
run commands as a specific user. By default, it will run using the user account that launched
the process (i.e. who launched node app.js).
If you want to instruct winsw to allow service account logins, specify allowServiceLogon: true. This is disabled by default since some users have experienced issues running this without service logons.
The other attribute is sudo. This attribute has a single property called password. By supplying
this, the service module will attempt to run commands using the user account that launched the
process and the password for that account. This should only be used for accounts with administrative
privileges.
app.js
var Service = require('node-windows').Service;

// Create a new service object
var svc = new Service({
  name:'Hello World',
  script: require('path').join(__dirname,'helloworld.js')
});

svc.sudo.password = 'password';
...
Cleaning Up: Uninstall a Service
Uninstalling a previously created service is syntactically similar to installation.
var Service = require('node-windows').Service;

// Create a new service object
var svc = new Service({
  name:'Hello World',
  script: require('path').join(__dirname,'helloworld.js')
});

// Listen for the "uninstall" event so we know when it's done.
svc.on('uninstall',function(){
  console.log('Uninstall complete.');
  console.log('The service exists: ',svc.exists);
});

// Uninstall the service.
svc.uninstall();
The uninstall process only removes process-specific files. It does NOT delete your Node.js script!
What Makes node-windows Services Unique?
Lots of things!
Long Running Processes & Monitoring:
The built-in service recovery for Windows services is fairly limited and cannot easily be configured from code. Therefore, node-windows creates a wrapper around the Node.js script. This wrapper is responsible for restarting a failed service in an intelligent and configurable manner. For example, if your script crashes due to an unknown error, node-windows will attempt to restart it. By default, this occurs every second. However; if the script has a fatal flaw that makes it crash repeatedly, it adds unnecessary overhead to the system. node-windows handles this by increasing the time interval between restarts and capping the maximum number of restarts.
Smarter Restarts That Won't Pummel Your Server:
Using the default settings, node-windows adds 25% to the wait interval each time it needs to restart
the script. With the default setting (1 second), the first restart attempt occurs after one second.
The second occurs after 1.25 seconds. The third after 1.56 seconds (1.25 increased by 25%) and so on.
Both the initial wait time and the growth rate are configuration options that can be passed to a new
Service. For example:
var svc = new Service({
  name:'Hello World',
  description: 'The nodejs.org example web server.',
  script: 'C:\\path\\to\\helloworld.js',
  wait: 2,
  grow: .5
});
In this example, the wait period will start at 2 seconds and increase by 50%. So, the second attempt would be 3 seconds later while the fourth would be 4.5 seconds later.
Don't DOS Yourself!
Repetitive recycling could potentially go on forever with a bad script. To handle these situations, node-windows
supports two kinds of caps. Using maxRetries will cap the maximum number of restart attempts. By
default, this is unlimited. Setting it to 3 would tell the process to no longer restart a process
after it has failed 3 times. Another option is maxRestarts, which caps the number of restarts attempted
within 60 seconds. For example, if this is set to 3 (the default) and the process crashes/restarts repeatedly,
node-windows will cease restart attempts after the 3rd cycle in a 60 second window. Both of these
configuration options can be set, just like wait or grow.
Finally, an attribute called abortOnError can be set to true if you want your script to not restart
at all when it exits with an error.
How Services Are Made
node-windows uses the winsw utility to create a unique .exe
for each Node.js script deployed as a service. A directory called daemon is created and populated
with myappname.exe and myappname.xml. The XML file is a configuration for the executable. Additionally,
winsw will create some logs for itself in this directory (which are viewable in the Event log).
The myappname.exe file launches the node-windows wrapper, which is responsible for monitoring and managing
the script. Since this file is a part of node-windows, moving the node-windows directory could result in
the .exe file not being able to find the Node.js script. However; this should not be a problem if
node-windows is installed globally, per the recommended installation instructions.
All of these daemon-specific files are created in a subdirectory called daemon, which is created in the
same directory where the Node.js script is saved. Uninstalling a service will remove these files.
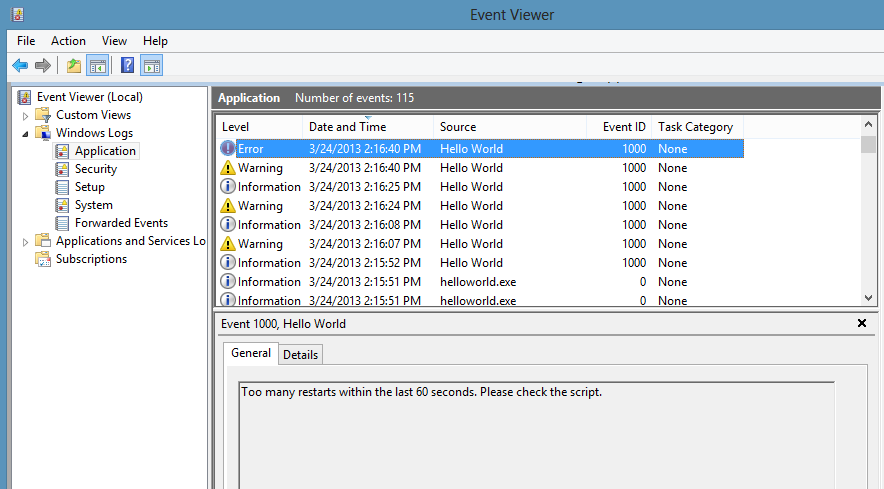
Event Logging
Services created with node-windows have two event logs that can be viewed through the Windows Event Viewer.
A log source named myappname.exe provides basic logging for the executable file. It can be used to see
when the entire service starts/stops or has errors. A second log, named after your service name (i.e. My App Name),
is used by the node-windows monitor. It is possible to write to this log from the Node.js script using
the node-windows Event Logging.
Event Logging
New as of v0.1.0 is a non-C++ based event logging utility. This utility can write to the event log,
making your logs visible from the Event Viewer.
To create a logger:
var EventLogger = require('node-windows').EventLogger;

var log = new EventLogger('Hello World');

log.info('Basic information.');
log.warn('Watch out!');
log.error('Something went wrong.');
Looks similar to:
Some lesser-used options are also available through node-windows event logging.
log.auditSuccess('AUser Login Success');
log.auditFailure('AUser Login Failure');
Each log type (info, warn, error, auditSuccess, and auditFailure) method optionally accepts two additional
arguments, including a code and callback. By default, the event code is 1000 if not otherwise specified.
To provide a custom event code with a log message and write that message to the console, the following code could
be used:
log.info('Something different happened!', 1002, function(){
  console.log('Something different happened!');
});
By default, event logs are all part of the APPLICATION scope. However; it is also possible to use the SYSTEM log.
To do this, a configuration object must be passed to the new log:
var EventLogger = require('node-windows').EventLogger;
var log = new EventLogger({
  source: 'My Event Log',
  eventLog: 'SYSTEM'
});
Commands
node-windows ships with several commands to simplify tasks on MS Windows.
elevate
Elevate is similar to sudo on Linux/Mac. It attempts to elevate the privileges of the
current user to a local administrator. Using this does not require a password, but it
does require that the current user have administrative privileges. Without these
privileges, the command will fail with a access denied error.
On systems with UAC enabled, this may prompt the user for permission to proceed:

Syntax:
elevate(cmd[,options,callback])
- cmd: The command to execute with elevated privileges. This can be any string that would be typed at the command line.
-
options (optional): Any options that will be passed to
require('child_process').exec(cmd,<OPTIONS>,callback). -
callback (optional): The callback function passed to
require('child_process').exec(cmd,options,<CALLBACK>).
sudo
Sudo acts similarly to sudo on Linux/Mac. Unlike elevate, it requires a password, but it
will not prompt the user for permission to proceed. Like elevate, this
still requires administrative privileges for the user, otherwise the command will fail.
The primary difference between this and elevate() is the prompt.
Syntax:
sudo(cmd,password[,options,callback])
- cmd: The command to execute with elevated privileges. This can be any string that would be typed at the command line.
- password: The password of the user
-
options (optional): Any options that will be passed to
require('child_process').exec(cmd,<OPTIONS>,callback). -
callback (optional): The callback function passed to
require('child_process').exec(cmd,options,<CALLBACK>).
isAdminUser
This asynchronous command determines whether the current user has administrative privileges.
It passes a boolean value to the callback, returning true if the user is an administrator
or false if it is not.
Example
var wincmd = require('node-windows');

wincmd.isAdminUser(function(isAdmin){
  if (isAdmin) {
    console.log('The user has administrative privileges.');
  } else {
    console.log('NOT AN ADMIN');
  }
});
list
The list method queries the operating system for a list of running processes.
var wincmd = require('node-windows');

wincmd.list(function(svc){
  console.log(svc);
},true);
This returns an array of running processes. Supplying the optional true
argument in the above example provides a list with verbose output. The output is
specific to the version of the operating system. Here is an example of verbose
output on a Windows 8 computer.
[{
  ImageName: 'cmd.exe',
  PID: '12440',
  SessionName: 'Console',
  'Session#': '1',
  MemUsage: '1,736 K',
  Status: 'Unknown',
  UserName: 'Machine\\Corey',
  CPUTime: '0:00:00',
  WindowTitle: 'N/A'
},{
  ImageName: 'tasklist.exe',
  PID: '1652',
  SessionName: 'Console',
  'Session#': '1',
  MemUsage: '8,456 K',
  Status: 'Unknown',
  UserName: 'Machine\\Corey',
  CPUTime: '0:00:00',
  WindowTitle: 'N/A'
}]
The regualar (non-verbose) output typically provides the ImageName,PID,SessionName,
Session#, MemUsage, and CPUTime.
kill
This method will kill a process by PID.
var wincmd = require('node-windows');

wincmd.kill(12345,function(){
  console.log('Process Killed');
});
In this example, process ID 12345 would be killed. It is important to note that the
user account executing this node script may require administrative privileges.
Troubleshooting
If you're experiencing issues with the examples, please review the TESTS.md file.
If you are encountering the invalidinstallation event, take a look at the daemon
directory that is created during the installation to make sure the .exe and .xml
files are there. In some circumstances, primarily during _un_installation, it is
possbile for the process to temporarily lock a log file, which prevents Windows
from removing it. In this scenario, simply run the uninstall again. In most cases this
will fix the issue. If not, manually remove the daemon directory before running the
installation again.
Thank You
There have been many contributors who have done everything from committing features to helping pick up slack while I've been swamped. I'm incredibly appreciative for the help.
Special thanks to @arthurblake whose modifications have FINALLY been added. Thanks to @hockeytim11, who helped compile and update a bunch of outstanding issues and started bringing support to the other node-* libraries.
Licenses
winsw and sudowin are the copyrights of their respective owners. winsw is distributed under an MIT license. sudowin is distributed under a BSD license.
All other scripts are Copyright (c) Corey Butler under an MIT license.
(The MIT License)
Copyright (c) 2013 Corey Butler
Permission is hereby granted, free of charge, to any person obtaining a copy of this software and associated documentation files (the 'Software'), to deal in the Software without restriction, including without limitation the rights to use, copy, modify, merge, publish, distribute, sublicense, and/or sell copies of the Software, and to permit persons to whom the Software is furnished to do so, subject to the following conditions:
The above copyright notice and this permission notice shall be included in all copies or substantial portions of the Software.
THE SOFTWARE IS PROVIDED 'AS IS', WITHOUT WARRANTY OF ANY KIND, EXPRESS OR IMPLIED, INCLUDING BUT NOT LIMITED TO THE WARRANTIES OF MERCHANTABILITY, FITNESS FOR A PARTICULAR PURPOSE AND NONINFRINGEMENT. IN NO EVENT SHALL THE AUTHORS OR COPYRIGHT HOLDERS BE LIABLE FOR ANY CLAIM, DAMAGES OR OTHER LIABILITY, WHETHER IN AN ACTION OF CONTRACT, TORT OR OTHERWISE, ARISING FROM, OUT OF OR IN CONNECTION WITH THE SOFTWARE OR THE USE OR OTHER DEALINGS IN THE SOFTWARE.