JScripty
A simple REPL for transpiling & executing ES6/ES7 code.
Stolen from Inspired by the excellent esbox
written by Callum Locke.
Beware: This project is not intended to be used for anything productive!
I'm only using it to learn and test several frameworks and libraries [Ractive, Inferno, React & Redux]
JScripty creates a fully functional headless browser environment in the console. Although there's no browser you still have the complete DOM functionality.
Current Status
- Compiles ES6 & ES7. [Babel presets & plugins]
- Compiles TypeScript
- Runs React from the console.
- Runs Inferno from the console. [latest version 0.6.0]
- Runs Ractive from the console.
- Uses WebPack to create a fully operational environment for
headlesslive testing. 😄 - Uses jsdom to provide a complete DOM environment in the console.
- Offers a simple REPL for direct access. [namespace jscripty]
Installation
git clone https://github.com/brakmic/JScripty.git
npm install
Running
Open two consoles.
If you're running under Windows I recommend ConEmu.
In the first console open a script with your preferred editor.
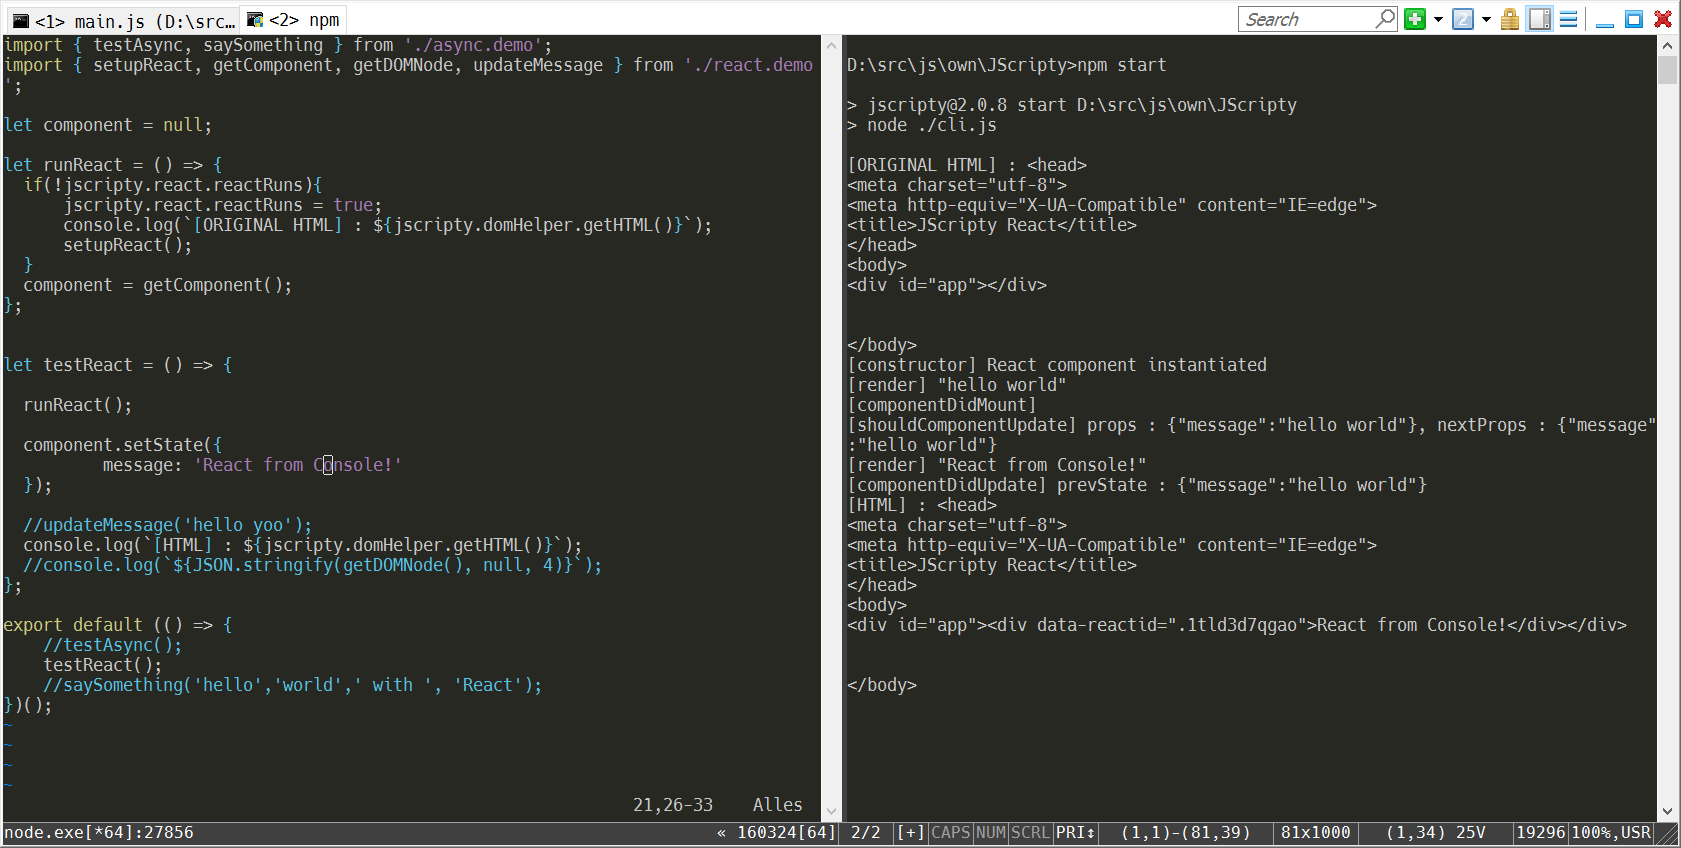
In the second console run JScripty with your preferred UI-Engine by executing
node cli.js --react

or

node cli.js --inferno
Ractive.js can run with both of them. Just append an additional --ractive flag. 😄
Now edit the file and save it to kick-off the transpile-process.
After a few moments your code will be executed and shown in the console.
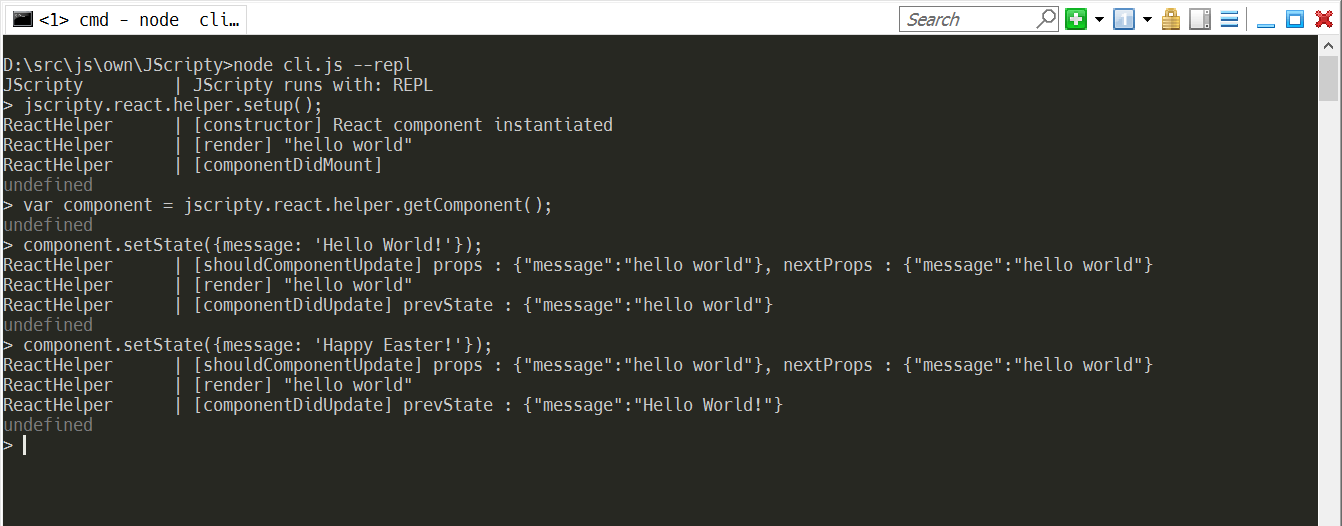
REPL
There's also a simple REPL available. All functions are located inside the namespace jscripty.
node cli.js --repl
Here's an example with React.
Playing with Inferno, Ractive & React
Change some piece of code, for example a component property, and press CTRL+S. Your running Ractive, Inferno or React instances will calculate the diffs and update accordingly. With a few simple logging commands you can now trace the data flows and interactions of your components.
IDE Integration
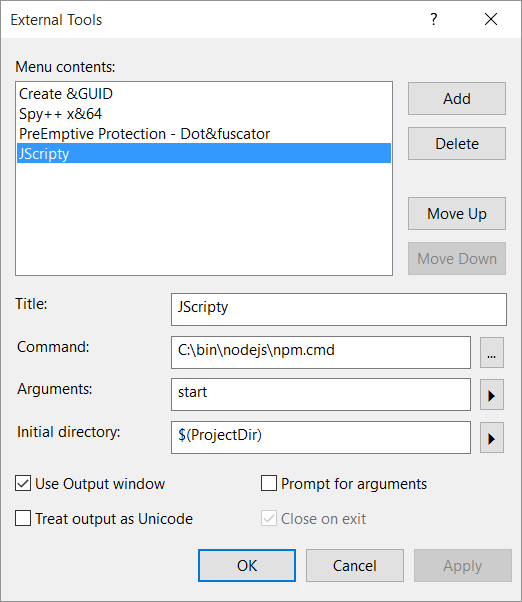
You don't have to run JScripty in a console. For example, I configured it as an External Tool in my Visual Studio 2015.
Just go to menu Tools\External Tools and type in the following (notice: use your Node install-path)
Now you'll get a new menu option JScripty under Tools.
Create a new, blank solution and import the JScripty folder as an Existing Web Site.
First right-click the Solution itself then select following options:

Go to the root folder of your JScripty project and select it.
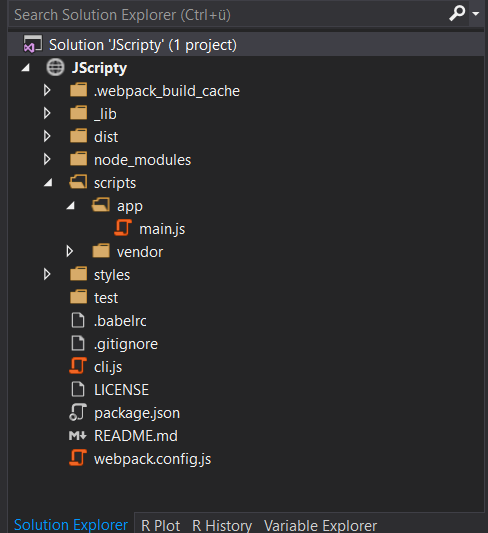
The import will take a few moments and in the end you should get the following project settings:
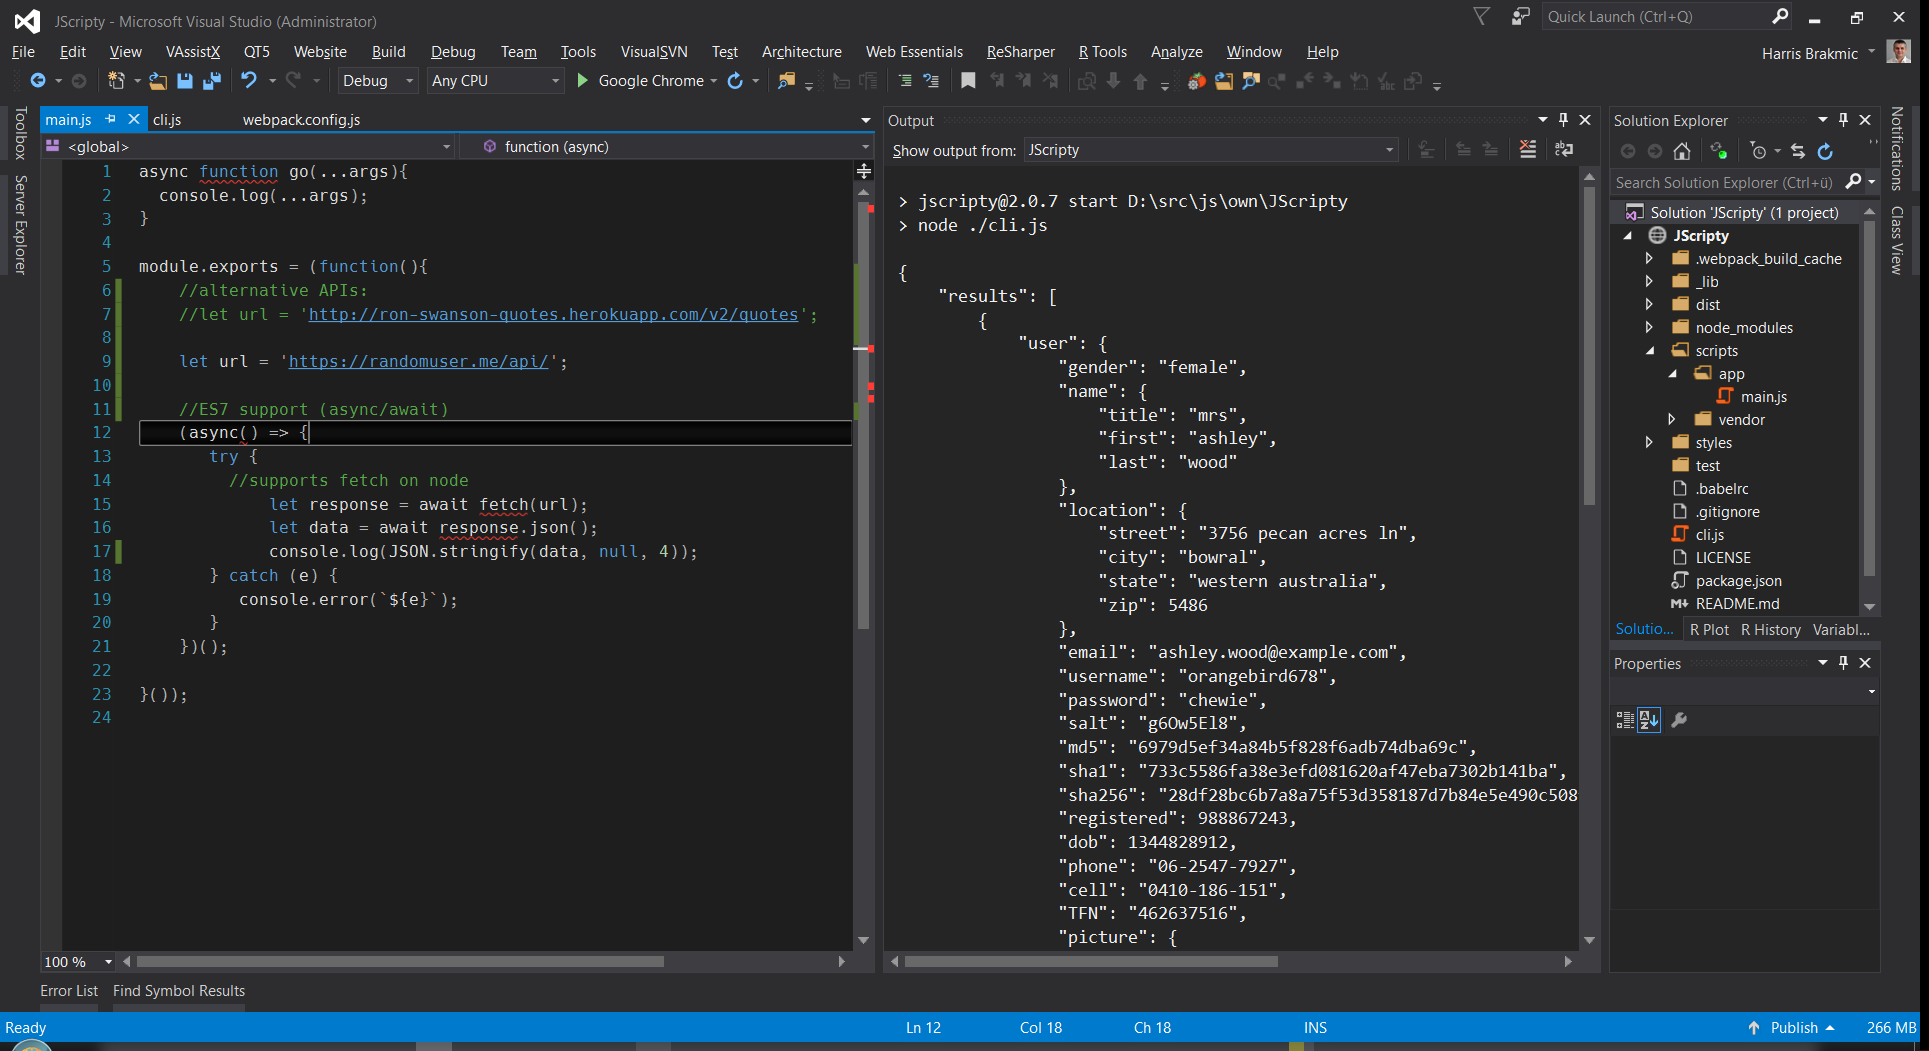
You can now select the JScripty menu option to start the watcher. Now change something in your main.js and watch the output.
Notice: Visual Studio's Output Window doesn't recognize ANSI Escape Commands which makes the clearScreen function unusable. In scripts/env/jscripty.js you can find a variable to silent the ANSI-output.
Background info
Originally, this project had used much of the code from Callum's project which is a great tool for experimenting with newest JavaScript features. However, I didn't like the slow compilation times.
This is because on each save the running node instance has to restart and reload the complete environment again.
Therefore I thought it'd be much nicer to let webpack do all the heavy lifting. 😄
After some experimentation with hot-reloading, webpack-dev-server and a few other things this solution now comprises of following ingredients:
- require-from-string module for loading changed scripts as a string
- a simple asynchronous
file reloadfunction inwebpack.config.jsto be called after each successful build - babel-loader combined with the usual presets like
es2015,stage-0,reactand transformers for ES7asyncsyntax. - on-build webpack plugin to reload the rebuilt scripts.
- isomorphic-fetch to execute web requests.
- es6-promise polyfill to provide a globally available Promise API.
- React directly from the console.
- Inferno directly from the console.
- Ractive directly from the console.
- TypeScript
- REPL