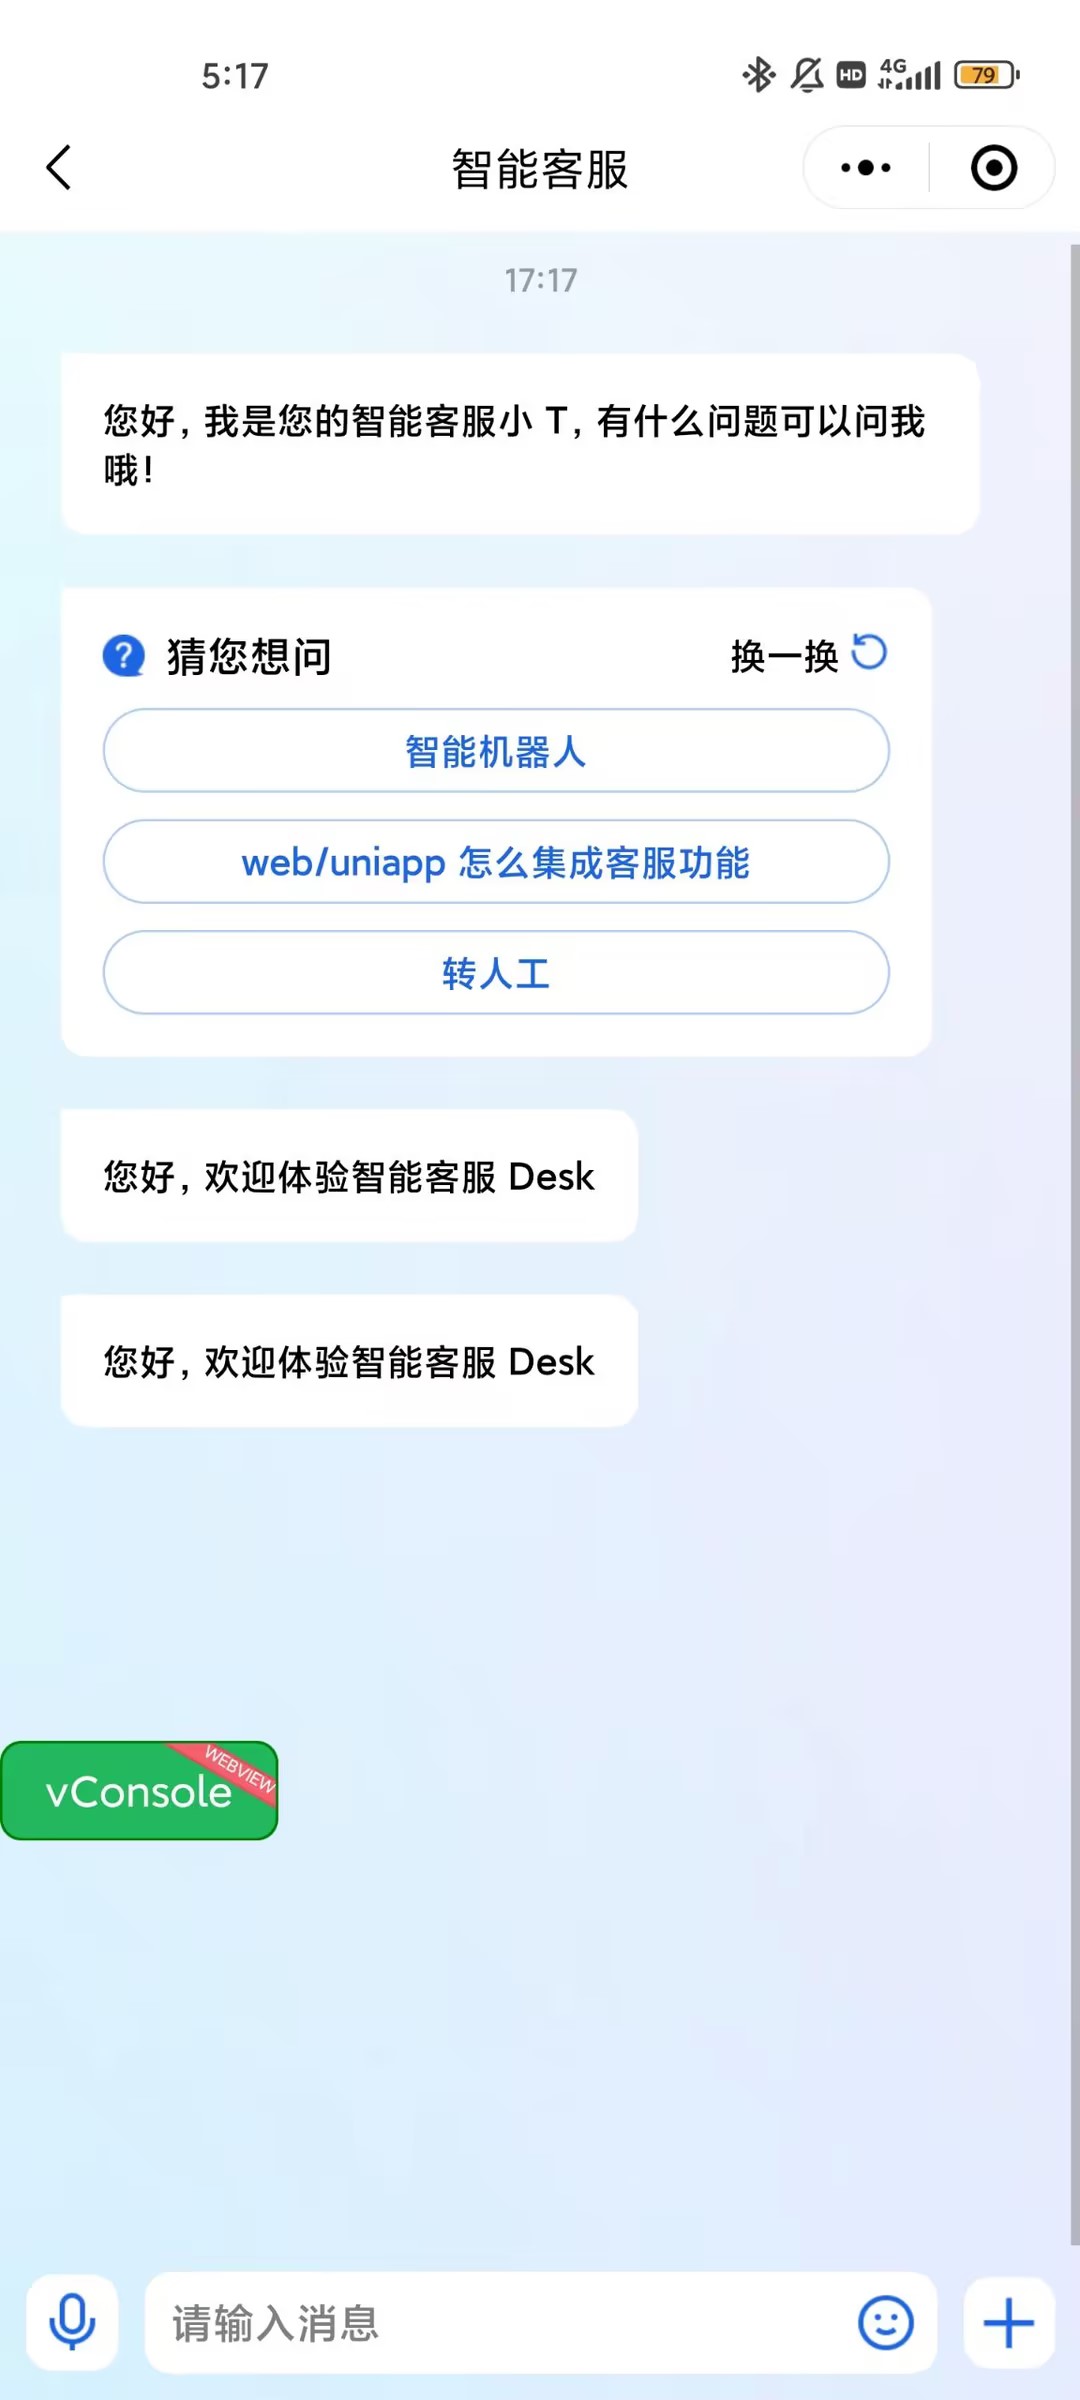
智能客服用户端的微信小程序 UIKit。使用此 UIKit,您可以在一天内将智能客服的能力集成到您的小程序项目。极简接入,用 AI 为您的产品增收提效。
-
微信开发者工具
-
JavaScript 或 TypeScript
-
node(node.js ≥ 16.0.0)
-
npm(版本请与 node 版本匹配)
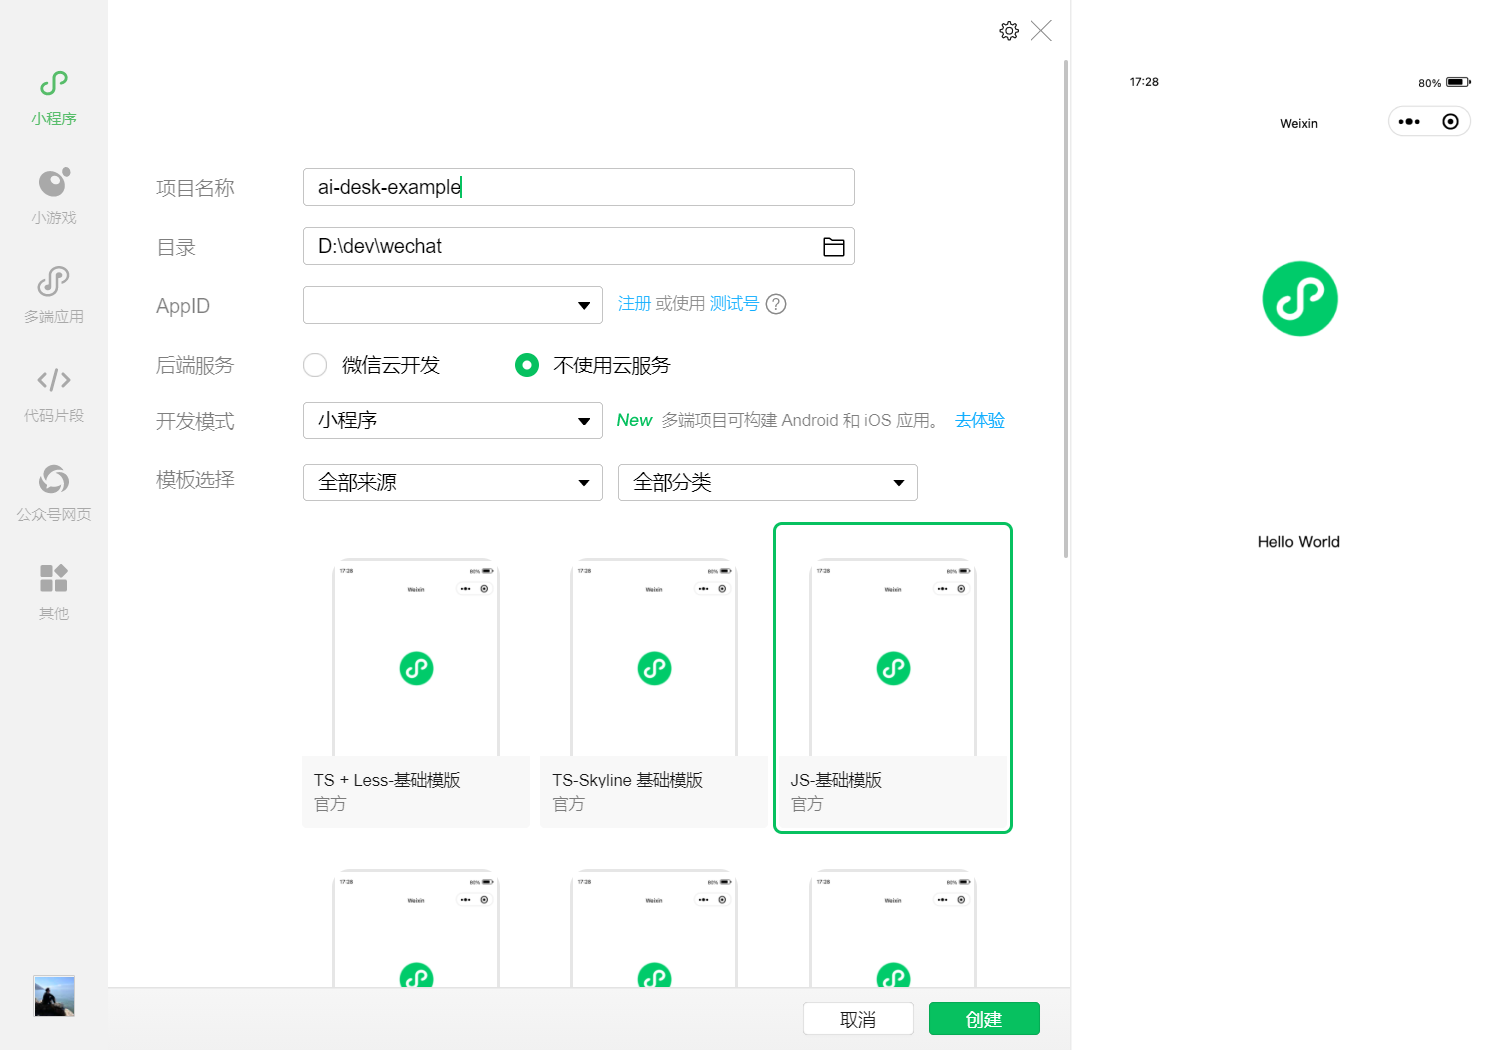
在微信开发者工具上创建一个使用 JS-基础模板的小程序项目(是否使用模板,是否使用 TS 均可),如图所示:
微信开发者工具创建的小程序项目默认没有 package.json,因此您需要先创建 package.json 文件。
npm init -y通过 NPM 方式下载 UIKit。
npm i @tencentcloud/ai-desk-customer-wechat@latest为了方便您对 UI 进行扩展,请在项目的根目录下执行以下命令,将 UIKit 源码复制到项目中。
【macOS 端】
mkdir -p ./ai-desk-customer-wechat &&
rsync -av --exclude={'node_modules','package.json','excluded-list.txt','script'} ./node_modules/@tencentcloud/ai-desk-customer-wechat/ ai-desk-customer-wechat/
【Windows 端】
xcopy .\node_modules\@tencentcloud\ai-desk-customer-wechat .\ai-desk-customer-wechat /i /e为了规避小程序主包体积超限问题,我们建议您将客服 UIKit 放入分包。
【app.js】
说明:
以下代码使用了分包异步化的技术方案。
"use strict";
Object.defineProperty(exports, Symbol.toStringTag, { value: "Module" });
let common_vendor;
require.async('./ai-desk-customer-wechat/common/vendor').then((res) => {
    common_vendor = res;
    const _sfc_main = {
        onLaunch: function() {
          console.log("App Launch");
        },
        onShow: function() {
          console.log("App Show");
        },
        onHide: function() {
          console.log("App Hide");
        }
      };
      function createApp() {
        const app = common_vendor.createSSRApp(_sfc_main);
        return {
          app
        };
      }
      createApp().app.mount("#app");
      exports.createApp = createApp;
}).catch(({ errMsg, mod }) => {
    console.error(`path: ${mod}, ${errMsg}`)
});
【app.json】
说明:
请务必配置 subPackages和 preloadRule。
{
  "pages": [
    "pages/index/index"
  ],
  "subPackages": [
    {
      "root": "ai-desk-customer-wechat",
      "pages": [
        "pages/index/index"
      ],
      "entry": "index.js"
    }
  ],
  "preloadRule": {
    "ai-desk-customer-wechat/pages/index/index": {
      "network": "all",
      "packages": [
        "ai-desk-customer-wechat"
      ]
    }
  },
  "window": {
    "navigationBarTextStyle": "black",
    "navigationBarTitleText": "Weixin",
    "navigationBarBackgroundColor": "#ffffff"
  },
  "style": "v2",
  "componentFramework": "glass-easel",
  "sitemapLocation": "sitemap.json"
}【主包 pages/index/index.js】
Page({
  data: {
  },
  getSupport() {
    // SDKAppID/userID/userSig 的获取请参考步骤4
    const SDKAppID = 0;
    const userID = '';
    const userSig = '';
    wx.navigateTo({
      url: `/ai-desk-customer-wechat/pages/index/index?SDKAppID=${SDKAppID}&userID=${userID}&userSig=${userSig}`
    })
  },
})
【主包 pages/index/index.wxml】
<button class="get-support" bind:tap="getSupport">咨询客服</button>【主包 pages/index/index.wxss】
page {
  height: 100vh;
  display: flex;
  flex-direction: column;
}

.get-support {
    background-color: #0052d9;
    color: #ffffff;
    margin: auto;
}获取 SDKAppID、userID、userSig 信息后填写到 pages/index/index.js 中对应的字段上。
const SDKAppID = 0;// Your SDKAppID
const userID = '';// Your userID
const userSig = '';// Your userSig-
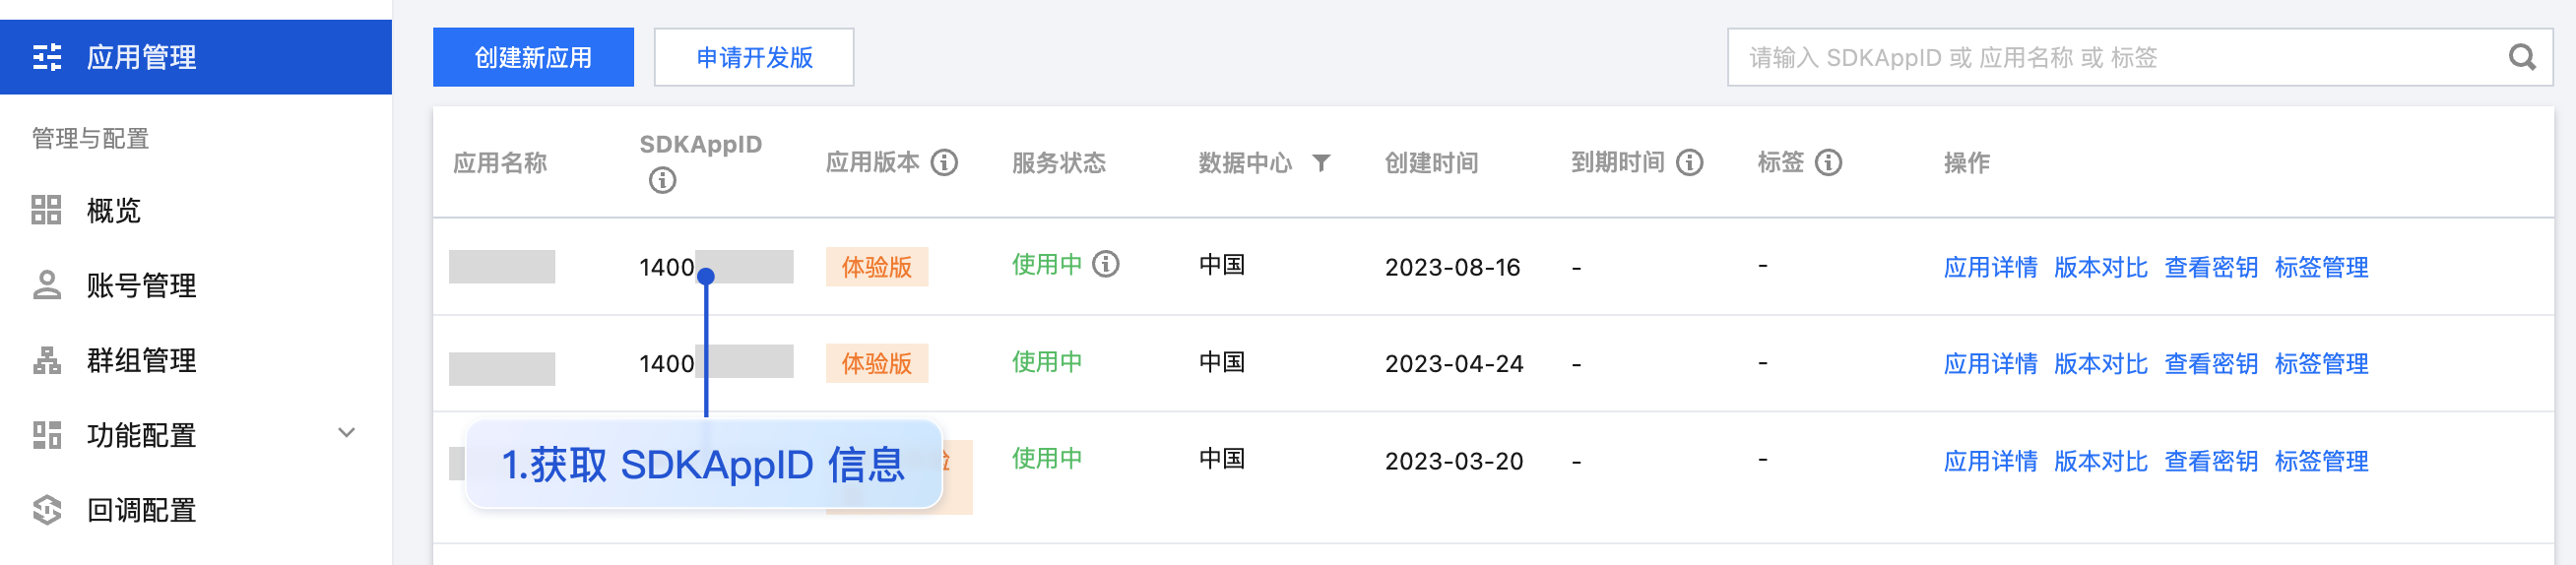
SDKAppID 信息,可通过 即时通信 IM 控制台 获取:
-
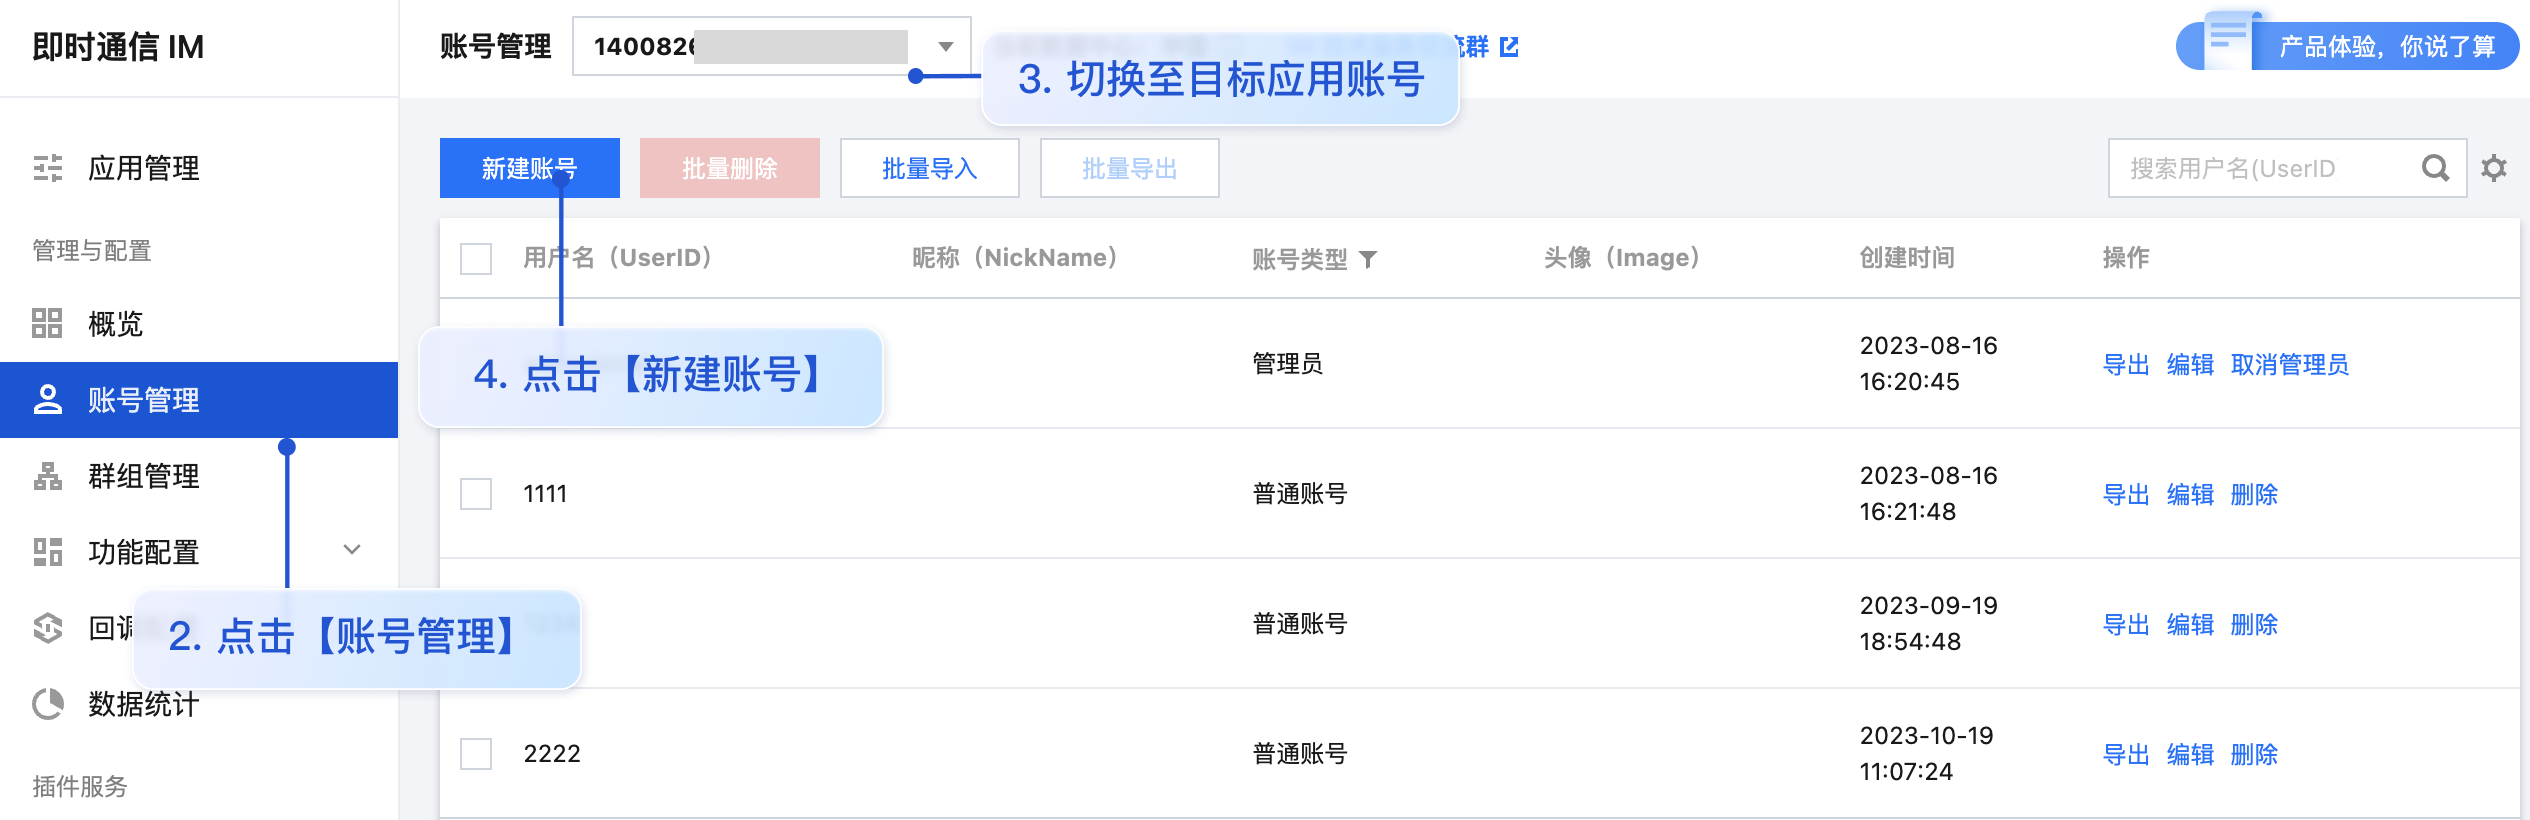
userID 信息,可单击 即时通信 IM 控制台 > 账号管理,切换至目标应用所在账号,创建 2 个 userID 方便后续体验聊天功能。
-
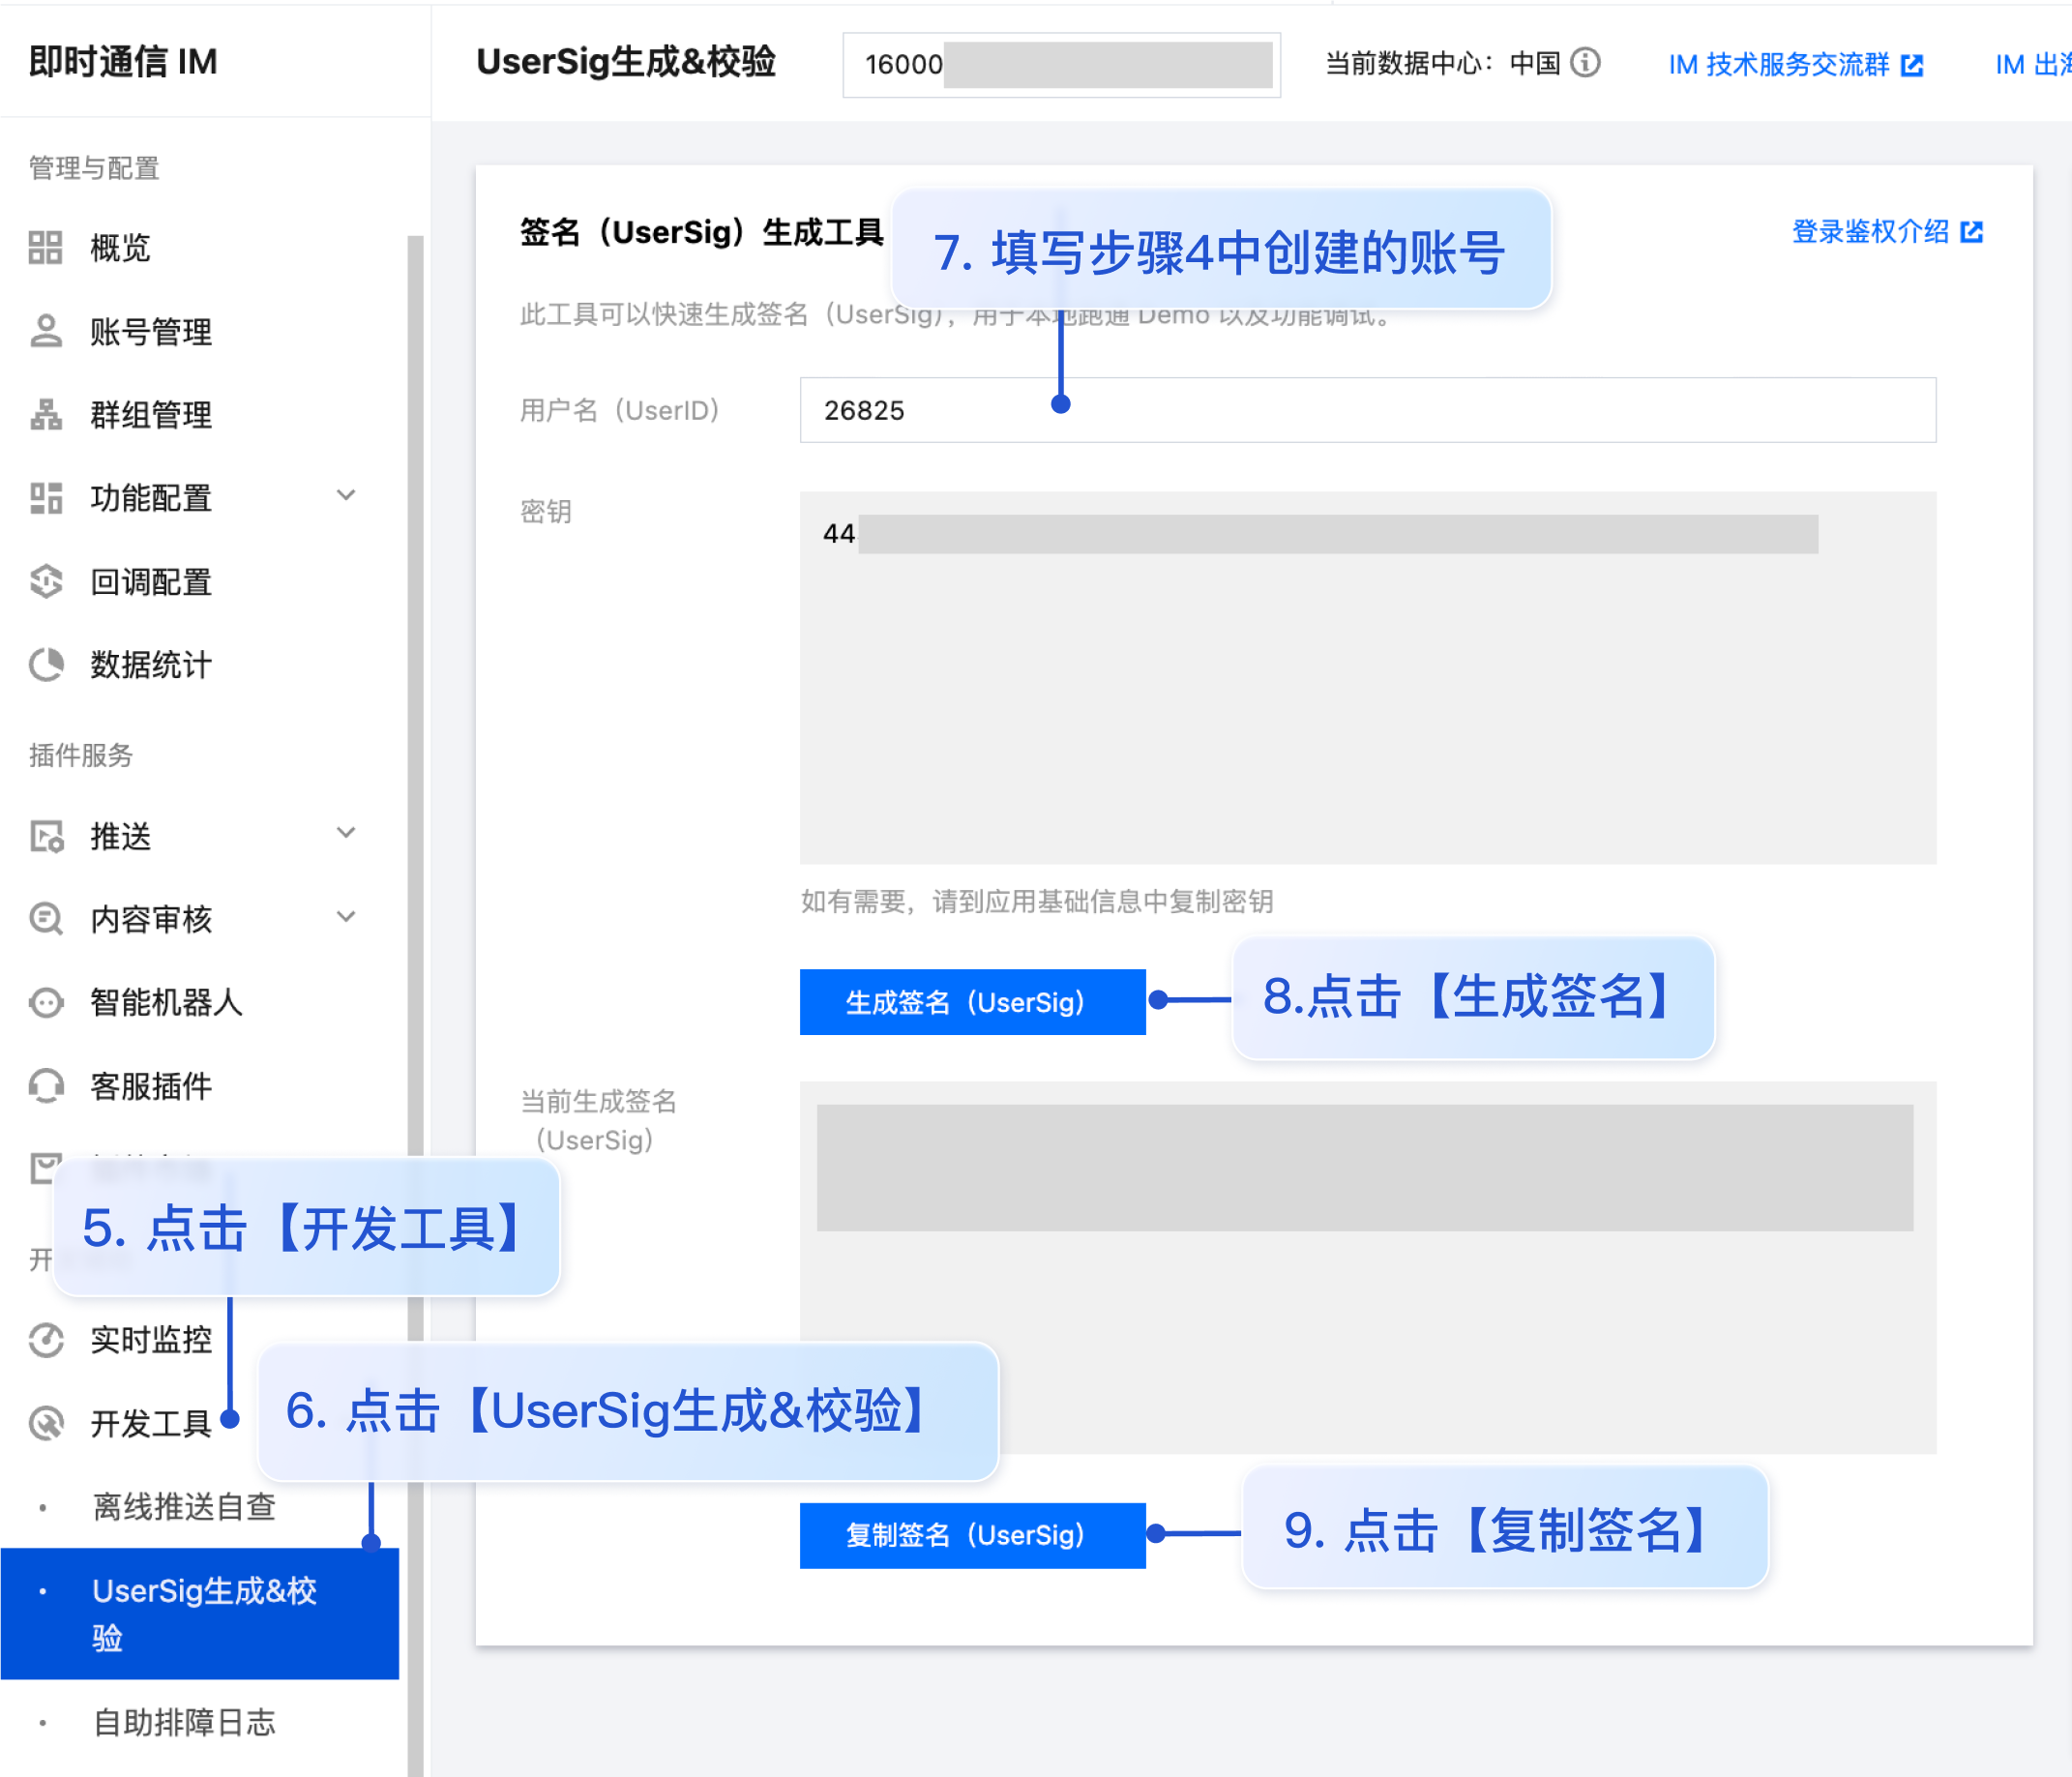
userSig 信息,可单击 即时通信 IM 控制台 > 开发工具 > UserSig生成&校验,填写创建的 userID,即可生成 userSig。
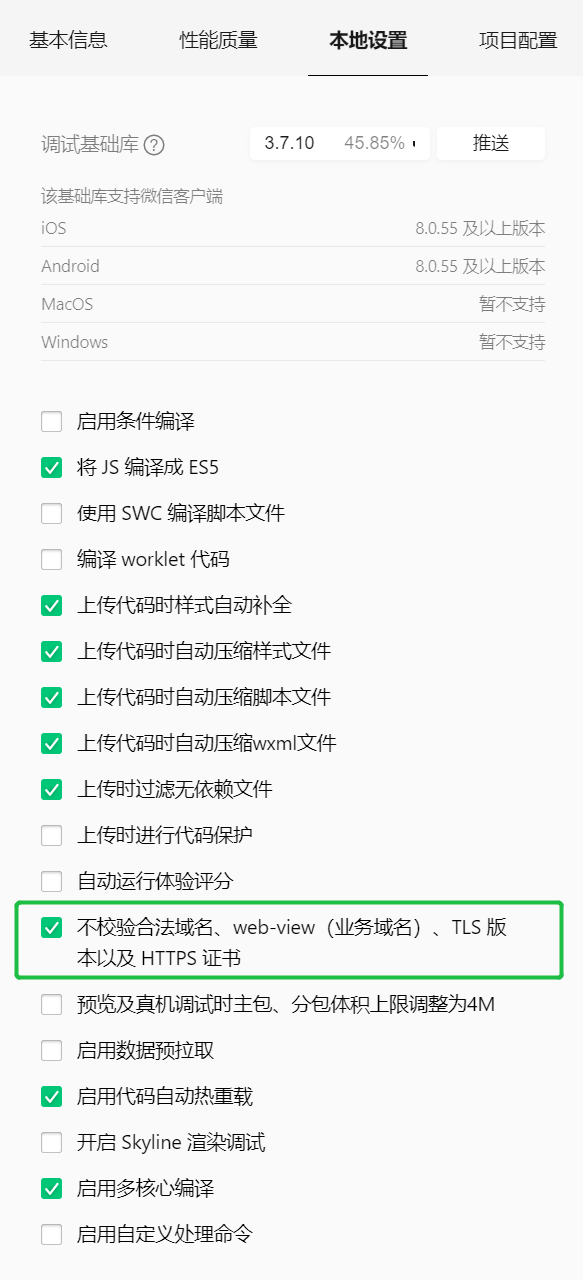
测试前,请先清理微信开发者工具的缓存,并勾选本地设置 > 不校验合法域名。
UserSig 是用户登录即时通信 IM 的密码,其本质是对 UserID 等信息加密后得到的密文。
UserSig 签发方式是将 UserSig 的计算代码集成到您的服务端,并提供面向项目的接口,在需要 UserSig 时由您的项目向业务服务器发起请求获取动态 UserSig。更多详情请参见 服务端生成 UserSig。
请在 微信公众平台 > 开发 > 开发管理 > 开发设置 > 服务器域名中进行域名配置。域名配置详细参见:小程序合法域名。
点此进入 IM 社群,享有专业工程师的支持,解决您的难题。