
vue-flash-message
![]()
![]()
![]()

⚠️ This is APLHA version for those who want to migrate from Vue 2 to Vue 3. Plugin API has some breaking changes from 0.x.x version of this package. Starting 1.0.0-beta.x API will be stable and do not change in final release.
vue-flash-message - is a component to provide simple and fast notification system for website/application user.
Main features:
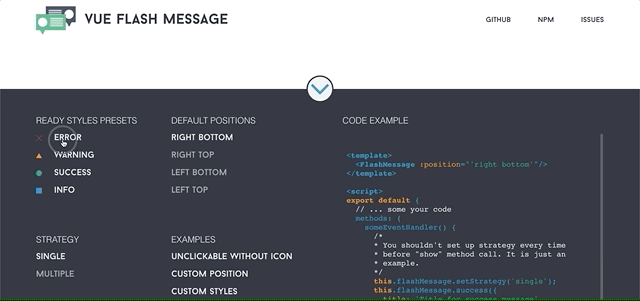
Live Demo and docs for Vue 3 version are in progress.
Live Demo Vue 2
Docs Vue 2
Installation and Configuration
Download package
npm i @smartweb/vue-flash-message@next
And register it as a Vue 3.x.x plugin
import { createApp } from 'vue';
import App from './App.vue';
import FlashMessage from '@smartweb/vue-flash-message';

const app = createApp(App);
app.use(FlashMessage);
app.mount('#app');
For TypeScript users
import { createApp } from 'vue';
import App from './App.vue';
import FlashMessage, { FlashMessagePlugin } from '@smartweb/vue-flash-message';

declare module '@vue/runtime-core' {
    interface ComponentCustomProperties {
        $flashMessage: FlashMessagePlugin
    }
}

const app = createApp(App);
app.use(FlashMessage);
app.mount('#app');
Usage
Put the component into your template
<FlashMessage />You can pass different props to cutomize the notification group. All of thme are optional.
| prop | type | default | description |
|---|---|---|---|
| group | string | - | Name of group of messages - for example 'email-messages' |
| tag | string | 'div' | HTML tag for messages container |
| transition-name | string | - | Custom transition name for messages |
| position | string | 'right bottom' | You can pass a string as position property to set up default position of messages block. Valid values: 'right bottom', 'right top', 'left bottom', 'left top'. |
| time | string | 8000 | Duration (in ms) of the notification display (can be customized during message call). |
| strategy | 'string' | 'multiple' | You can pass 'single' or 'multiple' to choose the default strategy. It can be changed in process. |
Example:
<FlashMessage position="left top" time="10000" strategy="single" group="hints"/>Now you can access flash message by using global alias (that is "$flashMessage" by default) of your Vue instance.
this.$flashMessage.show({
	type: 'error',
	title: 'Error Message Title',
	message: 'Oh, you broke my heart! Shame on you!'
});
If you want to use plugin in some place, where you have no access to current active Vue instance, for example in setup method
import {defineComponent} from 'vue'
import { flashMessage } from '@smartweb/vue-flash-message';

export default defineComponent({
    setup() {
        flashMessage.changeStrategy('multiple')
    }
}
Pugin API
Show method - take one argument messageObject and return serializedMessageObject.
this.$flashMessage.show(messageObject);messageObject Interface All properties are optional
| prop | type | default |
|---|---|---|
| title | string | Message title |
| text | string | Message text |
| image | string | Image URL to be displayed in message |
| type | string | Type of message. Default presets: 'error', 'warning', 'info', 'success' |
| time | number | Duration (in ms) of the single message instance. If time equal to 0, message will be shown until user click on it or you delete it programmatically. |
| group | string | Name of group, where the message will be shown |
| space | nubmer | Vertical space in 'px' between messages |
| image | strig | URL of the image |
| time | number | Duration of the notification instance |
| clickable | boolean | Message instance will be removed on click if true |
| position | string | [1]Available positions: 'top left', 'top right', 'bottom left', 'bottom right' (x and y axis orientation for fixed position messages) |
| x | string | [1]Position of the message instance relative to the viewport (x axis) |
| y | string | [1]Position of the message instance relative to the viewport (y axis) |
| component | object<VNode> | [2]Custom compotent to be rendered in message block |
| props | object | [2]Props for custom component |
| html | string | Raw HTML to be rendered in message block |
| blockClass | string | [3]Custom class to style message block |
| imageClass | string | [3]Custom class to style message image |
| contentClass | string | [3]Custom class to style message content |
| beforeCreate | function | Callback function, that will be invoked in message's instance beforeCreate hook |
| created | function | Callback function, that will be invoked in message's instance created hook |
| beforeMount | function | Callback function, that will be invoked in message's instance beforeMount hook |
| mounted | function | Callback function, that will be invoked in message's instance mounted hook |
| beforeUpdate | function | Callback function, that will be invoked in message's instance beforeUpdate hook |
| updated | function | Callback function, that will be invoked in message's instance updated hook |
| beforeUnmount | function | Callback function, that will be invoked in message's instance beforeUnmount hook |
| unmounted | function | Callback function, that will be invoked in message's instance unmounted hook |
1if you pass 'x' and 'y' props the message instance will have fixed position
2your component should be able to receive 'messageObj' prop to get actual message data
3Schema with base classes and custom classes is below

Show method
Show method will return object<FlashMessageSerializedObject>. It will have some additional properties, like id.
const message = this.$flashMessage.show({
	status: 'error',
	title: 'Error Message Title',
	message: 'Oh, you broke my heart! Shame on you!'
});

message.id //Id of message instance
Base usage:
    methods: {
        deleteTrouble() {
            this.$axios.delete(`/delete/trouble/${trouble.id}`)
                .then( res => {
                    let { status, data, error } = res.data;
                    if(status) {
                        this.$flashMessage.show({
                            type: 'success',
                            title: 'Don\'t Warry',
                            text: 'Be Happy!',
                            time: 5000,
                            blockClass: 'custom-block-class'
                        });
                    }
                    else {
                        this.$flashMessage.error({title: error.name || 'Error', message: error.message});
                    }
                })
                .catch(e);
        }
    }
RAW HTML
const message = this.$flashMessage.show({
	html: '<p>You should not render raw html from unreliable sources to avoid XSS attacks</p>'
});

message.id //Id of message instance
CUSTOM COMPONENT
import MyBeautifulComponent from '@/components/MyBeautifulComponent.vue'

export default {
    methods: {
        showMessage() {
            this.$flashMessage.show({
                component: MyBeautifulComponent,
                props: {someProp: 'Hello, it is text from someProp!'}
            })
        }
    }
}
You can declare messageObj prop inside your component and receive all messageObj data inside component.
Groups
Groups provide you possibility to divide your notifications among different app parts. For example, you want to show notifications for received messages in right bottom corner of viewport and some push notifications in left top corner. In addition group functionality will be increased in future releases.
<FlashMessage group="user-messages" position="bottom right" time="10000"/>
<FlashMessage group="push-messages" position="top left" time="0"/>
// Will be shown in 'user-message' group
this.$flashMessage.show({
type: 'info',
title: 'New message to you',
message: 'Mr. Major asks to go to his office!',
group: 'user-messages'
});
// Will be shown in 'user-push' group
this.$flashMessage.show({
type: 'warning',
title: 'Run boy, run',
message: 'They\'re trying to catch you!',
group: 'user-push'
});Remove methods
You can remove message programmatically using remove method
Example:
let id = this.$flashMessage.show({
    type: 'info',
	title: 'Hey, man. Time for beer!',
	text: 'It is Friday. Time to have a little party.'
});

this.$flashMessage.remove(id);
If you setup group, pass it name as second argument
let id = this.$flashMessage.show({
    type: 'info',
	title: 'Hey, man. Time for beer!',
    text: 'It is Friday. Time to have a little party.',
    group: 'auth'
});

this.$flashMessage.remove(id, 'auth');
Also you can remove all messages from group or all messages from all groups
// remove all messages from 'auth' group
this.$flashMessage.removeAll('auth');

// remove all messages from all groups
this.$flashMessage.removeAll();
Callbacks
You can extend message instance behavior with lifecycle callbacks. For example, give some audio info.
Example:
<p>{{ text }}</p>
<button @click="clickHandler" type="button" name="button">Show Text!</button>
For example you can add some sound which will be played when message appears
    methods: {
        makeSomeNoize() {
            let sound = new Audio('audio source'); // add sound source
            sound.play(); // and play it
        },
        buyBuySound() {
            let sound = new Audio('audio source'); // add sound source
            sound.play(); // and play it
        },
        clickHandler() {
            this.$flashMessage.info({
                title: 'Ooooooops!',
                message: 'Do you see this text and hear this sound? Wtf?',
                mounted: makeSomeNoize,
                beforeUnmount: buyBuySound
            },
        }
    }
Set Strategy
You can update default strategy using setStrategy method.
// strategy changed to multiple
this.$flashMessage.changeStrategy('multiple');
// if you setup group name provide group name as second argument
this.$flashMessage.changeStrategy('multiple', 'auth');
LICENSE
The MIT License (MIT). Please see License File for more information.