cypress-vue-unit-test
A little helper to unit test Vue components in the open source Cypress.io E2E test runner
TLDR
-
What is this? This package allows you to use Cypress test runner to unit test your Vue components with zero effort.
-
How is this different from vue-test-utils? It is similar in functionality BUT runs the component in the real browser with full power of Cypress E2E test runner: live GUI, full API, screen recording, CI support, cross-platform.
Table of Contents
- Options
- Global Vue Extensions
- The Intro Example
- The List Example
- Handling User Input
- Component Example
- Spying Example
- XHR Spying and Stubbing
- Spying On
window.alert - Tests for a component that uses Vuex data store
- Tests for a component that uses vue-router
- translated-message-spec.js shows how to test TranslatedMessage.vue component that uses Vue-i18n
Install
Requires Node version 6 or above and Cypress (peer dependency)
npm install --save-dev cypress cypress-vue-unit-testVue CLI 3
- Create a new project with
vue create <project-name>and select Cypress for E2E testing OR add the Cypress plugin to an existing Vue project withvue add @vue/cli-plugin-e2e-cypress - Install this package with
npm install --save-dev cypress-vue-unit-test - Enable the import of Vue files by uncommenting the "webpack import" and the "file:processor event" lines in tests/e2e/plugins/index.js. The file should then look like this:
// tests/e2e/plugins/index.js

// webpack import
const webpack = require('@cypress/webpack-preprocessor')

module.exports = (on, config) => {
  // file:processor event
  on(
    'file:preprocessor',
    webpack({
      webpackOptions: require('@vue/cli-service/webpack.config'),
      watchOptions: {}
    })
  )

  return Object.assign({}, config, {
    fixturesFolder: 'tests/e2e/fixtures',
    integrationFolder: 'tests/e2e/specs',
    screenshotsFolder: 'tests/e2e/screenshots',
    videosFolder: 'tests/e2e/videos',
    supportFile: 'tests/e2e/support/index.js'
  })
}
Use
Before each test, inject your component to test
const mountVue = require('cypress-vue-unit-test')
describe('My Vue', () => {
  beforeEach(mountVue(/* my Vue code */, /* options */))
  it('renders', () => {
    // Any Cypress command
    // Cypress.vue is the mounted component reference
  })
})
See examples below for details.
Options
See cypress/integration/options-spec.js for examples of options.
-
mountId- specify root Vue app mount element ID. Defaults toapp.
const options = {
  mountId: 'rootApp'  // div#rootApp
}
beforeEach(mountVue(/* my Vue code */, options))-
base- specify<base href=...>path. Useful to get static assets work, but might prevent relative HTTP references from working (like path to Vue.js from../../node_modules/vue/dist/vue.jsfor example)
const options = {
  base: '/'
}
beforeEach(mountVue(/* my Vue code */, options))-
html- custom test HTML to inject instead of default one. Good place to load additional libraries, polyfills and styles.
const polyfill = '../node_modules/mypolyfill/dist/polyfill.js'
const options = {
  html: `<div id="app"></div><script src="${polyfill}"></script>`
}
beforeEach(mountVue(/* my Vue code */, options))-
vue[DEPRECATED] - path or URL to the Vue library to load. By default, will try to load../node_modules/vue/dist/vue.js, but you can pass your own path or URL.
const options = {
  vue: 'https://unpkg.com/vue'
}
beforeEach(mountVue(/* my Vue code */, options))
Deprecation Warning
vueoption has been deprecated.node_modules/vue/dist/vueis always used.
Global Vue extensions
You can pass extensions (global components, mixins, modules to use)
when mounting Vue component. Use { extensions: { ... }} object inside
the options.
-
components- object of 'id' and components to register globally.
// two different components, each gets "numbers" list
// into its property "messages"
const template = `
  <div>
    <message-list :messages="numbers"/>
    <a-list :messages="numbers"/>
  </div>
`
// our top level data
const data = () => ({ numbers: ['uno', 'dos'] })
// register same component globally under different names
const components = {
  'message-list': MessageList,
  'a-list': MessageList
}
// extend Vue with global components
const extensions = {
  components
}
beforeEach(mountVue({ template, data }, { extensions }))
See Vue component docs, global-components-spec.js
-
use(aliasplugins) - list of plugins
const use = [MyPlugin]
// extend Vue with plugins
const extensions = {
  use
}
beforeEach(mountVue({}, { extensions }))
See Vue plugin docs and plugin-spec.js
-
mixin(aliasmixins) - list of global mixins
const MyMixin = {
  // we have to use original Sinon to create a spy
  // because we are outside a test function
  // and cannot use "cy.spy"
  created: Cypress.sinon.spy()
}
const mixin = [MyMixin]
// extend Vue with mixins
const extensions = {
  mixin
}
beforeEach(mountVue({}, { extensions }))

it('calls mixin "created" method', () => {
  expect(MyMixin.created).to.have.been.calledOnce
})
See Vue global mixin docs and mixin-spec.js
-
filters- hash of global filters
const filters = {
  reverse: s => s.split().reverse().join()
}
// extend Vue with global filters
const extensions = {
  filters
}
beforeEach(mountVue({}, { extensions }))
See Vue global filters docs and filters-spec.js
The intro example
Take a look at the first Vue v2 example: Declarative Rendering. The code is pretty simple
<div id="app">
  {{ message }}
</div>
var app = new Vue({
el: '#app',
data: {
message: 'Hello Vue!'
}
})It shows the message when running in the browser
Hello Vue!
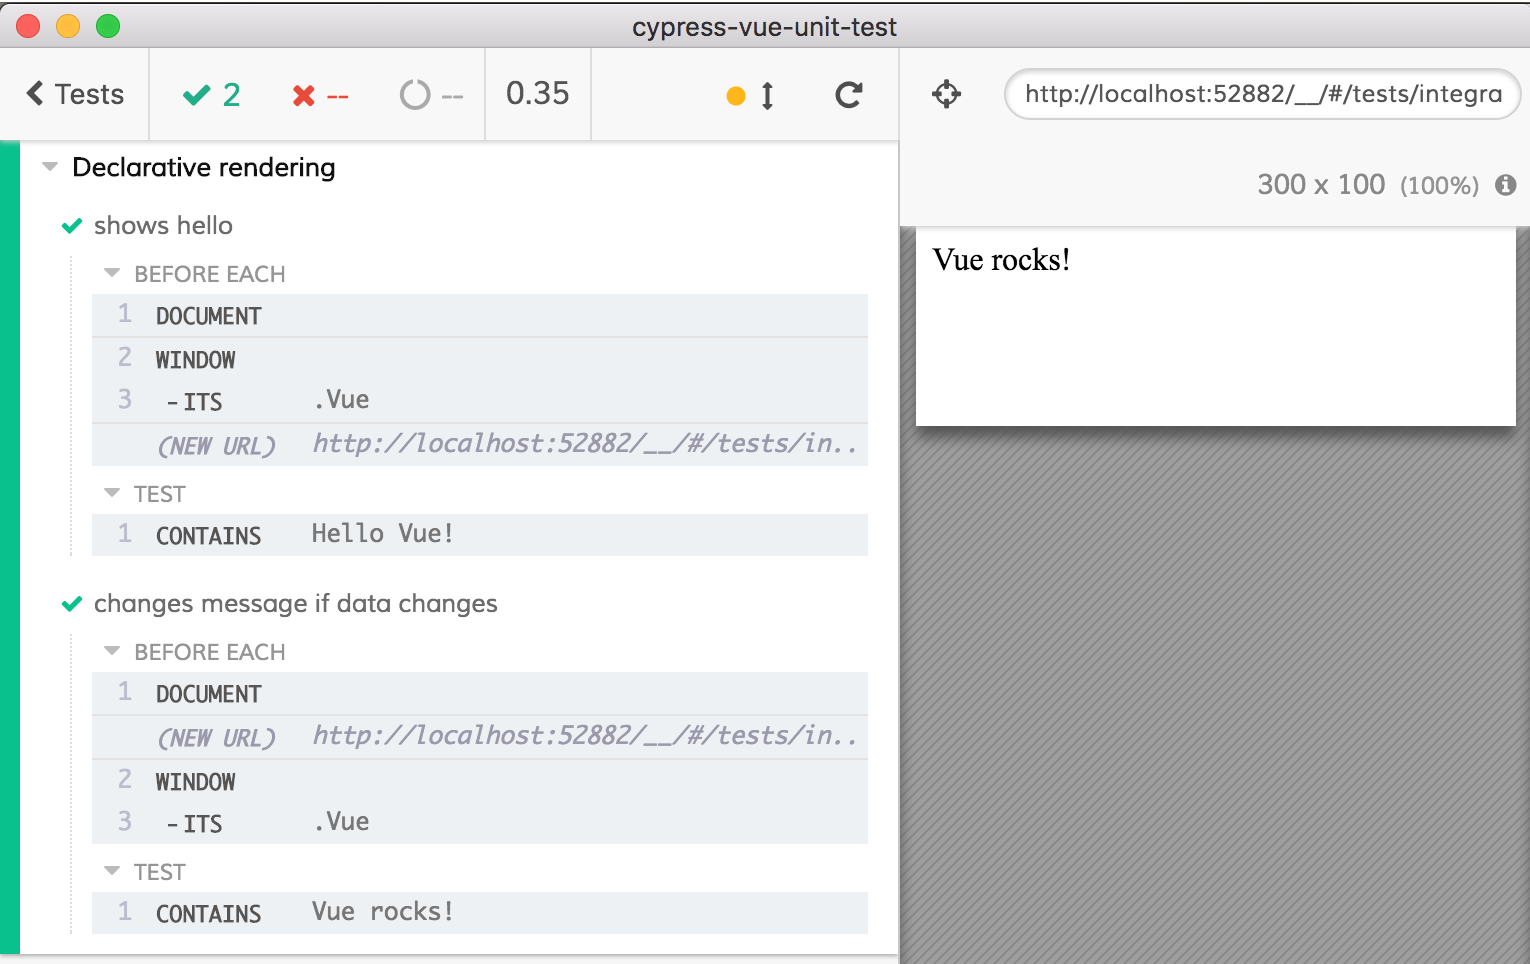
Let's test it in Cypress.io (for the current version see cypress/integration/spec.js).
const mountVue = require('cypress-vue-unit-test')

/* eslint-env mocha */
describe('Declarative rendering', () => {
  // Vue code from https://vuejs.org/v2/guide/#Declarative-Rendering
  const template = `
    <div id="app">
      {{ message }}
    </div>
  `

  const data = {
    message: 'Hello Vue!'
  }

  // that's all you need to do
  beforeEach(mountVue({ template, data }))

  it('shows hello', () => {
    cy.contains('Hello Vue!')
  })

  it('changes message if data changes', () => {
    // mounted Vue instance is available under Cypress.vue
    Cypress.vue.message = 'Vue rocks!'
    cy.contains('Vue rocks!')
  })
})
Fire up Cypress test runner and have real browser (Electron, Chrome) load
Vue and mount your test code and be able to interact with the instance through
the reference Cypress.vue.$data and via GUI. The full power of the
Cypress API is available.
The list example
There is a list example next in the Vue docs.
<div id="app-4">
  <ol>
    <li v-for="todo in todos">
      {{ todo.text }}
    </li>
  </ol>
</div>
var app4 = new Vue({
el: '#app-4',
data: {
todos: [
{ text: 'Learn JavaScript' },
{ text: 'Learn Vue' },
{ text: 'Build something awesome' }
]
}
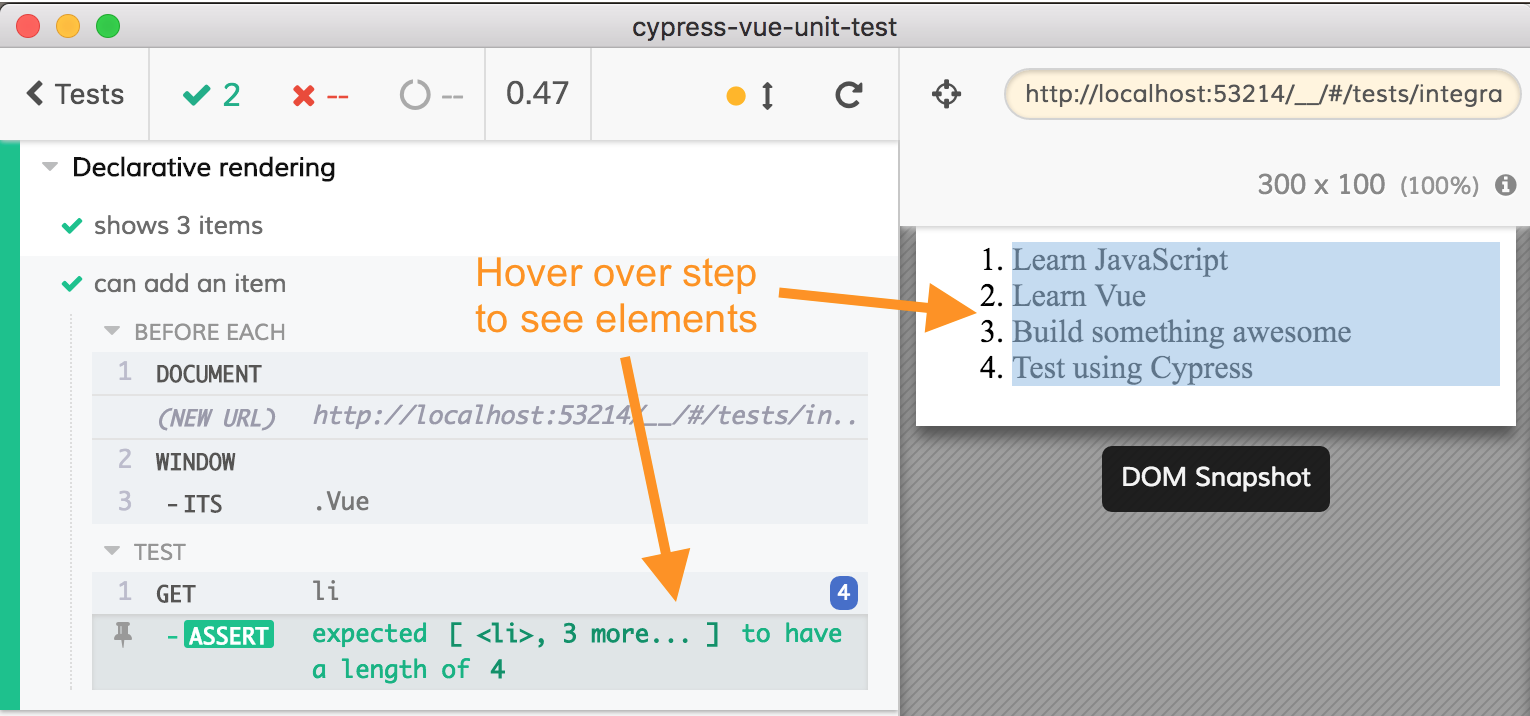
})Let's test it. Simple.
const mountVue = require('cypress-vue-unit-test')

/* eslint-env mocha */
describe('Declarative rendering', () => {
  // List example from https://vuejs.org/v2/guide/#Declarative-Rendering
  const template = `
    <ol>
      <li v-for="todo in todos">
        {{ todo.text }}
      </li>
    </ol>
  `

  const data = {
    todos: [
      { text: 'Learn JavaScript' },
      { text: 'Learn Vue' },
      { text: 'Build something awesome' }
    ]
  }

  beforeEach(mountVue({ template, data }))

  it('shows 3 items', () => {
    cy.get('li').should('have.length', 3)
  })

  it('can add an item', () => {
    Cypress.vue.todos.push({ text: 'Test using Cypress' })
    cy.get('li').should('have.length', 4)
  })
})
Handling User Input
The next section in the Vue docs starts with reverse message example.
<div id="app-5">
  <p>{{ message }}</p>
  <button v-on:click="reverseMessage">Reverse Message</button>
</div>
var app5 = new Vue({
el: '#app-5',
data: {
message: 'Hello Vue.js!'
},
methods: {
reverseMessage: function () {
this.message = this.message.split('').reverse().join('')
}
}
})We can write the test the same way
const mountVue = require('cypress-vue-unit-test')

/* eslint-env mocha */
describe('Handling User Input', () => {
  // Example from https://vuejs.org/v2/guide/#Handling-User-Input
  const template = `
    <div>
      <p>{{ message }}</p>
      <button v-on:click="reverseMessage">Reverse Message</button>
    </div>
  `

  const data = {
    message: 'Hello Vue.js!'
  }

  const methods = {
    reverseMessage: function () {
      this.message = this.message.split('').reverse().join('')
    }
  }

  beforeEach(mountVue({ template, data, methods }))

  it('reverses text', () => {
    cy.contains('Hello Vue')
    cy.get('button').click()
    cy.contains('!sj.euV olleH')
  })
})
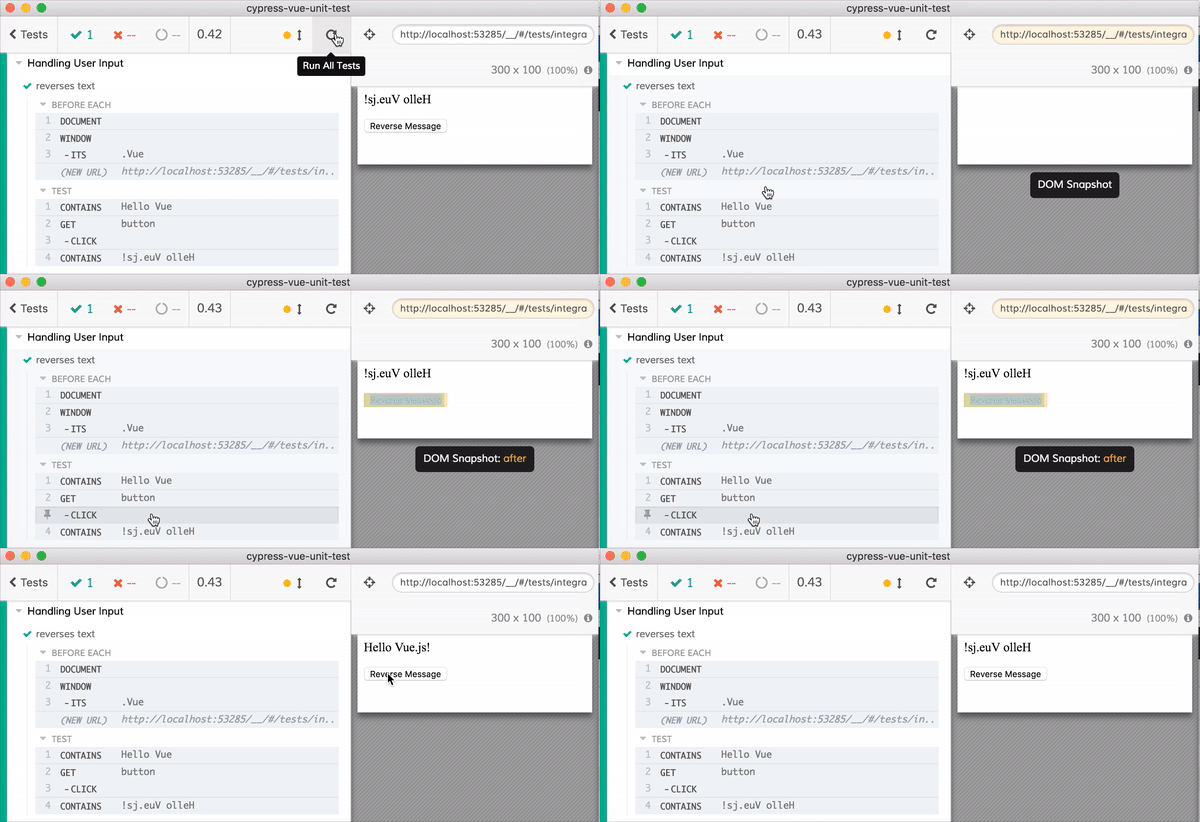
Take a look at the video of the test. When you hover over the CLICK step
the test runner is showing before and after DOM snapshots. Not only that,
the application is fully functioning, you can interact with the application
because it is really running!
Component example
Let us test a complex example. Let us test a single file Vue component. Here is the Hello.vue file
<template>
  <p>{{ greeting }} World!</p>
</template>

<script>
export default {
  data () {
    return {
      greeting: 'Hello'
    }
  }
}
</script>

<style scoped>
p {
  font-size: 2em;
  text-align: center;
}
</style>
note to learn how to load Vue component files in Cypress, see Bundling section.
Do you want to interact with the component? Go ahead! Do you want to have multiple components? No problem!
import Hello from '../../components/Hello.vue'
const mountVue = require('cypress-vue-unit-test')
describe('Several components', () => {
  const template = `
    <div>
      <hello></hello>
      <hello></hello>
      <hello></hello>
    </div>
  `
  const components = {
    hello: Hello
  }
  beforeEach(mountVue({ template, components }))

  it('greets the world 3 times', () => {
    cy.get('p').should('have.length', 3)
  })
})
Spying example
Button counter component is used in several Vue doc examples
<template>
  <button v-on:click="incrementCounter">{{ counter }}</button>
</template>

<script>
  export default {
    data () {
      return {
        counter: 0
      }
    },

    methods: {
      incrementCounter: function () {
        this.counter += 1
        this.$emit('increment')
      }
    }
  }
</script>

<style scoped>
button {
  margin: 5px 10px;
  padding: 5px 10px;
  border-radius: 3px;
}
</style>
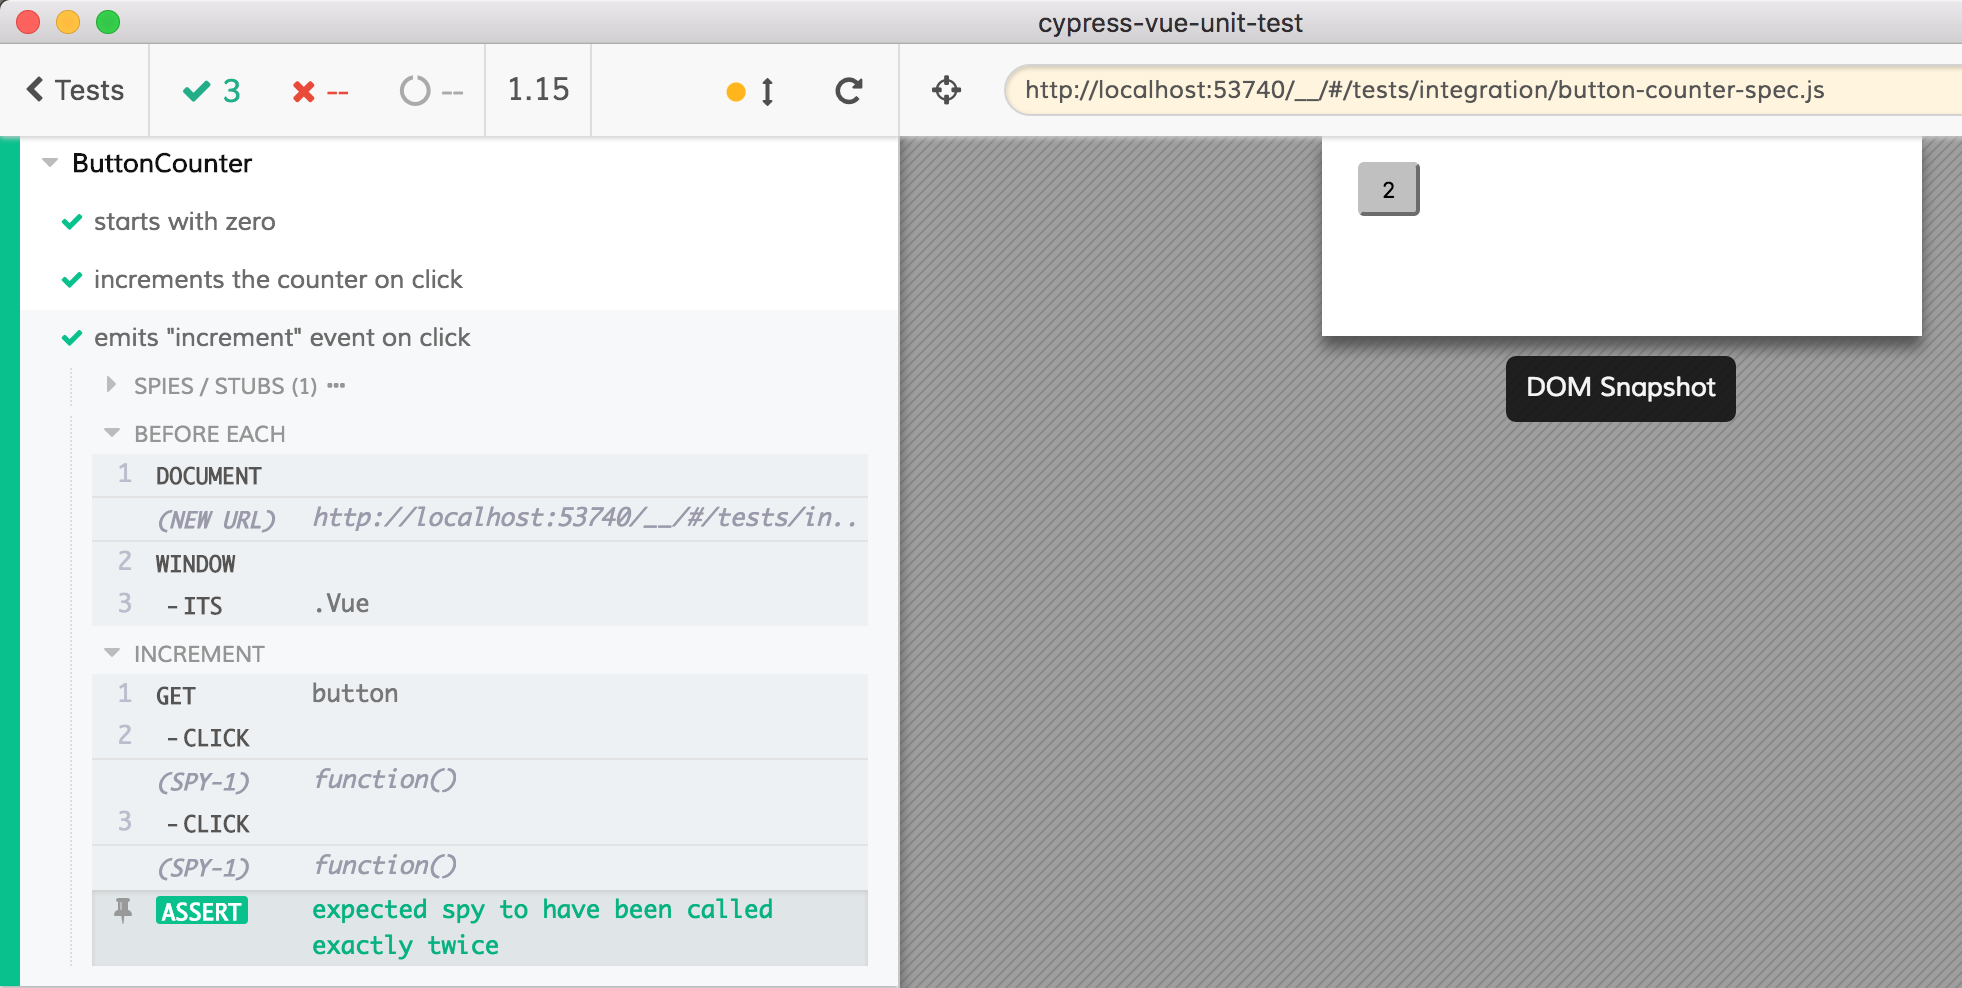
Let us test it - how do we ensure the event is emitted when the button is clicked? Simple - let us spy on the event, spying and stubbing is built into Cypress
import ButtonCounter from '../../components/ButtonCounter.vue'
const mountVue = require('cypress-vue-unit-test')

/* eslint-env mocha */
describe('ButtonCounter', () => {
  beforeEach(mountVue(ButtonCounter))

  it('starts with zero', () => {
    cy.contains('button', '0')
  })

  it('increments the counter on click', () => {
    cy.get('button').click().click().click().contains('3')
  })

  it('emits "increment" event on click', () => {
    const spy = cy.spy()
    Cypress.vue.$on('increment', spy)
    cy.get('button').click().click().then(() => {
      expect(spy).to.be.calledTwice
    })
  })
})
The component is really updating the counter in response to the click and is emitting an event.
XHR spying and stubbing
The mount function automatically wraps XMLHttpRequest giving you an ability to intercept XHR requests your component might do. For full documentation see Network Requests. In this repo see components/AjaxList.vue and the corresponding tests cypress/integration/ajax-list-spec.js.
// component use axios to get list of users
created() {
  axios.get(`http://jsonplaceholder.typicode.com/users?_limit=3`)
  .then(response => {
    // JSON responses are automatically parsed.
    this.users = response.data
  })
}
// test can observe, return mock data, delay and a lot more
beforeEach(mountVue(AjaxList))
it('can inspect real data in XHR', () => {
  cy.server()
  cy.route('/users?_limit=3').as('users')
  cy.wait('@users').its('response.body').should('have.length', 3)
})
it('can display mock XHR response', () => {
  cy.server()
  const users = [{id: 1, name: 'foo'}]
  cy.route('GET', '/users?_limit=3', users).as('users')
  cy.get('li').should('have.length', 1)
    .first().contains('foo')
})
Spying on window.alert
Calls to window.alert are automatically recorded, but do not show up. Instead you can spy on them, see AlertMessage.vue and its test cypress/integration/alert-spec.js
Bundling
How do we load this Vue file into the testing code? Using webpack preprocessor. Note that this module ships with @cypress/webpack-preprocessor 2.x that requires Webpack 4.x. If you have Webpack 3.x please add @cypress/webpack-preprocessor v1.x.
Short way
Your project probably already has webpack.config.js setup to transpile
.vue files. To load these files in the Cypress tests, grab the webpack
processor included in this module, and load it from the cypress/plugins/index.js
file.
const {
  onFilePreprocessor
} = require('cypress-vue-unit-test/preprocessor/webpack')
module.exports = on => {
  on('file:preprocessor', onFilePreprocessor('../path/to/webpack.config'))
}
Cypress should be able to import .vue files in the tests
Manual
Using @cypress/webpack-preprocessor and vue-loader.
You can use cypress/plugins/index.js to load .vue files
using vue-loader.
// cypress/plugins/index.js
const webpack = require('@cypress/webpack-preprocessor')
const webpackOptions = {
  module: {
    rules: [
      {
        test: /\.vue$/,
        loader: 'vue-loader'
      }
    ]
  }
}

const options = {
  // send in the options from your webpack.config.js, so it works the same
  // as your app's code
  webpackOptions,
  watchOptions: {}
}

module.exports = on => {
  on('file:preprocessor', webpack(options))
}
Install dev dependencies
npm i -D @cypress/webpack-preprocessor \
  vue-loader vue-template-compiler css-loader
And write a test
import Hello from '../../components/Hello.vue'
const mountVue = require('cypress-vue-unit-test')

/* eslint-env mocha */
describe('Hello.vue', () => {
  beforeEach(mountVue(Hello))

  it('shows hello', () => {
    cy.contains('Hello World!')
  })
})
Development
To see all local tests, install dependencies and open Cypress in GUI mode
npm install
npm run cy:open
FAQ
- If your component's static assets are not loading, you probably need to start and proxy Webpack dev server. See issue #4
Related info
- Testing Vue web applications with Vuex data store & REST backend
- Why Cypress?
- Cypress API
- Learn TDD in Vue
- cypress-vue-unit-test vs vue-test-utils
Test adapters for other frameworks
- cypress-react-unit-test
- cypress-cycle-unit-test
- cypress-svelte-unit-test
- cypress-angular-unit-test
- cypress-hyperapp-unit-test
- cypress-angularjs-unit-test
Contributors
Small print
Author: Gleb Bahmutov <gleb.bahmutov@gmail.com> © 2017
License: MIT - do anything with the code, but don't blame me if it does not work.
Support: if you find any problems with this module, email / tweet / open issue on Github
MIT License
Copyright (c) 2017 Gleb Bahmutov <gleb.bahmutov@gmail.com>
Permission is hereby granted, free of charge, to any person obtaining a copy of this software and associated documentation files (the "Software"), to deal in the Software without restriction, including without limitation the rights to use, copy, modify, merge, publish, distribute, sublicense, and/or sell copies of the Software, and to permit persons to whom the Software is furnished to do so, subject to the following conditions:
The above copyright notice and this permission notice shall be included in all copies or substantial portions of the Software.
THE SOFTWARE IS PROVIDED "AS IS", WITHOUT WARRANTY OF ANY KIND, EXPRESS OR IMPLIED, INCLUDING BUT NOT LIMITED TO THE WARRANTIES OF MERCHANTABILITY, FITNESS FOR A PARTICULAR PURPOSE AND NONINFRINGEMENT. IN NO EVENT SHALL THE AUTHORS OR COPYRIGHT HOLDERS BE LIABLE FOR ANY CLAIM, DAMAGES OR OTHER LIABILITY, WHETHER IN AN ACTION OF CONTRACT, TORT OR OTHERWISE, ARISING FROM, OUT OF OR IN CONNECTION WITH THE SOFTWARE OR THE USE OR OTHER DEALINGS IN THE SOFTWARE.


