Build, test, and send HTTP requests without code using your Pipedream workflows. The HTTP / Webhook action is a tool to build HTTP requests with a Postman-like graphical interface.

Define the target URL, HTTP verb, headers, query parameters, and payload body without writing custom code.

This action can also use your connected accounts with third-party APIs. Selecting an integrated app will automatically update the request’s headers to authenticate with the app properly, and even inject your token dynamically.
Pipedream integrates with thousands of APIs, but if you can’t find a Pipedream integration simply use Environment Variables in your request headers to authenticate with.
The HTTP/Webhook action exports HTTP response data for use in subsequent workflow steps, enabling easy data transformation, further API calls, database storage, and more.
Response data is available for both coded (Node.js, Python) and no-code steps within your workflow.
The HTTP / Webhook action is flexible. You can use it with your Pipedream connected accounts, import cURL commands, or manually define authentication headers with API keys stored in Environment Variables.
We recommend choosing this approach to authenticate your HTTP requests. Pipedream will manage your connected accounts, even rotating OAuth tokens, and you can focus on implementing the payload details.
Start by adding the HTTP/Webhook action as a new step in your workflow.

Then select Use app to search for the API you’d like to send this HTTP request to. Then use 'Select App' to find and choose the API for your HTTP request:

Then connect your account, if the app has OAuth then Pipedream will initiate the OAuth sequence and automatically rotate your tokens for you.
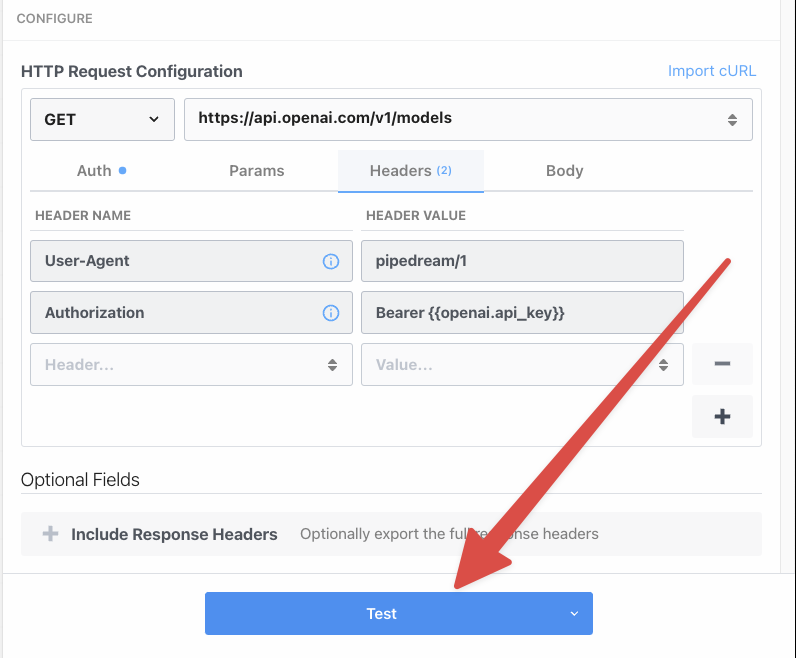
After connecting your account, the URL, verb, and headers update to enable a valid authenticated request.
Then click Test to send the HTTP request:
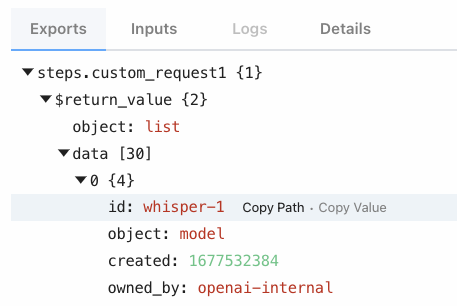
In the Exports tab, you’ll see the data the API responds with. You can click Copy Path next to an attribute to copy the path to that specific variable to your clipboard for easy pasting in other steps.
API documentation sometimes include cURL commands as examples. The HTTP request builder action can recognize cURL and update your request configuration to match.
For example, the OpenAI documentation includes an example cURL command to send a prompt to ChatGPT:
curl https://api.openai.com/v1/chat/completions \
-H "Content-Type: application/json" \
-H "Authorization: Bearer $OPENAI_API_KEY" \
-d '{
"model": "gpt-3.5-turbo",
"messages": [
{
"role": "system",
"content": "You are a helpful assistant."
},
{
"role": "user",
"content": "Hello!"
}
]
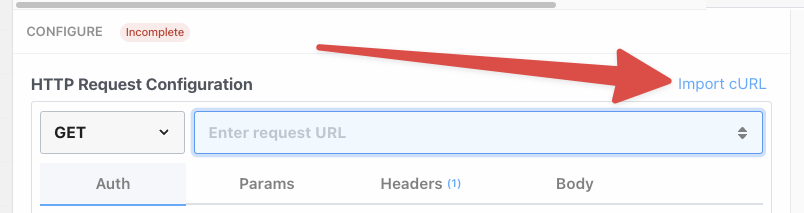
}'Configure the HTTP request to match this cURL command by clicking Import cURL:
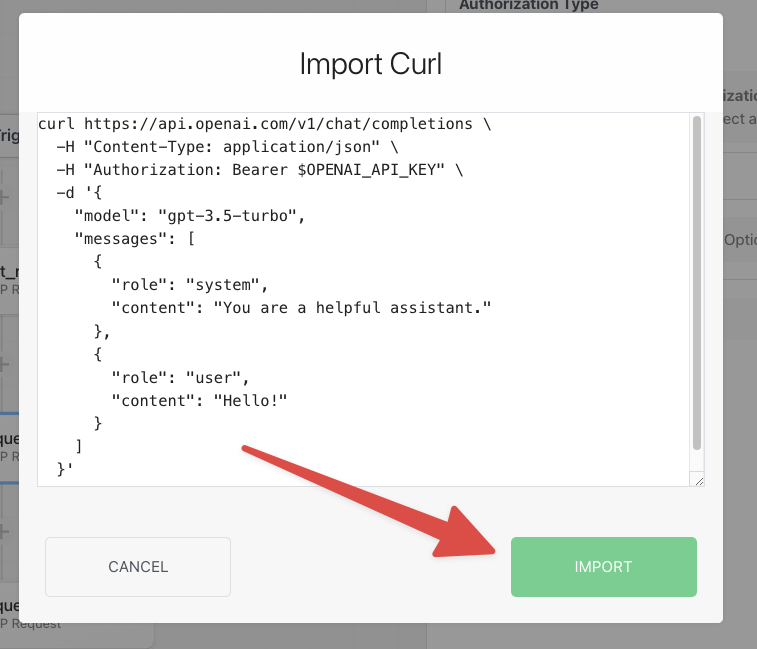
Then paste in the cURL command and click Import:
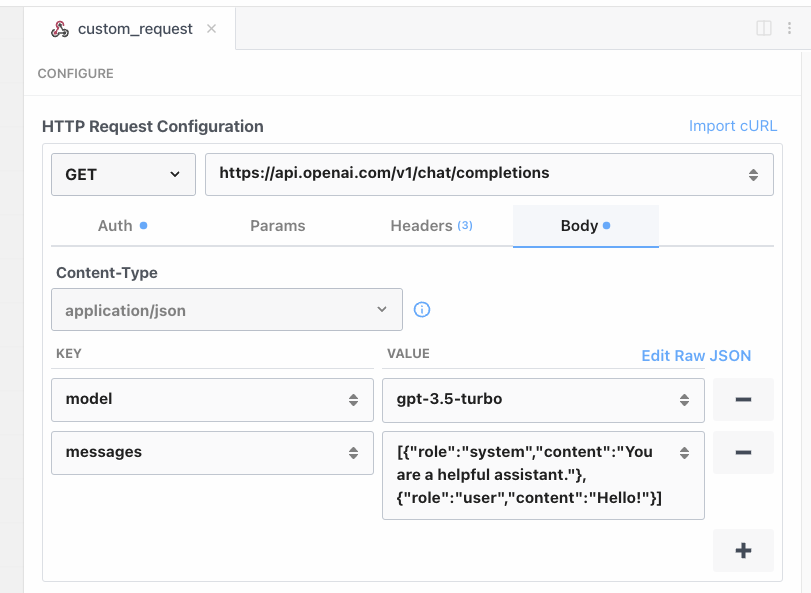
This will configure the HTTP request to match the details of the cURL statement:
Don't forget to inject your API keys into the headers. We recommend using Environment Variables to store your non-Pipedream managed account API keys.
For example, storing your OpenAI API key as OPEN_API_KEY you can then reference it in the Authorization header like so:
{{ process.env["OPEN_API_KEY"] }}
Then your key will be injected into the request.
You may run into issues integrating with other APIs. Typically these are errors thrown by the API you’re attempting to integrate with.
Common HTTP status codes provide a standard, but implementations may vary. Please check the API documentation for the service or app you’re integrating with for more details.
Below are a list of common errors when sending HTTP requests to 3rd party APIs:
This means that the API request successfully authenticated, but the resource you’re attempting to retrieve or act on doesn’t exist.
For example, if you’re attempting to update a Google Sheet but that sheet has been deleted, then you’ll see a 404 HTTP status code.
This error message means that you attempted to access an endpoint but the HTTP verb the request is using isn’t supported.
For example, you might have sent a GET request instead of a POST request or vice versa. This error is usually fixed by double checking that the HTTP action the request is configured with matches what the endpoint supports.
This error indicates the request's payload lacks data or contains invalid data.
Usually the API’s response will give you a list of errors that give more details.
For example, if you attempt to create a Google Calendar event, but the start_at date is after the end_at date, then the API will return a 422 error because you can’t create an event that ends before it starts.
If this error happens only intermittently, it could mean that downstream data is missing or occasionally produces invalid payloads. You’ll need to select the broken use case in the builder, and test it to find the culprit.
APIs typically implement rate limits. A rate limit defines how many times you’re allowed to send requests to the API within a specific time frame.
Exceeding this limit prompts the API to respond with a 429 status code and reject the requests.
You can use Concurrency and Rate Limiting controls within your Pipedream workflow settings to respect these 3rd party API limits, and you can also enable Automatic Retries to attempt the request again.
This error means that either your request isn’t authentication properly, meaning that your API token is missing or is in the incorrect header; or potentially it means that your API key is valid but it doesn’t have the permissions required to access that resource.
For example, you might see this error if your API key is missing a character, or is incorrectly formatted in the request.
A common cause is omitting 'Bearer' or the space after it in the Authorization header: Bearer ${your API key here}.
An authorization error can happen if you attempt to modify a resource your account on that service doesn’t have permission to access.
For example, modifying a Google Sheet not shared with your Google Drive account will result in a permissions error.
This means that the API encountered a fatal error and it wasn’t able to perform your request. It could be that this service is having an outage, or there’s a specific issue with this particular resource you’re attempting to access or modify.
Your request might be configured correctly, and your authentication headers properly set, but the issue is within the 3rd party’s API. We recommend contacting their customer support for more details.
You can also enable Automatic Retries on your workflow to automatically retry failed requests in case of an intermittent outage.