 leonardo javascript svg library v. 1.0.38
A simple library to draw sgv
> yarn add @fedeghe/leonardo
First of all in your html include Leonardo.js in the <head> tag:
<script src="path/to/Leonardo.js"></script>Now create another <script> tag to use Leonardo.js, and here create an instance for each svg you need to create using the Leonardo factory:
<script>+function(){ // do not pollute glob
    var L = Leonardo(300, 200, {id: 'theRootSvg', target: theTargetNode});
    // ...
}()
</script>-
width: mandatory Integer -
height: mandatory Integer -
options: an optional object literal which allows to set some attributes that will be added to the root svg tag:-
ns: set the namespaces that are needed, one or more from['cc', 'dc', 'ev', 'rdf', 'svg', 'xlink']if all are needed is enough to pass*. -
target: define the target node for rendering
-
anyway it will be possible to set (or override if given already in the instance constructor) the target even when invoking the render method on the instance.
To draw something we need to add svg tags. Leonardo lets you create the following tags: desc, circle, ellipse, group, image, line, path, polygon, polyline, rect, text, title, script.
In case this is not enough a special function will allow you to get any valid tag.
Some additional functions allow to create more easily some common composed elements: centeredText, textPath. More will come.
Every tag is a Element instance, and thus benefits the following instance methods: attrs, styles, add, on ,off, clone, trans, rotate, scale, mirrorO, mirrorV and move. I will describe all them soon below here.
there is the list of the methods available to create tags:
var myDesc = L.desc('This is the description of my svg')Returns a <desc> tag containing the text passed to it
var myCircle = L.circle(cx, cy, r)Returns a <circle> tag centered at {cx, cy} with radius r.
var myEllipse = L.ellipse(cx, cy, rx, ry)Returns a <ellipse> tag centered at {cx, cy} with radiuses rx and ry.
var myGroup = L.group()Returns a group <g> tag.
Optionally you can pass one or more elements to it
L.group(a, b, c)
for appending instead of invoke after myGroup.append(a, b, c)
var myImage = L.image(x, y, w, h, src)Returns a <image> tag positioned at {x,y} about w and h are meant to be the clearly the sizes but real image size will win on it, in the end the ratio cannot be modified.
var myLine = L.line(x1, y1, x2, y2)Returns a <line> tag representing a segment starting from {x1,y1} and ending in {x2, y2}.
var myPath = L.path(d)Returns a <path> tag with data corresponding to the d parameter passed; for example for a simple triangle could be something like M150 0 L75 200 L225 200 Z as here. Leonardo makes it easy to create that for you.
var myPolygon = L.polygon(x1, y1, ...xn, yn)Returns a <polygon> tag with points attribute corresponding to those passed; for example for a simple triangle could be something like 200,10 250,190 160,210 as here. Leonardo makes it easy to create that for you.
var myPolyline = L.polyline(x1, y1, ...xn, yn)creates a polyline which can even be opened (it does not close automatically).
var myRect = L.rect(x, y, w, h)Returns a <rect> tag with the upper left corner positioned at {x, y} then w is for the width and `h for the height.
var myText = L.text(x, y, content)Returns a <text> tag with positioned at the upper left corner positioned at {x, y} containing the text passed as content.
var myTitle = L.title(txt)Returns a <title> tag containing the text passed as content.
var myScript = L.script(content)Returns a <script> tag containing the text passed as content.
var myTextBox = L.centeredText(w, h, text, textAttrs)to be documented
var myTextPath = L.textPath(id, d, content)If we want a text to follow a path then a single tag is not enough
This function returns an element which contains all is needed given an id, a d data for the path and a content string.
var myArcSection = L.arcSection(centerX, centerX, innerRadius, outerRadius, fromAngle, toAngle, outerVersus=1, innerVersus=0)If we want a section of a circle slice.
Svg tags are really so many and I just tried to cover the very most common. In case you need to use a tag not contempled here you can still use .Element:
var whatever = L.Element('hatch')Now that we know how to create a root <svg> and sub-elements we need some methods to append them so to create the right hierarchy, to style them, give attributes, ... and more.
<Leonardo_Instance>.render({target: DOMNode, cb: function (instance) {}}) -> Leonardo_Instance
renders the instance into the target.
In case when invoking the Leonardo factory method the target parameter has been passed then here it is optional, otherwise must be passed, otherwise an exception will be thrown.
var root = Leonardo(300, 200, {target: myDomNode})
root.render(); // now is optional
//
var rootOrphan = Leonardo(300, 200)
root.render(); // now is not, need to pass `{target: aDomNode}`
// otherwise will throw an exceptionHere attributes is an object literal that can contain all the attributes we may need to add to the tag. For example for a <line> tag we could write:
myLine.setAttributes({'stroke-width': 12, stroke: 'black'});Here styles is an object literal that can contain all the styles we may need to add to the tag. For example for a <recat> tag we could write:
myRect.setStyles({cursor: 'pointer'})This adds all tags passed to it into the instance tag. For example let's say we have a <g> of objects and we would like to rotate (see tranformation section) all the elements contained into it; optionally also an array of elements can be passed:
myGroup.append(line, circle)
// now we can rotate all elements just rotating the groupThis method allows to register an event listener for a tag:
myRect.on('click', function (e) {
    console.log(e)
})This method allows to unregister an event listener for a tag:
myRect.off('click', function (e) {
    console.log(e)
})
As expected if You plan to register and unregister an handler function You must use the same referenced handler function in both calls.
Should be clear what this does.
Creates a clone of the instance
Creates something similar to a clone of the instance, the limitation/power of a <use> tag is that one cannot override the properties defined in the original instance. More here.
Removes the subtree of a tag.
Removes a tag.
Replaces oldTag with newTag.
Gets the bounding box of the instance {x, y, w, h}. More infos can be found here
instance.rotate(deg, x, y) // -> instanceRotates a tag of deg degrees around the point {x, y}.
instance.scale(sx, sy) // -> instanceScales a tag using sx to scale along x axis and sy to scale along y axis.
instance.instance.mirrorH() // -> instanceMirrors a tag horizontally.
instance.instance.mirrorV() // -> instanceMirrors a tag vertically.
instance.instance.move(x, h) // -> instanceMoves a tag of x pixels along x axis and y pixels along y axis.
instance.filter(filters []) // -> filter id to be documented, still you can find some example usage in the demo
Leonardo comes with two basic gradient, linear and radial:
instance.linearGradient(gradient [, fromX, fromY, toX, toY]) // returns filling gradientthe gradient is meant to be specified as an array of objects containing a perc and a color fields; percentages from 0 to 100 and the color values are expected to be hex colors.
The optional fromX, fromY, toX, toY are the percentage starting and ending coords which allows to rotate the linear gradient (default is 0% 0% 100% 0%, thus from left to right).
then it should be used on a tag simply setting it as the fill attribute:
myTag.setAttributes({fill: myGradient}) Small working example:
<div id="root"></div>
<script>
(function (){
    var svg = Leonardo (300, 200, {
            target: document.getElementById('root')
        }),
        circle = L.circle(150, 100, 50)
            .setAttributes({
                fill: L.linearGradient([
                    {perc: "0", color: "#0a0"},
                    {perc: "5", color: "#00a"},
                    {perc: "95", color: "#aa0"},
                    {perc: "100", color: "#f00"},
                ], '0%', '0%', '100%', '0%') //45
            });
    svg.append(circle).render();
})()
</script>
var gradient = instance.radialGradient(gradient) // returns filling gradient The radial gradient is supposed to receive the same array as first parameter.
instance.animate.attrs(config) // animate tag This method is useful when we need to animate an attribute of a tag. Svg allows to do that creating an <animate> tag containing the righ parameters and append it inside the tag that needs to be animated:
var circle = instance.circle(100, 100, 20),
    animateTag = instance.animate.attrs({
        attributeName: 'r',
        from: 20,
        to: 1E3,
        dur: '10s',
        repeatCount: 'indefinite'
    });
circle.append(animateTag);
It's also possible to move a tag, changing the x and y position attributes, but this acts directly on the tag:
instance.animate.cartesian(tag, funcX, funcY, t) // returns stopper function ...still need to be documented, there's anyway a clear sample
instance.animate.polar(tag, funcR, funcPHI, t) // returns stopper function ...still need to be documented, there's anyway a clear sample
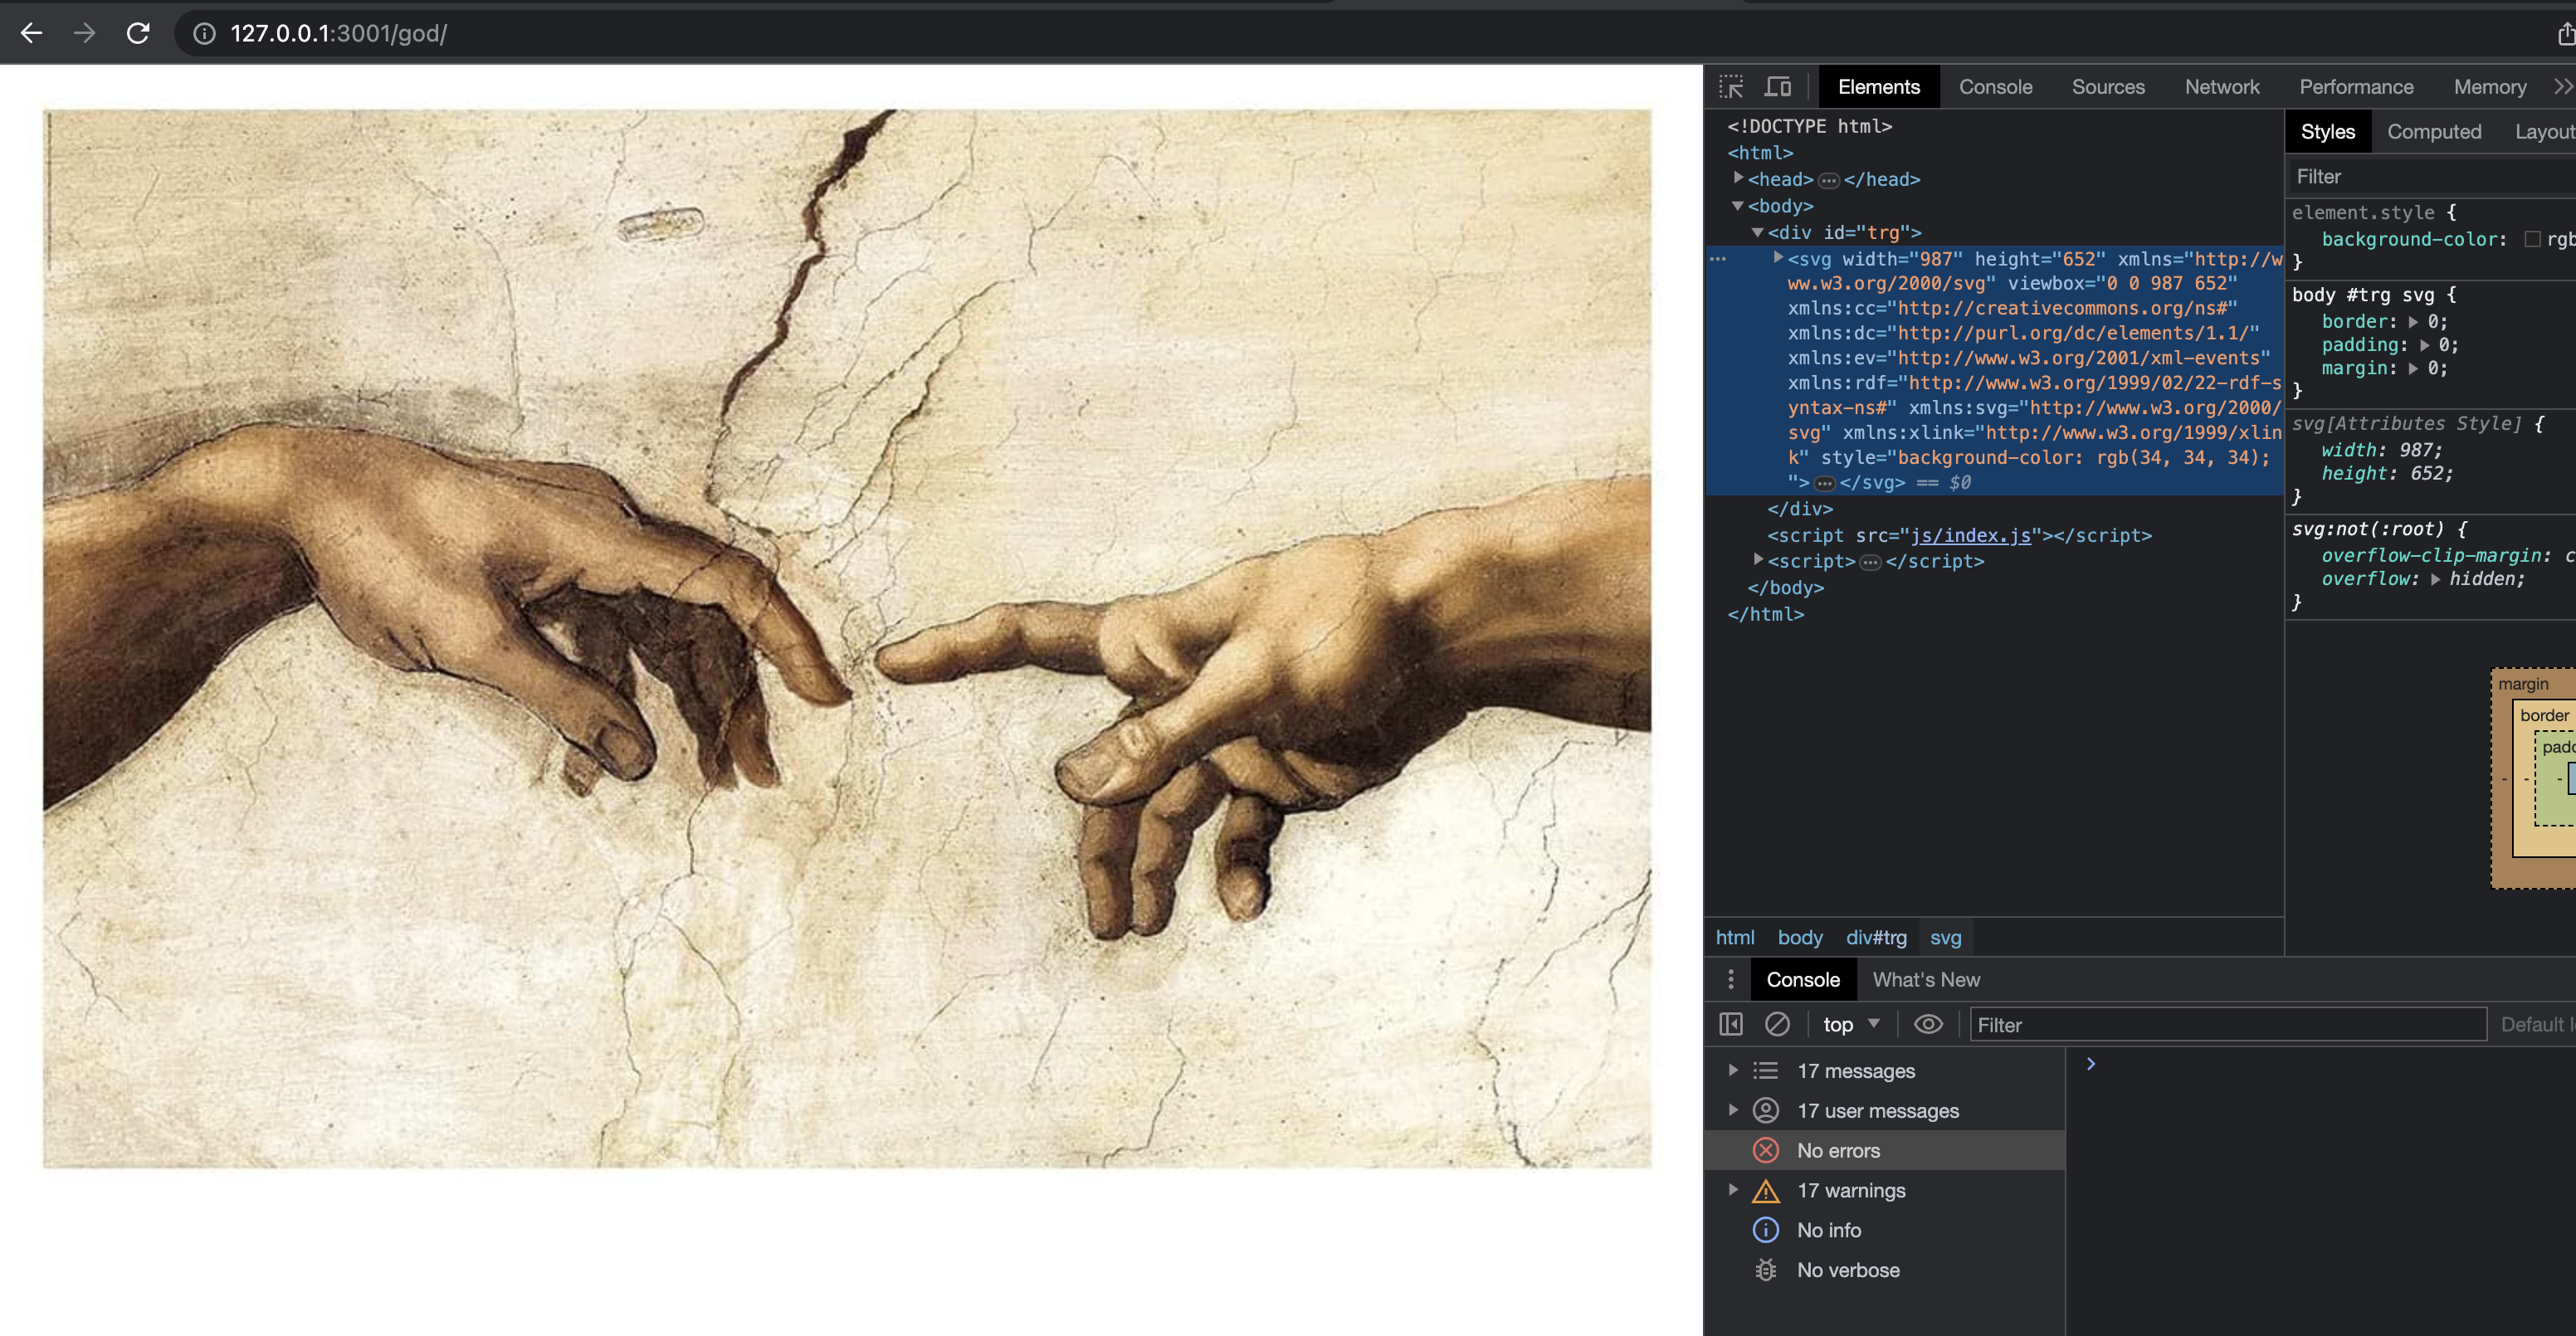
instance.positionInspector(config)To me happened many times to draw by hand something and then having the need to move that into an <svg>.
If you ever tried you are perfectly aware of how much time this can take (I'm clearly considering the programmatinc way). The positionInspector utility aim to offer a tool to come and help in such cases.
Let's say we target a random image 🥰, and we would have a raw silouhette version of it :

we can start a simple file:
window.onload = function () {
    var target = document.getElementById('trg'),
        width = 987,
        height = 652,
        w = function (p) {return width * p/100;},
        h = function (p) {return height * p/100;},
        Leo = Leonardo(width, height, { ns: '*', target: target }),
        img = Leo.image(0,0,width, height, './god.jpg').setAttributes({opacity: 0.6}),
        main = Leo.group(),
        fillStyle = {
			"stroke-width": 2,
			"stroke": '#ef88d8',
			"stroke-opacity": 1,
			"fill-opacity": 10,
			"stroke-linejoin": "round",
			fill: 'transparent'
		};

    main.append(img);
    Leo.append(main);
    Leo.render();
}
to get
now, we would want to have a quick way to get the right d attribute content to be used in a <path/> tag so to draw what we want, all we need to do is invoke Leo.positionInspector():
In the source/demo folder there are some examples I use for development purposes.
If You run yarn start (and let it go since it is watching for changes in the source folder) and then visit http://127.0.0.1:3001 You can see all of them.