易安鸟编码规范
1.文件名
业务逻辑使用大驼峰,如:Index.vue、Check.ts,根目录下或基础文件全小写,如:package.json
2.变量名
变量、属性使用大驼峰,函数使用_连接、方法使用小驼峰,如:
    const Check=ref({   //这里是变量
        Name:'',    //这里是属性
        setData:()=>{}  //这里是方法
        })

    function get_check(){}   //这里是函数,也推荐使用小驼峰
当然了,一些通俗变量使用小驼峰,如:
    import { useRouter,useRoute } from 'vue-router'
    const router=useRouter()
    const route=useRoute()

    import { useStore } from '../store'
    const store=useStore()
函数、方法中,局部变量使用小驼峰,如:
    async function upload(){
        let file=await UploadApi.select_upload('file','.png,.gif,.jpg')
    }
3.编码方面的一些细节问题
1.变量命名具有语义:
    /**
     * 示例中代码中,回调函数会使用到大量的v,k,d,i,rs等
     */
    let Lists:number[]=[]    //List是列表,通常列表是以数组的形式存在,因此命名时是复数,即Lists
    Lists.forEach((v,k)=>{})    //v是value的意思,k是key的意思
    for(let i of Lists){}   //i是index的意思
    for(let d in Lists){}   //d是data的意思
    function get_data(){ //get_data英译获取数据的意思
        let rs:{[index:string]:any}={}   //rs是result的意思
    }
2.调用接口时,必须使用try{}catch(error){}包裹
3.关于字符串拼接:
    /**
     * 字符串拼接推荐使用字符串模板(`${变量}`)
     */
    let ContactNumber=10
    let ContactCSS=`${ContactNumber}px`

    /**
     * 存在多次使用的字符串建议使用变量将其存储
     */
    const URL = 'https://127.0.0.1:8080/api/yan/'
    let SignLogo=`${URL}2023-02-01/signlogoactived.svg`
    let Logo=`${URL}2023-02-01/sigenlogo.svg`
4.vite @2.9.0
    /**
    *我司项目皆由vite构建,模板为vue-ts,请注意node版本
     */
yarn create vite 项目名称 --template vue-tsvite祥见:https://cn.vitejs.dev/guide/
有时,我们更新了第三方库,重载了IDE窗口,重新启动vue服务,但是页面也没有报错,就是无法达到预期效果。
这时请你注意看一下node_modules下面是否含有.vite文件夹,如果有请先删除它,再重复前面的操作。
5.pinia @2.0.13
可以理解为Vuex,祥见:https://pinia.web3doc.top/introduction.html
yarn add pinia@2.0.13因公司库@yakj/sdk/sdk/store中使用了pinia,在调用该库中的方法时,pinia可能并未挂载,因此需要将@yakj/sdk/sdk/store二次封装:
1.初始化pinia:pinia.ts
    import {createPinia} from 'pinia';
    const Pinia =createPinia()
    export default pinia
2.封装@yakj/sdk/sdk/store:yan.ts
    import sdk from '@yakj/sdk/sdk/store'
    import pinia from './pinia'
    export default fuction get_yan_store(){
        return sdk(pinia)
    }
3.在入口文件中挂载pinia:mian.ts
    import pinia from './store/pinia'
    const app=createApp(App).use(pinia)
由上可见,我们并未按照通俗做法,在入口文件(main.ts)中直接导入pinia(即 import {createPinia} from 'pinia')并挂载。
6.demo的编写
当我们前端页面业务逻辑已经完成,需要调用接口测试时,或许后端只是把接口文档准备好了,调用接口后并不会返回真实数据,或者调用接口后数据并不理想,此时需要我们根据接口文档自己准备测试数据。
比如接口文档如下: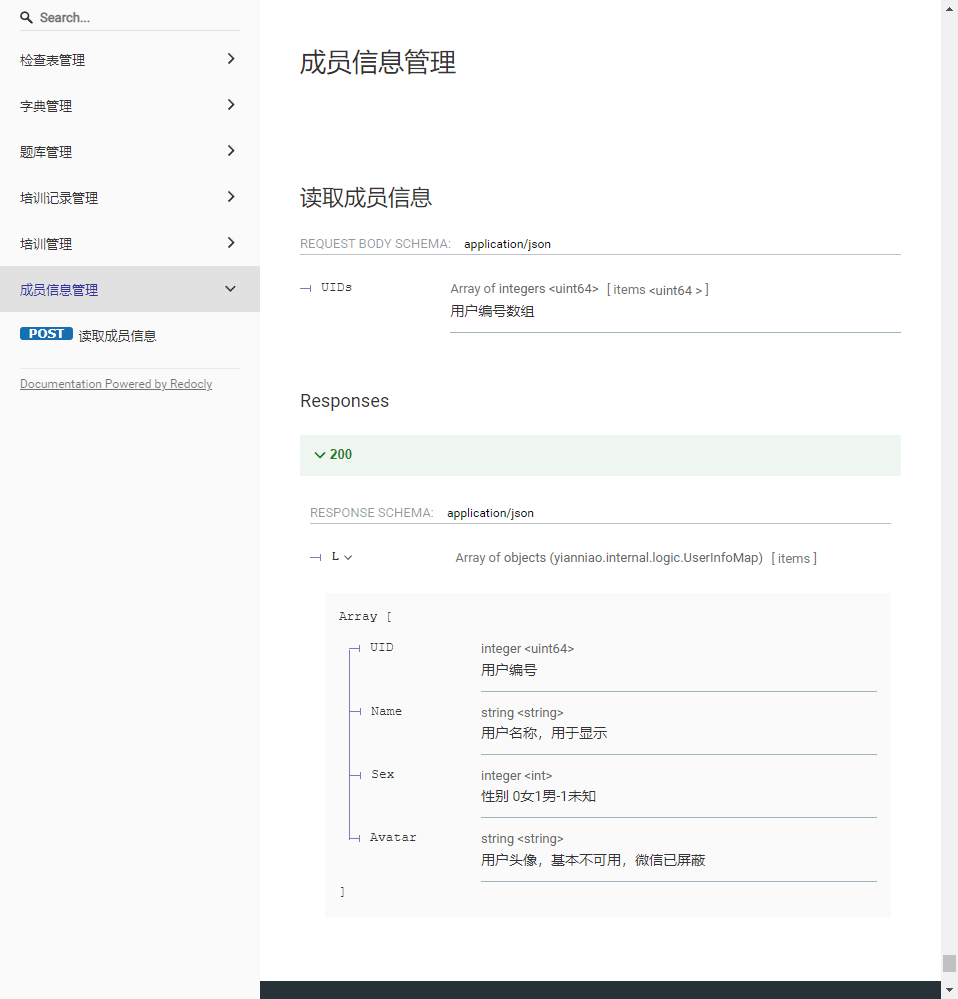
    export class User{
        UID:number
        Name:string
        Sex:number
        Avatar:string
    }
    export const UserList:User[]=[
        {
            UID:0,
            Name:'古力娜扎',
            Sex:0,
            Avatar:'https://npm.tansuyun.cn/@yakj/y407@0.0.21/dist/img/hoverbtn.02c89e24.svg'
        },
         {
            UID:1,
            Name:'迪丽热巴',
            Sex:0,
            Avatar:'https://npm.tansuyun.cn/@yakj/y407@0.0.21/dist/img/hoverbtn.02c89e24.svg'
        },
         {
            UID:100,
            Name:'刘德华',
            Sex:1,
            Avatar:'https://npm.tansuyun.cn/@yakj/y407@0.0.21/dist/img/hoverbtn.02c89e24.svg'
        },
         {
            UID:101,
            Name:'张学友',
            Sex:1,
            Avatar:'https://npm.tansuyun.cn/@yakj/y407@0.0.21/dist/img/hoverbtn.02c89e24.svg'
        },
    ]
而后在要使用到demo的页面引入并使用,如User.vue
    import UserList from '../api/User'
    const Users=ref([])
    onMounted(()=>{
        Users.value=UserList
    })
7.推荐使用组合式Api(composition Api)以及组合式函数(Composables)
为了可维护性、可阅读性,需要整个团队统一编码风格(Ⅰ.option Api,Ⅱ.compositon Api,Ⅲ.compositon Api + Composables);
option Api 参考:https://git.tansuyun.com/yakj/yan/answermodule
composition Api 参考:https://git.tansuyun.com/yakj/yan/check master主分支
composition Api+Composables 参考:https://git.tansuyun.com/yakj/yan/check test主分支
组合式函数需要已掌握组合式Api; 组合式Api、组合式函数祥见:https://cn.vuejs.org/guide/reusability/composables.html 了解掌握组合式函数:https://juejin.cn/post/7083401842733875208
4.关于组件、第三方包、库
1.签名组件:基于第三方库vue-signatrue-pad封装的Sign组件
    /**
     * 在需要签字的页面,放入Sign组件。
     * 1.v-model绑定一个boolean,控制组件的显示和隐藏;
     * 2.传入一个Name属性,显示当前调用组件的人名;
     * 3.绑定一个sunccess函数,接收签字成功后,签字图片的URL,URL通常以函数参数的形式存在;
     * 4.绑定一个cancel函数,逻辑处理为用户取消签字后的逻辑。
     */
    <Sign v-model='ShowSign' :Name='UserName' @success='success' @cancel='cancel'></Sign>
    const ShowSign=ref(false)   //控制签字组件的显示隐藏
    const Name=ref('')  //签字人,通常在父组件使用UID获取到用户对象,拿到Name
    function success(URL:string){ console.log(URL) }    //签名提交成功后,返回签名图片的URL
function cancel(){} //签名取消的逻辑处理vue-signatrue-pad祥见:https://github.com/neighborhood999/vue-signature-pad
2.公司自有的开源包@ctsy
2.1@ctsy/api-sdk
安装 yarn add @ctsy/api-sdk
内容及使用方法:
Demo.ts
    import { ApiController,ControllerApi } from '@ctsy/api-sdk' //ApiController完整的控制器,ControllerApi不完整的控制器
    class Demo extends ApiController{
        host='127.0.0.1:8080'   //设置主机
        async getData(){
            let rs= await this._get()   //ApiController的_get方法使用
            return rs            //一定记得return
        }
        async setData(ID:number){   //ApiController的_post方法使用
            return await this._post('set',{ID}) //一定记得return
        }
    }
    const DemoApi=new Demo('name','prefix')
    export default DemoApi
Demo.vue
    /**
     * 使用我司标准接口时
     */
    import { SearchResult,SearchWhere } from '@ctsy/api-sdk' //SearchResult查询条件,SearchWhere查询结果
    import UploadApi from '@ctsy/api-sdk/dist/modules/Upload'   //文件接口
    import UserApi from '@ctsy/api-sdk/dist/modules/User'   //用户接口
    import DemoApi from '../api/Demo'
    const SearchResult=ref(new SearchResult())
    const SearchWhere=ref(new SearchWhere())

    async function upload(){
        let file=await UploadApi.select_upload('','.png,.gif,.jpg') //UploadApi 文件接口的使用
    }

    onMounted(async()=>{
        let rs=await DemoApi.getData()
    })
2.2@ctsy/common
安装 yarn add @ctsy/common
内容及使用方法:
    /**
     * 常用日期处理方法format_date,DateFMT
     * 常用数组格式处理方法array_key_set => 将数组对象转换成字典
     * 常用延时方法delay_cb
     */
    import { format_date,DateFMT,array_key_set,delay_cb } from '@ctsy/common'

    let Now=format_date(new Date(),DateFMT.YMD)

    onMounted(async()=>{
        let rs=await getData() //rs=[{DID:0,UID:100},{DID:1,UID:10},{DID:2,UID:1}]
        let lists=array_key_set(rs.L,'DID') //list={0:{DID:0,UID:100},1:{DID:1,UID:10},{DID:2,UID:1}}
})前端库还有@ctsy/hook、@ctsy/sdk,@ctsy更多详情内容,请查看:https://www.npmjs.com/search?q=%40ctsy
3.其他库
1.移动端使用vantUI风格 @3.4.3
调用接口时,配合vant库的Toast使用,如:
    import {Toast} from 'vant'
    async function save_data(){
        Toast.loading('加载中...')
        try{
            let rs=await save(ID,Data)
            Toast.success('保存成功')
        }catch(error){
            Toast.fail(`${error}`)
        }finally{
            Toast.clear()
        }
}vant3版本,请查看https://vant-contrib.gitee.io/vant/v3/#/zh-CN/home vant4版本,请查看https://vant-contrib.gitee.io/vant/#/zh-CN/home
2.PC端使用elementUI风格
element教程,请查看https://element-plus.gitee.io/zh-CN/guide/design.html
3.lodash
常用cloneDeep方法做深拷贝:
    import { cloneDeep } from 'lodash'

    const Obj={}
const CloneObj=cloneDeep(Obj)lodash教程,请查看https://www.lodashjs.com/
5.关于git
使用教程,请查看:https://www.liaoxuefeng.com/wiki/896043488029600
1.将项目从远程仓库克隆到本地仓库
git clone https://github.com/SkyCui2022/-2023-.git2.将本地仓库绑定到远程仓库
git remote add origin https://github.com/SkyCui2022/-2023-.git3.全局绑定用户
    git config --global user.email "cuixiujingyun@163.com"
    git config --global user.name "cuixiujingyun@163.com"
4.创建并切换分支(建议使用分支,-c表示创建,切换分支时不带-c)
git switch -c dev5.将文件添加至缓存区(*表示所有文件)
    git add README.md
    git add *
6.添加文件信息
git commit -m '文件信息'7.合并分支代码(此操作通常由主分支master上进行)
git merge demo8.从远程仓库拉取代码(后面加“origin 分支名”可以拉取指定分支的代码)
git pull9.推送代码到远程仓库
git push说明:“符号”+“提交内容”
示例:“+添加检查表”
1.“+”表示新增或添加;
2.“-”表示删除;
3.“#”表示修复或更改;
4.“^”表示优化或升级;
5.“=”表示格式化或无功能变化。
6.关于icon
除了使用vantUI、element-ui自带的icon,建议使用阿里巴巴iconfont,祥见:https://www.iconfont.cn/home/index?spm=a313x.7781069.1998910419.3;