
🧶 <web-socket>
v7.1.0 - 19-09-2023
Simple debug WebSocket CustomElement 🧶! The component can be used with a simple UI or without it (ui attribute), you can connect and disconnect from your WebSocket server or set auto attribute to set an infinite connection loop.
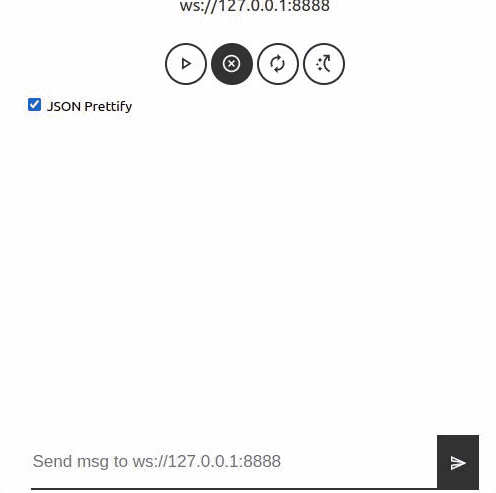
When using the UI click the Connect button to connect to the WebSocket server, the address of the server is set as an attribute on the component.
examples • usage • api • accessibility • TODO •
Examples
<!-- easy with user interface no autoconnection -->
<web-socket url="ws://127.0.0.1:8888" ui></web-socket>

<!-- With auto connection (10sec) -->
<web-socket url="ws://127.0.0.1:8888" ui auto></web-socket>

<!-- With auto connection and no User Interface -->
<web-socket url="ws://127.0.0.1:8888" auto></web-socket>
🚀 Usage
- Install package
npm install --save @cicciosgamino/web-socket- Import
<!-- Import Js Module -->
<script type="module">

  // Note this import is a bare module specifier, so it must be converted
  // to a path using a server such as @web/dev-server.
  import '@cicciosgamino/web-socket'
</script>- Place in your HTML
<web-socket url="ws://127.0.0.1:8888" ui></web-socket>

<!-- Place your element without url, set the url before click connect button -->
<!-- or pass an active WebSocket with the passWebSocket method -->
<web-socket></web-socket>- Use the component with LitElement
  _handleMsg (event) {
    // event.details.message
  }

  _handleStatus (event) {
    // event.details.message
  }

  _handleError (event) {
    // event.details.message
  }

  render () {
    return html`
      <web-socket
        url="ws://127.0.0.1:8888"
        ui
        @ws-message=${this._handleMsg}
        @ws-status=${this._handleStatus}
        @ws-error=${this._handleError}>
      </web-socket>
    `
}- Set the url attribute with
// plain html
document.querySelector('#ws-element')
			.setAttribute('url','ws://127.0.0.1:8888')

// in lit element
this.renderRoot.querySelector('#ws-element')
			.setAttribute('url','ws://127.0.0.1:8888')

// create your WebSocket object with Javascript
const ws = new WebSocket('ws://127.0.0.1:8888')

// Or get the WebSocket from the WebComponent
const ws = this.renderRoot.querySelector('#ws-one')
  .getWebSocket()

// pass the WebSocket on other web-socket component
this.renderRoot.querySelector('#ws-two')
  .passWebSocket(ws)
🐝 API
📒 Properties/Attributes
| Name | Type | Default | Description |
|---|---|---|---|
| url | String | '' |
WebSocket Server URL |
| protocols | String | [] |
WebSocket Supported protocols (TODO) |
| ui | Boolean | `` | If Attribute defined is show easy UI |
| auto | Boolean | `` | Attribute to set the auto connection mode |
🃏 Methods
| Name | Description |
|---|---|
connect() => void |
Create WebSocket to url, protocols specified as attributes |
disconnect() => void |
Close the WebSocket |
sendMsg(msg) => void |
Send message down to websocket |
passWebSocket(ws) => void |
Pass a WebSocket object to the widget (you create it) |
getWebSocket() => ws |
Get Back the WebSocket object from the WebComponent |
🎊 Events
| Name Name | Target | Detail | Description |
|---|---|---|---|
ws-message |
web-socket |
{ detail: { message: ''} | Fired when a message is received |
ws-error |
web-socket |
{ detail: { message: ''} | Fired when a Error is received |
ws-status |
web-socket |
{ detail: { message: ''} | Fired when the connection status changes |
🧁 CSS Custom Properties
| Name | Default | Description |
|---|---|---|
--ws-svg-size |
24px |
Button and SVG width & height |
--text-size |
1.7rem |
Text hight base |
--text1 |
#333 |
Base text button, border color |
--text2 |
#888 |
Hover color |
--surface1 |
whitesmoke |
Background 1 |
--surface2 |
purple |
Background 2 |
: 1.7rem;
🤖 Write HTML and JavaScript
Import the component's JavaScript module, use the component in your HTML, and control it with JavaScript, just like you would with a built-in element such as <button>:
<!doctype html>
<html>
  <head>
    <meta charset="utf-8">
    <title>My Example App</title>

    <!-- Add support for Web Components to older browsers. -->
    <script src="./node_modules/@webcomponents/webcomponentsjs/webcomponents-loader.js"></script>

  </head>
  <body>
    <!-- Use Web Components in your HTML like regular built-in elements. -->
    <web-socket url="ws://127.0.0.1:8888" ui auto></web-socket>

    <!-- The Material Web Components use standard JavaScript modules. -->
    <script type="module">

      // Importing this module registers <progress-ring> as an element that you
      // can use in this page.
      //
      // Note this import is a bare module specifier, so it must be converted
      // to a path using a server such as @web/dev-server.
      import '@cicciosgamino/web-socket'

      // Standard DOM APIs work with Web Components just like they do for
      // built-in elements.
      const ws = document.querySelector('web-socket')
    </script>
  </body>
</html>
🚀 Serve
Serve your HTML with any server or build process that supports bare module specifier resolution (see next section):
# use globally instelled
npm install -g @web/dev-server

# install the project dev-dependencies and npm run
npm install
npm run serve
🕶 Examples
Into the examples folder you can find the app-shell.js where the code of how use the component reside. Into the example two setTimeout trigger two situation, after 5sec the WebSocket (connect or not connect) is passed to an other web-socket component so the WebSocket object is shared between two web-socket components. After 7sec the url attribute of the first component is changed to another value (to try a bad address).
Contributing
Got something interesting you'd like to share? Learn about contributing.
🪆 Accessibility
🔧 TODO
- [ ] Basic Unit testing
📝 License
GNU General Public License v3.0
Made 🧑💻 by @cicciosgamino