Table of Contents
npm install --save timeseries-3d
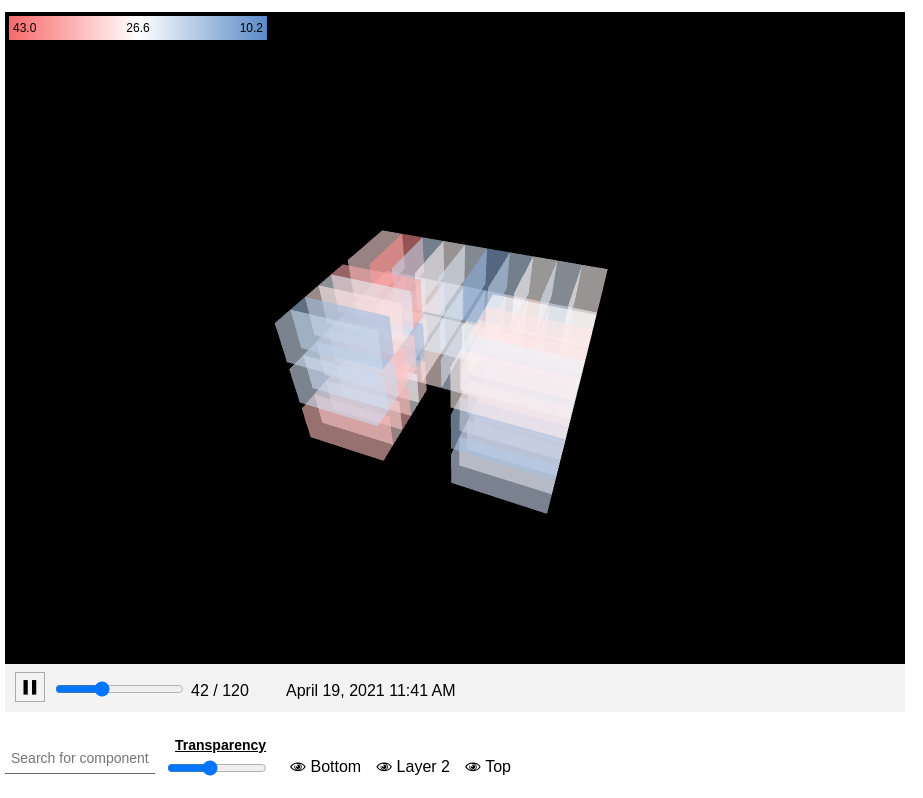
- This package provides 2 components: a
ModelEditorand aTimeseries3Dcomponent, which visualises the model and any data provided. - The
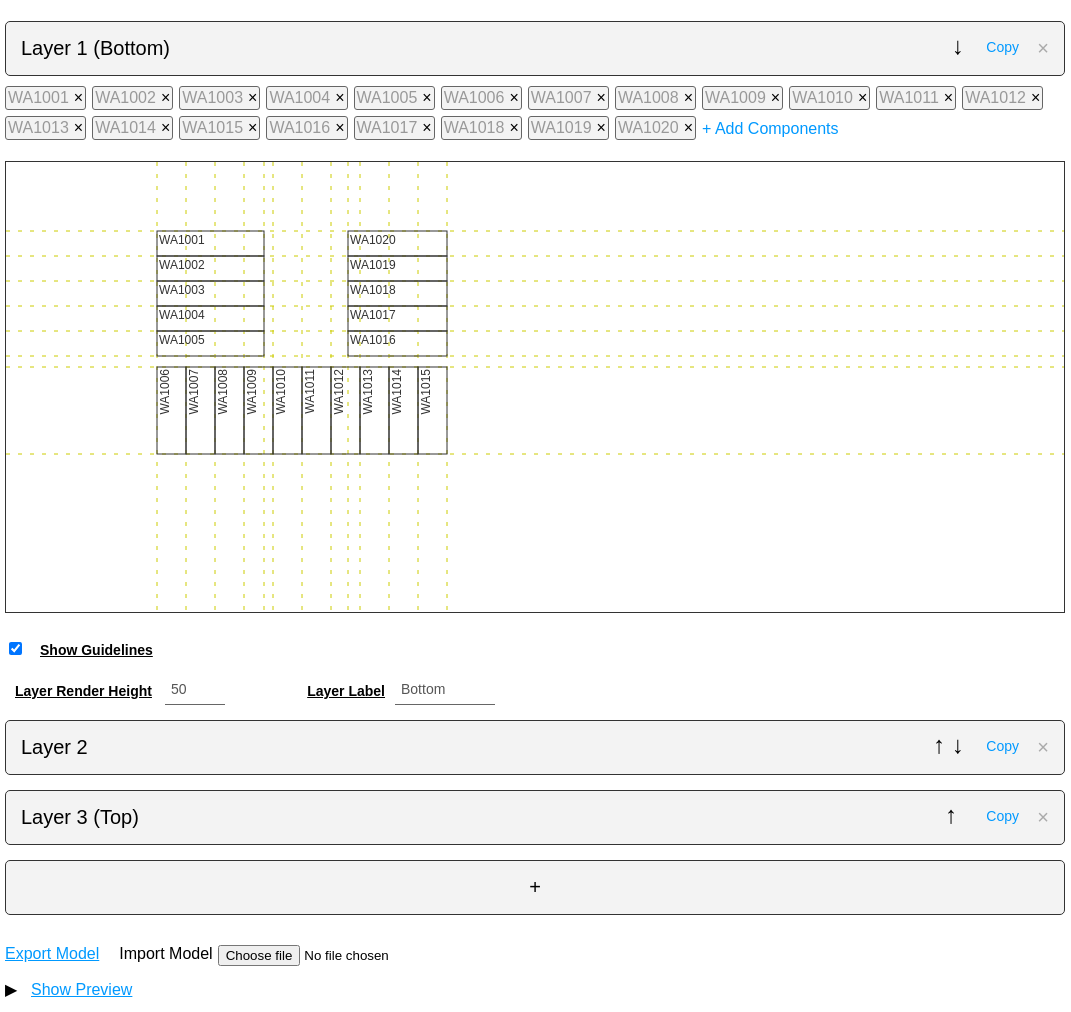
ModelEditorallows to create different layers of a 3D model using a floorplan-like editor for each layer.- The model editor allows to import and export the model as JSON file
- Data for the
Timeseries3Dcan be provided in 2 ways: as JSON object providing single values for each component OR as JSON object with list of values and corresponding timestamps for each component.- If no data is provided, the component will simply render the model
Preview ModelEditor
Preview Timeseries3D
- Use the "+" bar at the bottom to add new layers. Click on a layer to expand it.
- Click "+ Add Components" to open the component form. You can either add single component identifiers or generate a series of them.
- Once you've generated a set of component identifiers, you can select a component (focus) and start drawing rectangles on the canvas. As soon as components are drawn, the focus will move to the next component. Additional components will snap to the guidelines that are generated as you draw components. Additionally a component will snap to the width/height of the previously create component when close.
- You can export the model as JSON file. Layers are provided in order from bottom to top.
Example of a model
{
    "layers": [
        {
            "components": [
                { "x": 151, "y": 69, "size": [107, 25], "id": "WA001" },
                { "x": 151, "y": 94, "size": [107, 25], "id": "WA002" }
            ],
            "height": 50,
            "label": "Bottom Layer"
        },
        {
            "components": [
                { "x": 180, "y": 205, "size": [29, 87], "id": "PA001" },
                { "x": 209, "y": 205, "size": [29, 87], "id": "PA002" }
            ],
            "height": 60
        }
    ]
}- You can either use the "Show Preview" section at the bottom of the
ModelEditoror simply embed aTimeseries3Delement with just themodelproperty provided:
import { ModelEditor } from "timeseries-3d"

const model = { layers: [...] }  // this is your model as generated by the editor
const MyReactComponent = () => <ModelEditor model={demoModel} />Provide the data as data property to the Timeseries3D. The data structure is a flat JSON object with keys for each component
identifiers and the value to represent.
Example
import { Timeseries3D } from "timeseries-3d"

const data = {
    "WA001": 31.3,
    "WA002": 27.4,
    "PA001": 19.8,
    "PA002": 26.9
}
const model = { layers: [...] }  // this is your model as generated by the editor
const MyReactComponent = () => <Timeseries3D model={model} data={data} />Provide the data as data property to the Timeseries3D. The data structure is a JSON object with a "timestamps" and "values" key. The
"timestamps" is a simple array of Unix timestamps, the "values" is a JSON object with keys for each component. Underneath each key is an
array of numeric values that correspond to the "timestamps" in the same order.
Example
import { Timeseries3D } from "timeseries-3d"

const data = {
    "timestamps": [1618794000, 1618794060, 1618794120],
    "values": {
        "WA001": [19.6, 20.2, 21.0],
        "WA002": [31.8, 32.5, 32.5],
        "PA001": [26.1, 27.0, 27.9],
        "PA002": [28.0, 27.0, 26.1]
    }
}

const model = { layers: [...] }  // this is your model as generated by the editor
const MyReactComponent = () => <Timeseries3D model={model} data={data} autoplay />Required Parameters
-
model- the model to render
Optional Parameters (Model)
-
width- the width in pixel of the rendering - default900 -
height- the height in pixel of the rendering - default700 -
layerGap- the gap in pixel to render in between layers - default10 -
noFilters- whether filtering the rendering by layer or component ID and adjusting
transparency is hidden or not - defaultfalse -
transparency- the initial transparency for the components between 0.0 (opaque) and 0.95 (transparent) - default0.4
Optional Parameters (Data)
-
data- a JSON object containing the values to render. This can either be a flat list of values or list of values - defaultnull. -
minValue- provide a minimum value that defines the bottom end of the colour scale. Values below will be rendered with the colour representing the minimum value - default will be determined automatically from the data -
maxValue- provide a maximum value that defines the upper end of the colour scale. Values above will be renderedc with the colour representing the maximum value - default will be determined automatically from the data -
colors- an array of 3 colours, each colour provided as an array of 3 integers representing the RGB values - default[[248, 105, 107], [255, 255, 255], [90, 138, 198]](red -> white -> blue) -
inverse- inverses the colour representation of the min/max value - defaultfalse -
timestampFormat- whether the timestamps are provided as seconds, milliseconds or nanoseconds ("s","ms","ns") - default"s" -
autoplay- if time-series data is provided, this will indicate whether to
automatically start playing - defaultfalse -
dateFormat- if time-series data is provided, this will provide the momentjs format to render the timestamp in the player bar - default"LLL" -
playbackSpeed- the delay in milliseconds between frames during playback - default500
Full Example
import { Timeseries3D } from "timeseries-3d"

const data = {
    "timestamps": [1618794000000, 1618794060000, 1618794120000],
    "values": {
        "WA001": [19.6, 20.2, 21.0],
        "WA002": [31.8, 32.5, 32.5],
        "PA001": [26.1, 27.0, 27.9],
        "PA002": [28.0, 27.0, 26.1]
    }
}

const model = { layers: [...] }  // this is your model as generated by the editor
const MyReactComponent = () => (
    <Timeseries3D
        model={model}
        data={data}
        autoplay
        playbackSpeed={1000}
        timestampFormat="ms"
        dateFormat="hh:mm"
        inverse
        minValue={20.0}
        maxValue={25.0}
        colors={[[180, 30, 30], [160, 160, 70], [30, 180, 30]]}
        width={1024}
        height={768}
        transparency={0.1}
        layerGap={0}
        noFilters
    />
)
This will render the component with the provided data:
- the time series will automatically playback with 1000ms between frames
- the timestamps are provided in milliseconds and they will be rendered using the "hh:mm" (hour:minute) date format
- the values will be rendered on an inverted red -> yellow -> green colour scale (highest values are red, lowest are green) within the range of 20.0 (green) to 25.0 (red)
- the rendering will be 1024px wide and 768px high, componens will be very opaque (0.1) and there will be no gaps between layers and no ability to show/hide layers or adjust transparency.
Optional Parameters
-
height- the height of the layout editor for each layer - default450 -
model- optional - the model to initialise the editor with

