Raspberry Pi Jenkins Light


Note: this package was tested on Raspberry Pi 2.
Installation
- SSH to Raspberry Pi
$ sudo su(need install Node and GPIO module)- Install NodeJs 5.x
- Add repository
$ curl -sL https://deb.nodesource.com/setup_5.x | sudo -E bash - - Run
$ apt-get install nodejs
- Add repository
- From GitHub sources:
- Clone repository
$ git clone https://github.com/antonfisher/rpi-jenkins-light.git $ cd rpi-jenkins-light- Install dependencies
$ npm install
- Clone repository
- From NPM:
$ npm install rpi-jenkins-light.
Configure
Edit $ vim configs/config.js file:
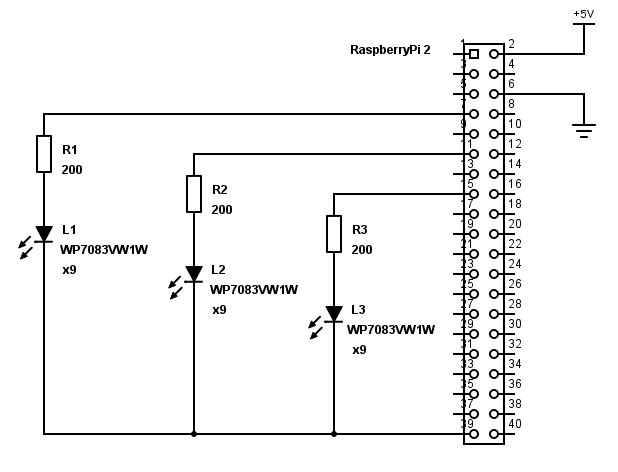
moduleexports =rpi: // Raspberry Pi sub-configgpio: // GPIO [General Purpose Input Output] configcolor:red: 15 // pin # for red coloryellow: 11 // pin # for yellow colorgreen: 7 // pin # for green coloroutputLevel:on: true // 3v3 // led turn on output leveloff: false // 0v // led turn off output leveljenkins: // Jenkins sub-configinterval: 5 * 1000 // requests intervalhost: '10.0.0.1'port: '8080'view: 'JenkinsLight' // http://localhost:8080:/view/%VIEW_NAME%/demoMode: true // ignore jenkins config, turn on red-yellow-green lights;
Demo mode
To run light in demo mode set property: demoMode: true in jenkins section in configs/config.js.
Connect LEDs to Raspberry Pi
Example config works with this configuration:
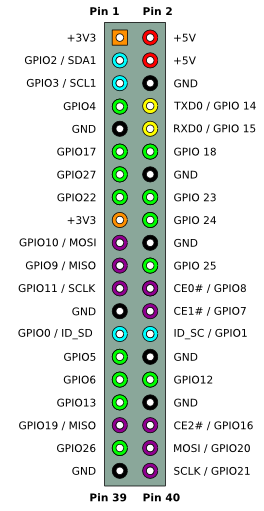
Pins map
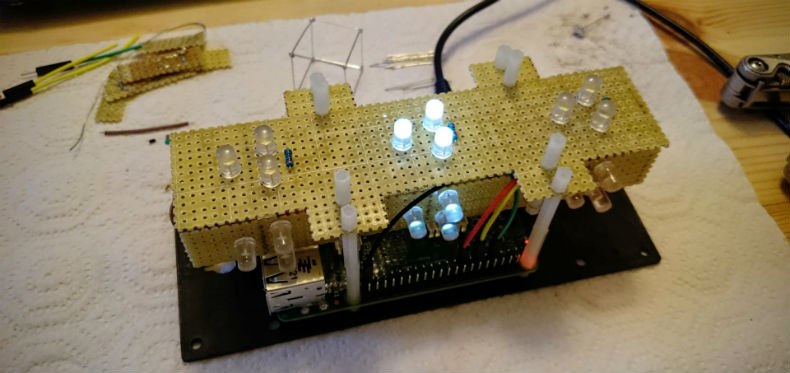
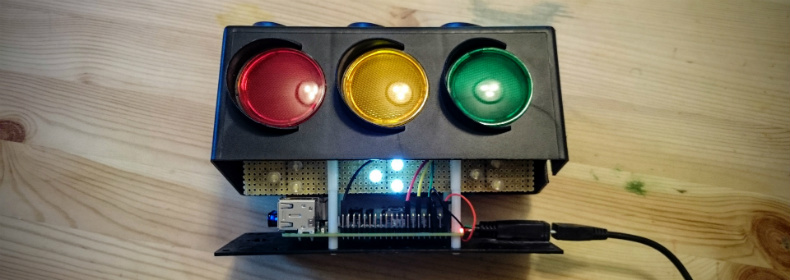
Final version
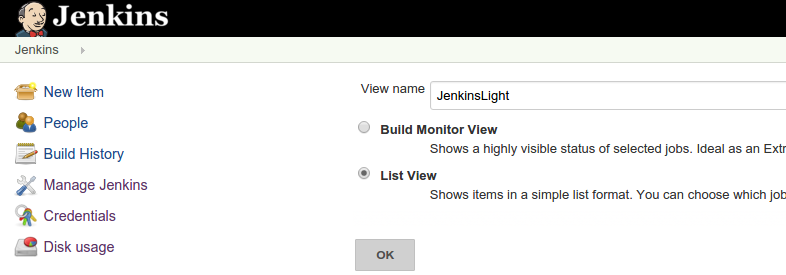
Configure Jenkins
- Open Jenkins main page
- Create new list view called
JenkinsLight - Add monitored tasks to this view.
Run
$ sudo su(need for GPIO module)- From GitHub sources:
$ node run.js
- From NPM:
$ node ./node_modules/rpi-jenkins-light/run.js.
Autorun
$ sudo su(need for global modules)$ npm install pm2 -g$ pm2 startup$ pm2 start run.js$ pm2 save.
Tests
- Use NodeJs v5.x
$ npm install --dev$ npm test.
Release History
- 1.1.0 Tests and improvements
- configuration examples
- test with jenkins mock
- 1.0.0 Initial release.
ToDo
- npm global module
- add link to article
License
Copyright (c) 2015 Anton Fisher a.fschr@gmail.com
MIT License. Free use and change.