React Native Voximplant Demo Application
User agent demo application that uses react-native-voximplant and VoxImplant cloud platform for making/receiving audio/video calls.
In Action
Getting started
-
Install React Native as described at https://facebook.github.io/react-native/docs/getting-started.html#content
-
Create new application using
react-native init VoximplantDemo -
Execute:
cd VoximplantDemowget https://github.com/voximplant/react-native-demo/archive/master.zipunzip -j master.ziprm -rf master.zipmkdir android/app/src/main/assets android/app/src/main/assets/fonts && cp Custom.ttf android/app/src/main/assets/fonts/Custom.ttf -
Run
npm install, all required components will be installed automatically -
Read the instructions for installed react native modules (they will be placed into node_modules folder) , some of them will require additional steps.
react-native-voximplantexample:### iOS
- In XCode, in the project navigator, right click
Libraries➜Add Files to [your project's name] - Go to
node_modules➜react-native-voximplant/iosand addVoxImplant.xcodeproj - In XCode, in the project navigato r, select your project. Add
libvoximplant.a, react-native-voximplant/VoxImplantSDK/libVoxImplantSDK.a, libc++.dylib or libc++.tbd, GLKit.frameworkto your project'sBuild Phases➜Link Binary With Libraries - Click
VoxImplant.xcodeprojin the project navigator and go theBuild Settingstab. Make sure 'All' is toggled on (instead of 'Basic'). Look forHeader Search Pathsand make sure it contains$(SRCROOT)/../node_modules/react-native/Reactand mark asrecursive. Look forLibrary Search Pathsand add$(SRCROOT)/../node_modules/react-native-voximplant/ios/VoxImplantSDK/lib - Right click on you project in XCode and select Add files to "NameOfYourProject" and add
Custom.ttffrom the project folder - Edit
Info.plistand add a property called Fonts provided by application (if you haven't added one already) and type in the file you just added: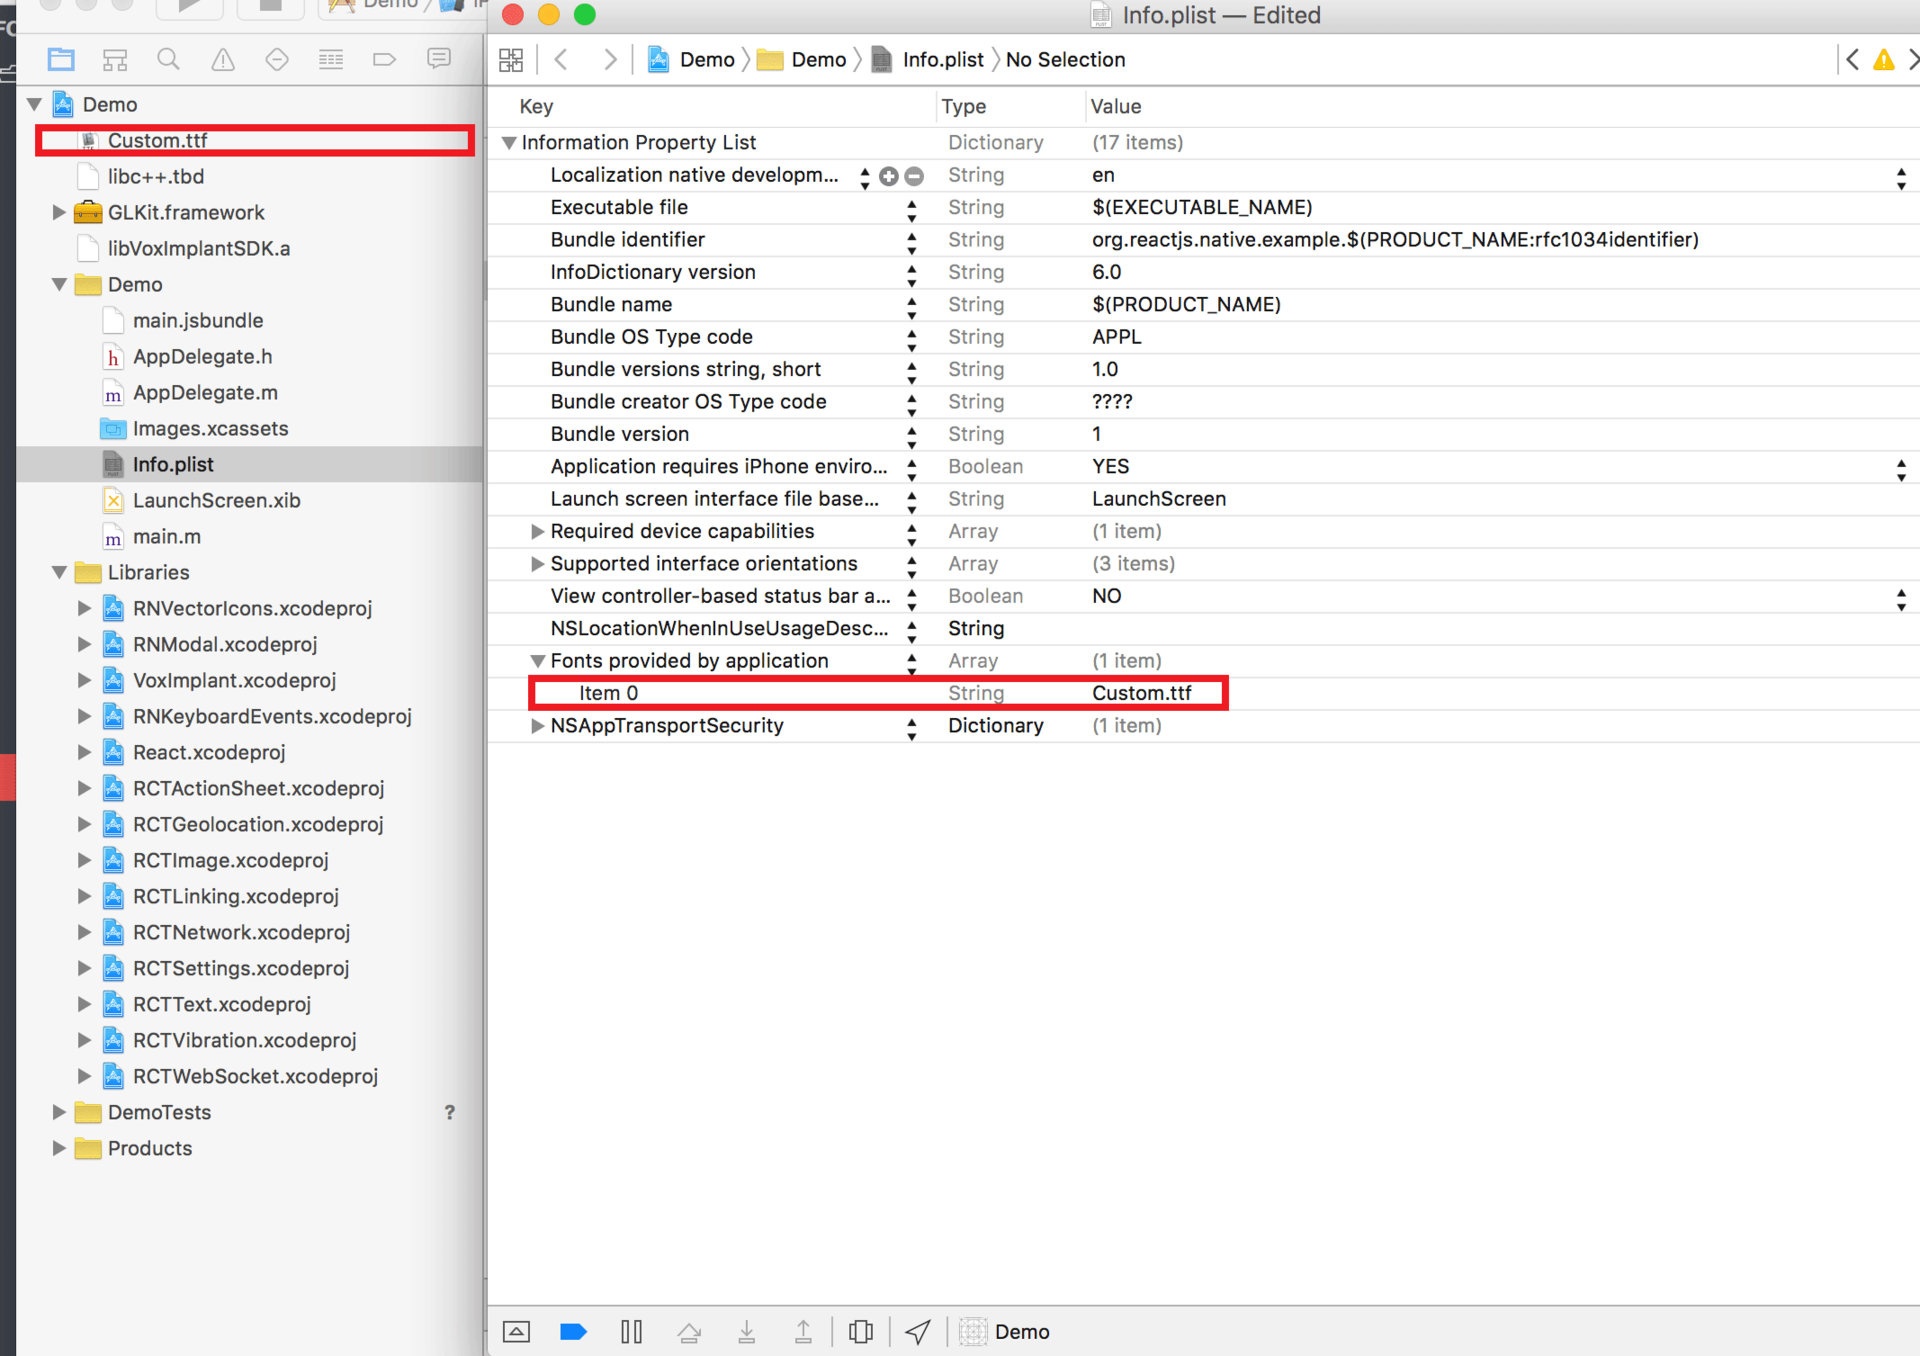
### Android
-
Open up
android/app/main/java/[...]/MainApplication.java- Add
import com.voximplant.reactnative.VoxImplantReactPackage;to the imports at the top of the file - Add
new VoxImplantReactPackage()to the list returned by thegetPackages()method
- Add
-
Append the following lines to
android/settings.gradle:include ':react-native-voximplant' project(':react-native-voximplant').projectDir = new File(rootProject.projectDir, '../node_modules/react-native-voximplant/android') -
Insert the following lines inside the dependencies block in
android/app/build.gradle:compile project(':react-native-voximplant') -
And finally, in android/src/main/AndroidManifest.xml add user permissions
<uses-permission android:name="android.permission.CAMERA" />
<uses-permission android:name="android.permission.MODIFY_AUDIO_SETTINGS" />
<uses-permission android:name="android.permission.ACCESS_NETWORK_STATE" />
<uses-permission android:name="android.permission.RECORD_AUDIO" />
<uses-permission android:name="android.permission.INTERNET" />
- In XCode, in the project navigator, right click
-
Run your project from XCode (
Cmd+R) for iOS, or usereact-native run-androidto run your project on Android.