react-native-google-sign

Features
- Support all 3 types of authentication methods (standard, with server-side validation or with offline access (aka server side access))
- Native signin button
- Consistent API between Android and iOS
- Promise-based JS API
Installation
npm install react-native-google-signin --saveWarning: For react-native >= v0.30 use react-native-google-signin >= v0.8.0
Project setup and initialization
See Android guide and iOS guide
Public API
1. GoogleSigninButton

; { <GoogleSigninButton style=width: 48 height: 48 size=GoogleSigninButtonSizeIcon color=GoogleSigninButtonColorDark onPress=this_signIn/>}Possible value for size are:
- Size.Icon: display only Google icon. recommended size of 48 x 48
- Size.Standard: icon with 'Sign in'. recommended size of 230 x 48
- Size.Wide: icon with 'Sign in with Google'. recommended size of 312 x 48
Possible value for color are:
- Color.Dark: apply a blue background
- Color.Light: apply a light gray background
2. GoogleSignin
;- hasPlayServices
Check if device has google play services installed. Always return true on iOS.
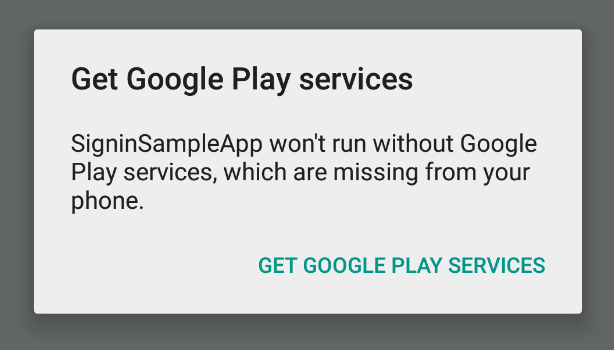
GoogleSigninwhen autoResolve the library will prompt the user to take action to solve the issue.
For example if the play services are not installed it will prompt:
- configure
It is mandatory to call this method before login.
Example for default configuration. you get user email and basic profile info.
; GoogleSignin;Example to access Google Drive both from the mobile application and from the backend server
GoogleSignin; iOS Note: your app ClientID (iosClientId) is always required
- currentUserAsync
Typically called on the componentDidMount of your main component. This method give you the current user if already login or null if not yet signin.
GoogleSignin;- currentUser
simple getter to access user once signed in.
const user = GoogleSignin;// user is null if not signed in- signIn
Prompt the modal to let the user signin into your application
GoogleSignin;- getAccessToken (Android Only)
Obtain the user access token.
GoogleSignin;iOS Note: an error with code -5 is returned if the user cancels the signin process
- signOut
remove user session from the device
GoogleSignin;iOS Note: the signOut method does not return any event. you success callback will always be called.
- revokeAccess
remove your application from the user authorized applications
GoogleSignin3. User
This is the typical information you obtain once the user sign in:
  {
    id: <user id. do not use on the backend>
    name: <user name>
    email: <user email>
    photo: <user picture profile>
    idToken: <token to authenticate the user on the backend>
    serverAuthCode: <one-time token to access Google API from the backend on behalf of the user>
    scopes: <list of authorized scopes>
    accessToken: <needed to access google API from the application> (iOS only)
  }
Android Note: To obtain the user accessToken call getAccessToken
idToken Note: idToken is not null only if you specify a valid webClientId. webClientId corresponds to your server clientID on the developers console. It HAS TO BE of type WEB
Read iOS documentation and Android documentation for more information
serverAuthCode Note: serverAuthCode is not null only if you specify a valid webClientId and set offlineAccess to true. once you get the auth code, you can send it to your backend server and exchange the code for an access token. Only with this freshly acquired token can you access user data.
Read iOS documentation and Android documentation for more information
Additional scopes
The default requested scopes are email and profile.
If you want to manage other data from your application (for example access user agenda or upload a file to drive) you need to request additional permissions. This can be accomplished by adding the necessary scopes when configuring the GoogleSignin instance.
Please visit https://developers.google.com/oauthplayground/ for a list of available scopes.
Licence
(MIT)