
Amazon Alexa Platform Integration
To view this page on the Jovo website, visit https://v3.jovo.tech/marketplace/jovo-platform-alexa
Learn more about Alexa specific features that can be used with the Jovo Framework.
- Introduction
- Configuration
- $alexaSkill Object
- Jovo Language Model
- Permissions and Data
- Alexa Skill Interfaces
- Monetization
- Progressive Responses
Introduction
Installation
$ npm install --save jovo-platform-alexaImport the installed module, initialize and add it to the app object:
// @language=javascript

// src/app.js
const { Alexa } = require('jovo-platform-alexa');

app.use(new Alexa());

// @language=typescript

// src/app.ts
import { Alexa } from 'jovo-platform-alexa';

app.use(new Alexa());
Quickstart
Install the Jovo CLI
We highly recommend using the Jovo CLI if you want to benefit from all the features coming with Jovo. You can learn more and find alternatives on our installation page.
$ npm install -g jovo-cliCreate a new Jovo Project
You can create a Jovo project into a new directory with the following command:
// @language=javascript

# Create default Jovo project (Alexa and Google Assistant)
$ jovo3 new <directory>

# Create Alexa-only Jovo project
$ jovo3 new <directory> --template alexa


// @language=typescript

# Create default Jovo project (Alexa and Google Assistant)
$ jovo3 new <directory> --language typescript

# Create Alexa-only Jovo project
$ jovo3 new <directory> --template alexa --language typescript
This will create a new folder, download the Jovo "Hello World" template, and install all the necessary dependencies so you can get started right away.
This is how a typical Jovo project looks like:
// @language=javascript

models/
  └── en-US.json
src/
  |── app.js
  |── config.js
  └── index.js
project.js

// @language=typescript

models/
  └── en-US.json
src/
  |── app.ts
  |── config.ts
  └── index.ts
project.jsRun and Test the Code
To test the logic of your code, you can use the local development server provided by Jovo, and the Jovo Debugger.
To get started, use the following command:
// @language=javascript

# Run local development server
$ jovo3 run

// @language=typescript

# Run compiler
$ npm run tsc

# Run local development server
$ jovo3 run
This will start the development server on port 3000 and create a Jovo Webhook URL that can be used for local development. Copy this link and open it in your browser to use the Jovo Debugger.
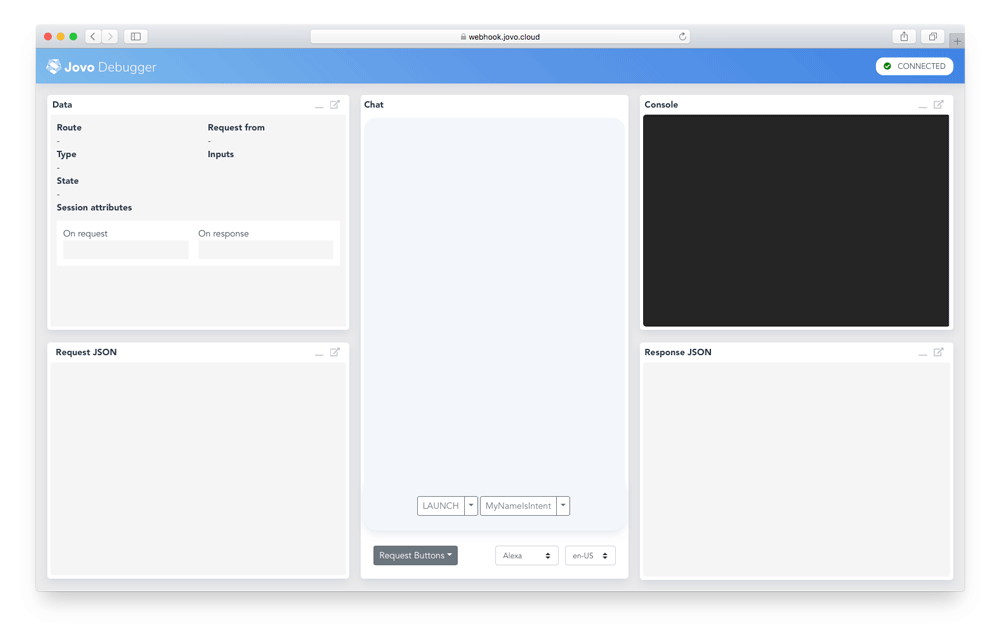
In the Debugger, you can quickly test if the flow of your voice app works. For this example, click on the LAUNCH button, and then specify a name on the MyNameIsIntent button. The Debugger will create requests and run them against your local webhook.
Configuration
Using the project.js in your project directory, you can configure your skill specifically for your needs. Using stages, you can also utilize different configurations for different environments.
The following elements can be added to the alexaSkill object:
{
  alexaSkill: {
    skillId: '<your-skill-id>',
    askProfile: '<your-ask-cli-profile>'
  },
}
In the deployment process with the Jovo CLI (jovo deploy), skillId and askProfile are by default taken from the existing config in the /platforms/alexaSkill/.ask folder. Specifying those in the project.js to override the existing platform files is especially useful if you have different versions of the Alexa Skill in separate developer accounts (see Stages).
skill.json Overrides
You can also add information to go into the skill.json. You can basically add or override any element that you can find in the skill manifest:
{
  alexaSkill: {
    manifest: {
      // Add elements to override here.
    }
  },
}
To add an object, make sure to add the same path it has in the skill.json. The below example (from our Alexa Audioplayer Template) adds the Audioplayer Directive to the Alexa Skill:
{
  alexaSkill: {
    manifest: {
      apis: {
        custom: {
          interfaces: [
            {
              type: 'AUDIO_PLAYER',
            }
          ]
        }
      }
    }
  }
}
$alexaSkill Object
The $alexaSkill object holds references to every Alexa-specific feature:
// @language=javascript

this.$alexaSkill

// @language=typescript

this.$alexaSkill!
Jovo Language Model
For a general understanding of the Jovo Language Model, check out the platform-independent docs
When using the Jovo Language Model you can add an alexa object to each intent. In there you can define the intent name for Alexa specifically:
{
	"name": "NextIntent",
	"alexa": {
		"name": "AMAZON.NextIntent"
	},
	"phrases": [
		"skip",
		"next",
		"next one",
		"skip please",
		"next one please",
		"skip the episode",
		"skip to next episode",
		"skip to the next episode",
		"next episode",
		"would like the next episode",
		"I would like the next episode",
		"I would like to listen to the next episode"
	]
},
But, that way, the AMAZON.NextIntent would still be extended using the utterances in the phrases array. To specify Alexa-specific utterances you can add a samples array as well. If you keep the array empty, the intent won't be extended at all:
{
	"name": "NextIntent",
	"alexa": {
		"name": "AMAZON.NextIntent",
		"samples": []
	},
	"phrases": [
		"skip",
		"next",
		"next one",
		"skip please",
		"next one please",
		"skip the episode",
		"skip to next episode",
		"skip to the next episode",
		"next episode",
		"would like the next episode",
		"I would like the next episode",
		"I would like to listen to the next episode"
	]
},
When using slots in your intents, you can define platform-specific slot types:
{
	"name": "ChooseFromListIntent",
	"phrases": [
		"{ordinal}",
		"{ordinal} one please",
		"{ordinal} one",
		"{ordinal} episode"
	],
	"inputs": [
		{
			"name": "ordinal",
			"type": {
				"alexa": "ordinal",
				"dialogflow": "@sys.ordinal"
			}
		}
	]
},
Last but not least, you can add an alexa object at the root of the Jovo Language Model which has the same syntax as the original Alexa interaction model. Both the platform-independent Jovo Language Model and the alexa part will be merged when building:
"alexa": {
	"interactionModel": {
		"languageModel": {
			"intents": [
				{
					"name": "AMAZON.CancelIntent",
					"samples": []
				},
				{
					"name": "AMAZON.HelpIntent",
					"samples": []
				},
				{
					"name": "AMAZON.StopIntent",
					"samples": []
				}
			]
		}
	}
}
Dynamic Entities
If you want to augment your existing entities depending on a dynamic change in data or context, you can use Dynamic Entities to dynamically create new entities during your session. These will be resolved in addition to your static slot values and are valid for a total time of 30 minutes, even after the user session has ended, although we recommend to clear every dynamic entity as soon as the session ends.
Here is the official reference by Amazon: Dynamic Entities.
// You can use either of these functions, depending on your use case.

// Adds a single dynamic entity.
this.$alexaSkill.addDynamicEntityType({
	name: 'FruitInput',
	values: [
		{
			name: {
				value: 'apple',
				synonyms: ['red apple', 'sweet apple']
			}
		},
		{
			name: {
				value: 'banana',
				synonyms: ['yellow banana'],
				id: 'banana'
			}
		}
	]
});

// Adds an array of dynamic entities.
this.$alexaSkill.addDynamicEntityTypes([
	{
		name: 'FruitInput',
		values: [
			{
				name: {
					value: 'peach'
				}
			}
		]
	}
]);

// Use this function to add one or multiple dynamic entities.
this.$alexaSkill.replaceDynamicEntities({
	name: 'FruitInput',
	values: [
		{
			name: {
				value: 'strawberry'
			}
		}
	]
});

// Or
this.$alexaSkill.replaceDynamicEntities([
	{
		name: 'FruitInput',
		values: [
			{
				name: {
					value: 'kiwi'
				}
			}
		]
	}
]);
Permissions and Data
There are a lot of Alexa specific permissions and data that a Skill can use, such as:
- Location
- Contact Information
- Lists
- Reminders
- Settings
- Skill Events
Alexa Skill Interfaces
Learn more about the different Alexa Skill Interface types here: Alexa Skill Interfaces.
Monetization
Amazon Pay
Learn how to sell physical goods and services in your Alexa Skills using Amazon Pay and Jovo. Find out more here: Amazon Pay Docs.
In-Skill-Purchasing (ISP)
Learn how to sell digital goods in your Alexa Skills using Alexa In-Skill Purchases (ISPs). Find out more here: Alexa ISP Docs.
Progressive Responses
For responses that require long processing times, you can use progressive responses to tell your users that you are currently working on fulfilling their request.
Here is the official reference by Amazon: Send the User a Progressive Response.
// @language=javascript

this.$alexaSkill.progressiveResponse(speech);

// Example
this.$alexaSkill.progressiveResponse('Processing')
    .then(() => this.$alexaSkill.progressiveResponse('Still processing'));
await dummyApiCall(2000);

this.tell('Text after API call');

// @language=typescript

this.$alexaSkill!.progressiveResponse(speech: string);

// Example
this.$alexaSkill!.progressiveResponse('Processing')
    .then(() => this.$alexaSkill!.progressiveResponse('Still processing'));
await dummyApiCall(2000);

this.tell('Text after API call');
Find an example file here:
appProgressiveResponse.js.