generator-react-firebase
Yeoman generator for starting projects using React and Firebase (Redux optional)


Installation
Install Yeoman and generator-react-firebase using npm (we assume you have pre-installed node.js):
npm install -g yo generator-react-firebaseBefore Starting
- Do the following in the Firebase Console:
- Create both a Firestore Database and Real Time Database within your project
- Enable Google and/or Email Sign In Methods in the Authentication tab (required to enable login/signup within your application)
- Confirm billing is enabled for your project
- Make sure to have Node ^12 installed and selected - this is to match the
enginessetting infunctions/package.jsonwhich defines the function runtime node version (more in the FAQ section) - Make sure you have
firebase-toolsinstalled an you are logged in (firebase login) - Confirm Firebase Hosting API is enabled for your project
Getting Started
-
Create a project folder and enter it:
mkdir myProject && cd myProject -
Generate project:
yo react-firebase(project will be named after current folder) -
Start application:
npm startoryarn startProject will default to being named with the name of the folder that it is generated within (in this case
myProject)
Note: To skip installing dependencies during generation pass the skip install flag (i.e. --skip-install)
Whats Next
- Deploy your application either manually through firebase-tools or by setting up CI Deployment
- Enable APIs for features which were opted into:
- Checkout and understand
.env.local. This was generated for you for your local development environment, but is is ignored from git tracking (within.gitignore). You can have different settings within this file based on environment or if multiple developers are running the same code. - Tryout the Sub Generators to add new features such as routes, components, and Cloud Functions to your project quickly
Features
- React + React Dom
^16.13.0(has hooks) - Material-UI application styling including Navbar
- Full Authentication with validation (through Email, Google or Github)
- Async route loading (using
React.lazyandReact.Suspense) - Route protection (only view certain pages when logged in)
- Firebase Functions Setup with function splitting for faster cold-starts (including support within function sub-generator)
- Automatic Build/Deploy config for multiple CI Providers including:
- Github Actions
- Gitlab (uses pipelines)
- Travis
- Component Testing With Jest
- UI Testing with Cypress
- Dependabot settings for automatic PRs for dependency version updates
- Account Management Page
Uses
- react - Rendering + Components
- react-router - Routing (including async route loading)
- material-ui - Google Material Styling React Components
-
eslint - Linting (also implements
prettier) - react-hook-form - Form input validation + state
- react-scripts - Build + Dev tooling from create-react-app
When opting out of redux (default)
When opting into redux
- redux - Client Side state
- react-redux-firebase - Easily Persist results of Firebase queries to redux state
- redux-auth-wrapper - Easily create HOCs for route/component protection based on auth state
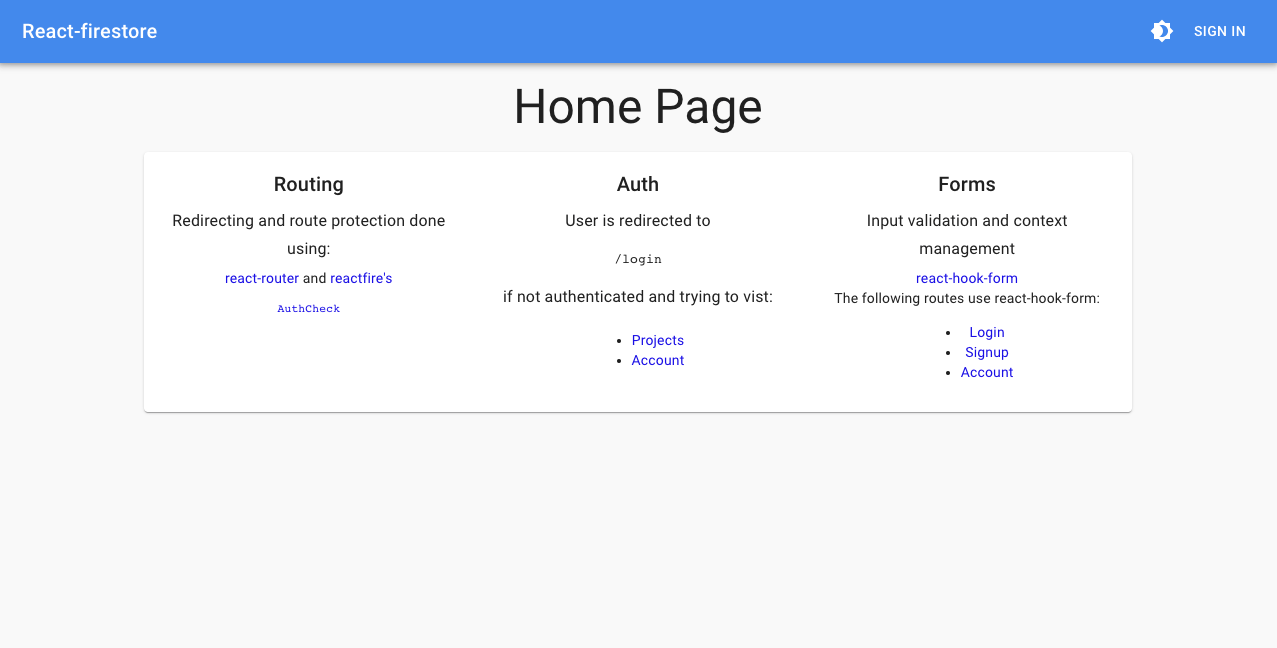
Screenshots

Sub generators
Sub generators are included to help speed up the application building process. You can run a sub-generator by calling yo react-firebase:<name of sub-generator> <param1>.
Example: To call the component sub-generator with "SomeThing" as the first parameter write: yo react-firebase:component SomeThing
Path Argument
Another argument can be passed to sub generators (unless otherwise noted) to provide the base path in which you would like to run the generator (starts from src). For example: yo react-firebase:component Car routes/Project runs the component generator within the Project route folder meaning that the component will be added to routes/Project/components instead of the top level src/components folder.
Function
Generates a Cloud Function allowing the user to specify trigger type (from HTTPS, Firestore, RTDB, Auth, or Storage)
A component is best for things that will be reused in multiple places. Our example
command
yo react-firebase:function uppercaser
result
/functions
--/uppercaser
----uppercaser.spec.js
----index.js
/functions/uppercaser/index.js:
import * as functions from "firebase-functions";
import * as admin from "firebase-admin";
import { to } from "utils/async";

const eventName = "uppercaser";

/**
 * @param {functions.Change} change - Function change interface containing state objects
 * @param {functions.EventContext} context - Function event context
 * @return {Promise}
 */
async function uppercaserEvent(change, context) {
  const { params, auth, timestamp } = context;
  const { before, after } = change;

  console.log("<%= camelName %> <%= eventType %> event:", {
    before: before.val(),
    after: after.val(),
    uid: auth?.uid,
    params,
    timestamp,
  });

  // End function execution by returning
  return null;
}

/**
 * Event handler that fires every time data is updated in Firebase Realtime Database.
 *
 * Trigger: `RTDB - onUpdate - '/uppercaser/{pushId}'`
 * @name uppercaser
 * @type {functions.CloudFunction}
 * @public
 */
export default functions.database
  .ref(`/${eventName}/{pushId}`)
  .onUpdate(uppercaserEvent);
Note: This sub-generator does not support the Path Argument (functions are automatically placed within the folder indicated within functions.source of firebase.json, otherwise functions).
Component
Generates a React component along with an option matching style file (either Javascript or SCSS) and places it within /components.
A component is best for things that will be reused in multiple places. Our example
command
yo react-firebase:component Car
result
/app
--/components
----/Car
------index.js
------Car.enhancer.js // optional
------Car.styles.js // optional (Localized MUI Styling)
------Car.js
------Car.scss // option (SCSS File)
/app/components/Car.js:
import React from "react";
import PropTypes from "prop-types";
import { makeStyles } from "@material-ui/core/styles";
import styles from "./Car.styles";

const useStyles = makeStyles(styles);

function Car({ car }) {
  const classes = useStyles();

  return (
    <div className={classes.container}>
      <span>Car Component</span>
      <pre>{JSON.stringify(car, null, 2)}</pre>
    </div>
  );
}

export default Car;
NOTE: Option to use Javascript file for styles is only offered if @material-ui/core is included in package.json
Form
Generates a Redux Form wrapped React component along with a matching scss file and places it within /components.
command
yo react-firebase:form Car
or
yo react-firebase:form CarForm
result
/app
--/components
----/CarForm
------index.js
------CarForm.enhancer.js
------CarForm.js
------CarForm.styles.js
/app/components/CarForm.js:
import React from "react";
import PropTypes from "prop-types";
import { makeStyles } from "@material-ui/core/styles";
import styles from "./CarForm.styles";

const useStyles = makeStyles(styles);

function CarForm({ onSubmit }) {
  const classes = useStyles();
  const {
    register,
    handleSubmit,
    errors,
    formState: { isSubmitting, isValid },
  } = useForm({
    mode: "onChange",
    nativeValidation: false,
  });

  return (
    <form className={classes.root} onSubmit={handleSubmit(onSubmit)}>
      <TextField
        error={!!errors.name}
        helperText={errors.name && "Name is required"}
        name="name"
        label="Name"
        inputRef={register({
          required: true,
        })}
        margin="normal"
        fullWidth
      />
      <Button
        type="submit"
        color="primary"
        className={classes.submit}
        disabled={isSubmitting || !isValid}
      >
        {isSubmitting ? "Saving..." : "Save"}
      </Button>
    </form>
  );
}

CarForm.propTypes = {
  onSubmit: PropTypes.func.isRequired,
};

export default CarForm;
Hook
Generates a custom react hook for a react component. The hook is in it's own file
command
yo react-firebase:hook ProjectTile
result
/app
--/components
----/Project
------index.js
------Project.hook.js
With a file that looks like:
export default function useProjectTile() {
  // Hook logic
}
Route
Generates a React component along with a matching component (which has an scss file, an enhancer, and its own index file).
command
yo react-firebase:route Project
result
/app
--/routes
----/Project
------index.js
------components
--------ProjectPage
----------index.js
----------Project.js
----------Project.styles.js
Module
Generates a React component along with a matching component (which has an scss file, an enhancer, and its own index file).
command
yo react-firebase:module notification
result
/app
--/modules
----/notification
------components
------actions.js
------actionTypes.js
------index.js
------reducer.js
Note: This sub-generator does not support the Path Argument (functions are already placed within a folder matching their name).
Enhancer
Generates an enhancer for a react component. Also includes an index file that wraps the component in the enhancer.
command
yo react-firebase:enhancer Project
result
/app
--/components
----/Project
------index.js
Generated Project
Project outputted from generator has a README explaining the full structure and details specific to settings you choose. This includes everything from running your code to deploying it. Some of the key pieces of that information are included below:
Testing
Component Tests
To add a unit test, create a .spec.js or .test.js file anywhere inside of src. Jest will automatically find these files and generate snapshots to the __snapshots folder.
UI Tests
Cypress is used to write and run UI tests which live in the cypress folder. The following npm scripts can be used to run tests:
* Run using Cypress run: `npm run test:ui`
* Open Test Runner UI (`cypress open`): `npm run test:ui:open`
Deployment
Build code before deployment by running npm run build. There are multiple options below for types of deployment, if you are unsure, checkout the Firebase section.
- Install Firebase Command Line Tool:
npm i -g firebase-tools
CI Deploy
Note: Config for this is located within
firebase-ci has been added to simplify the CI deployment process. All that is required is providing authentication with Firebase:
- Login:
firebase login:cito generate an authentication token (will be used to give Travis-CI rights to deploy on your behalf) - Set
FIREBASE_TOKENenvironment variable within Travis-CI environment - Run a build on CI
If you would like to deploy to different Firebase instances for different branches (i.e. prod), change ci settings within .firebaserc.
For more options on CI settings checkout the firebase-ci docs
Manual Deploy
- Run
firebase login - Initialize project with
firebase initthen answer:- What file should be used for Database Rules? ->
database.rules.json - What do you want to use as your public directory? ->
build - Configure as a single-page app (rewrite all urls to /index.html)? ->
Yes - What Firebase project do you want to associate as default? -> your Firebase project name
- What file should be used for Database Rules? ->
- Build Project:
npm run build - Confirm Firebase config by running locally:
firebase serve - Deploy to Firebase (everything including Hosting and Functions):
firebase deploy
NOTE: You can use firebase serve to test how your application will work when deployed to Firebase, but make sure you run npm run build first.
Examples
Complete examples of generator output available in Examples
-
react-firebase-redux example -
reduxand Firebase Real Time Database -
redux-firestore -
reduxand Firestore - react-firebase example - Firebase Real Time Database
For full projects built out using this as a starting place, check the next section.
Projects Started Using This
- fireadmin.io - Application for Managing Firebase Applications. Includes support for multiple environments and data migrations.
- devshare.io - Codesharing site based on Firebase's Firepad and Realtime Database
- A number of projects at Reside
- react-redux-firebase material example - Shows usage of react-redux-firebase with material-ui
- react-redux-firebase firestore example - Shows usage of react-redux-firebase with firestore
open an issue or reach out over gitter if you would like your project to be included
FAQ
- Why use
.jsxextension for React component files? What if I want to use.jsinstead?
.jsx is used to clearly identify files which are using React JSX, which is non-standard javascript functionality. Some eslint configurations, such as Airbnb, have this as a rule (here is an issue that discusses why).
If you would still like to use .js instead, you can switch the extension of all .jsx files to .js using the following command:
for f in src/**/*.jsx; do
  mv -- "$f" "${f%.jsx}.js"
done- Why node
12instead of a newer version?
It is the newest node supported by the Cloud Functions runtime, which is why that is what is used for the suggested build version as well as the version used when building within CI.
- Why camel-cased environment variables instead of full capital letters (i.e.
process.env.REACT_APP_FIREBASE_projectIdinstead ofprocess.env.REACT_APP_FIREBASE_PROJECT_ID)
In CI the settings for you app are loaded dynamically through firebase-tools when using the apps:sdkconfig command, the values that are returned use camel-casing. Instead of making things more unclear by changing the case of these variables, they are left matching what the Firebase JS SDK is expecting. This pattern is also used in the .env.local file.
-
How do I deploy my application? The README of your generated project specifies deployment instructions based on your choices while generating. For an example, checkout any of the
README.mdfiles at the root of projects in the examples folder including this one. -
How do I add a route?
- Use the route sub-generator to add the route:
yo react-firebase:route MyRoute - Add a
pathof the new route toconstants/paths(i.e.MYROUTE_PATH) - Add the route to the list of routes in
src/routes/index.js
- Use the route sub-generator to add the route:
-
Where are the settings for changing how my project deploys through Continuous integration?
Within
.firebasercunder thecisection. These settings are loaded by firebase-ci -
Why are there
__snapshots__folders everywhere when opting into Jest?Jest just recently added support for adding your own snapshot resolver that allows you to place the
__snapshots__folder at the top level (logic included inscripts/snapshotResolver.js). Since feature is still in alpha, it is not yet included with this generator. While testing supporting a top level__snapshots__folder, there were a number of issues, but the provided resolver did work as expected in some cases.I got it working by:
- Ejecting result of generator (
yarn eject) - Installing beta version of Jest that is at least
24.0.0-alpha.6-yarn add jest@beta --dev - Adding a snapshot resolver to place snapshots where you want as
scripts/snapshotResolver.js - Referencing the snapshot resolver reference within
package.json(which should contain jest config after ejecting):"snapshotResolver": "<rootDir>/scripts/snapshotResolver.js"
- Ejecting result of generator (
-
How do I move/rename the
cypressfolder to something more general? If you wanted to move thecypressfolder intotest/uifor instance, you could modify yourcypress.jsonfile to match the following:cypress.json
{ "chromeWebSecurity": false, "fixturesFolder": "test/ui/fixtures", "integrationFolder": "test/ui/integration", "pluginsFile": "test/ui/plugins/index.js", "screenshotsFolder": "test/ui/screenshots", "videosFolder": "test/ui/videos", "supportFile": "test/ui/support/index.js" } -
Some of my answers were saved, how did that happen? Why?
Yeoman has the
storeoption, which uses the Yeoman Storage API to store answers to questions within within a.yo-rc.json. This allows you to rerun the generator in the future to recieve updates without having to remember the answers you used or re-lookup them up.This also shows you how examples were done by answering the generator questions.
-
How can I extend the build settings of my app after generating?
There are two options:
- Use
npm run ejectoryarn ejectto eject from react-scripts (this cannot be undone) - Use
customize-craandreact-app-rewiredto modify settings without ejecting (for more see the question about not ejecting)
- Use
-
How do I extend the webpack/babel config without ejecting?
-
Install
customize-craandreact-app-rewired:npm i --save-dev customize-cra react-app-rewired
-
Add the following to the
scriptssection of yourpackage.jsonfile:"start": "react-app-rewired start", "build": "react-app-rewired build", "eject": "react-app-rewired eject", "test": "react-app-rewired test"
-
Add
config-overrides.jsthat looks like so (any utils can be used inoverride):const utils = require("customize-cra"); module.exports = utils.override( utils.disableEsLint(), utils.useBabelRc() );
-
-
What happened to the
scssfrom before? What if I want to do the same setup?It was removed in favor of Javascript styling through
*.styles.jsfiles. It is common to use Javascript styles with material-ui, so following this pattern allows mirrors their examples/docs.If you want to do the same setup as before, make sure you reference the scss files correctly (now that the build config is through
react-scripts). For example if you want to importstyles/_base.scssmake sure you switch your imports like the following:- @import 'base'; + @import 'styles/_base.scss';
In the future
- Airbnb linting option (currently only
standard) - Option to use simple file structure instead of fractal pattern
- Open to ideas
License
MIT © Prescott Prue