Enterprise Angular Yeoman Generator
- Enterprise Angular Yeoman Generator
This generator is opinionated. It sums up the current state of my understanding of AngularJS best practices and patterns in an enterprise level project.
These opinions of mine cover various aspects like –but not limited to:
- Directory layout
- Naming conventions
- Grunt over Gulp, Less over SASS
- When to use a service or a factory
- The minimum usually required Bower packages
- How to separate a development workflow from a production build
- Unit testing
I like it, It works pretty fine for me. Here's hoping it'll work for someone else, too.
Also, I'll keep on updating it as long as I keep working with Angular. So, if you feel like contributing or even discussing with me about improvements or why I'm wrong in your opinion, be my guest.
Prerequisites
In order to use the generated AngularJS application, you'll need Grunt and Bower.
npm install -g bower grunt-cliInstall
This is a Yeoman generator, so installing it is a matter of having Yeoman installed:
npm install -g yoThen install the generator itself:
npm install -g generator-angular-trumbittaUse the generator
Again, just like every other Yeoman generator, you use it like this:
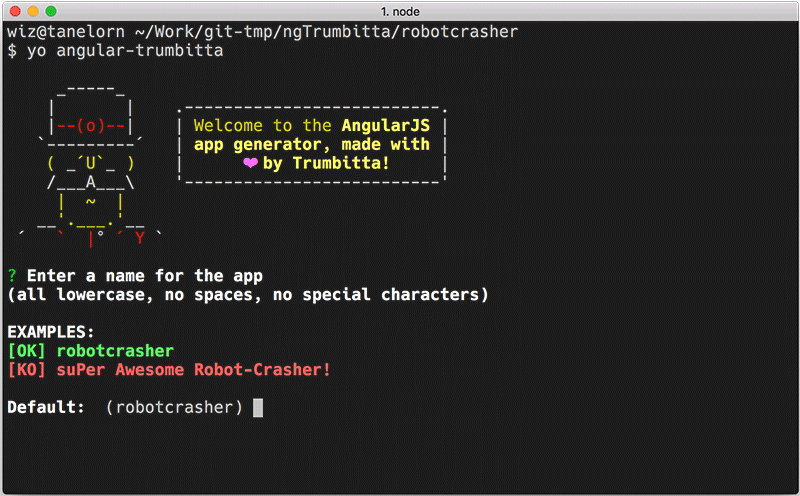
mkdir <yourappname> && cd <yourappname>yo angular-trumbittaYou'll be asked some questions:
- A name for your app (all lowercase, no spaces, no special characters)
Examples:
[OK] robotcrasher
[KO] suPer Awesome Robot-Crasher! - A description (try to be meaningful, while using less than 10-15 words)
Examples:
[OK] A robot crashing app with Spaceship integrations
[OK] A robot crashing app
[KO] app - Your full name (e.g. John Smith)
- Your email address
The generator will then proceed to run npm install and bower install for you. If either command fails, just try running it by yourself.
This step could take a while, depending on your connection speed, because involves downloading a couple heavyweight packages. Notable offenders are PhantomJS and Bootstrap.
The good news is that you're going to need this done the first time only.
When it's done, launch your newly created angular application to make sure everything worked out as expected:
grunt serveThen point your browser at http://localhost:9100 just to be greeted by the underwhelming Hello world default page.
Hit ctrl c if you want to stop it.
Sub-generators
resourceFactory
A resource factory is a factory whose only purpose is to let you access a REST entry point / URL.
Go where you want the new resource factory to be created, then:
$ yo angular-trumbitta:resourceFactory myFactoryName
The factory name argument is optional. If it's not supplied, Yeoman will ask you for it.
directive
The generator wants you to write a thin directive, but it really works for anything else.
Go where you want the new directive to be created, then:
$ yo angular-trumbitta:directive myDirectiveName
The directive name argument is optional. If it's not supplied, Yeoman will ask you for it.
Use the generated application
TL;DR
grunt serve- Hack away while grunt watches for changes together with LiveReload
grunt dist(Orgrunt dist-packageto create a packaged build intmp/build) when you are ready to deploy
Or, you could keep on reading and get some useful insights on how this whole thing actually works.
Directory layout
A freshly created app will sport this directory layout:
.
├── .bowerrc
├── .editorconfig
├── .jscsrc
├── .jshintignore
├── .jshintrc
├── .npmignore
├── Gruntfile.js
├── README.md
├── app
│   ├── app.module.js
│   ├── app.routes.js
│   ├── components
│   │   └── home
│   │       ├── home.controller.js
│   │       ├── home.controller.spec.js
│   │       └── home.template.html
│   └── shared
│       └── config
│           ├── dev.config.json
│           ├── dist.config.json
│           └── karma.config.js
├── assets
│   ├── images
│   │   └── README.md
│   ├── js
│   │   └── README.md
│   └── less
│       ├── app-custom.less
│       └── bootstrap
│           └── overrides
│               ├── README.md
│               └── variables.less
├── bower.json
├── dist
│   └── docs
├── index.html
└── package.json
Notable entries
- Linting / coding style support with JSHint, JSCS, and EditorConfig config files
- Source files for your app resides inside
app. There you can find two main files,app.module.jsandapp.routes.js, and two main directories:componentsandshared.app.module.jsis for the main app module (you don't say), and for any run or config block you may need.app.routes.jsis where you configureui.routerroutes, interceptors, and so oncomponentsis the directory where you put source files of things that can be organized in logical blocks a.k.a. components. One sample block,home, comes with the generator and as you can see it contains every part of thehomecomponent: a controller, a controller spec file for unit testing, and a template.sharedis where you put source files of things you plan to reuse on application-wide basis. Some custom directives, filters, general purpose services (e.g. a pagination service) usually reside here.
Inshared/config, besides the configuration file for the Karma test runner, you'll find two configuration files for your app.
assetscontains assets like images and Less files. Customize your Bootstrap build by editingassets/less/bootstrap/overrides, organize your custom Less classes and imports usingassets/less/app-custom.lessas a starting point.
Development
The generated app is ready for TDD. Here's a typical development cycle:
grunt serve- (If working on feature requiring JS code) Create / edit a spec file, the watcher launches the test suite, sends a LiveReload message, then keeps watching for modifications
- Create / edit a JS / Less / HTML template file, the watcher does its thing again
- Repeat 2. and 3. ad libitum
ctrl cto stop the {watch|serv}er
Caveat: the watcher doesn't react to newly created files, meaning you'll have to manually stop and restart the cycle for it to start watching over new files.
Naming conventions
The Gruntfile and Karma config expect you to follow some naming conventions.
Files
xyz.controller.jsfor controllersxyz.factory.jsfor factoriesxyz.service.jsfor services- and so on for filters, directives, interceptors, etc
xyz.{controller|factory|service|filter|...}.spec.jsfor spec filesxyz.template.htmlfor templates
Example: a component
app
└── components
    └── home
        ├── home.controller.js
        ├── home.controller.spec.js
        └── home.template.html
Example: a custom directive
app
└── shared
    └── directives
        └── my-custom-directive
            ├── my-custom-directive.directive.js
            ├── my-custom-directive.directive.spec.js
            └── my-custom-directive.directive.template.html
Modules
Every controller, factory, etc. should be kept into its own module. Such module should:
- Start with
app - Continue with a proper plural group (e.g.
controllers,filters,services, and so on) - Be all lowercase
Example: a controller
angular ;Example: a service
angular ;Modules can be then injected as needed.
Example: a controller depending on a service
angular ;Everything except directives
Be clear, not concise. Use the type of Angular thing in the thing's name (but not in the thing's module name).
someController,app.controllers.someoneSpecialService,app.services.onespecialheyLookAThreeHeadedFactory,app.factories.heylookathreeheaded- ...
Directives
Directives are, IIRC, the only Angular thing without their type in their name.
Example: myCrazyProgressBar, app.directives.mycrazyprogressbar
Adding new libraries
Third-party libraries / packages / modules are supposed to come from Bower or npm. I didn't need anything else so far.
Adding a Bower component
ctrl cto stop the {serve|watch}erbower install --save <the-component>or editbower.jsonto install the componentgrunt serveto restart the {serve|watch}er
Wiredep will perform its magic and update index.html for you, adding proper pointers to the new .js and / or .css files.
Adding a node package
ctrl cto stop the {serve|watch}ernpm install --save <the-package>or editpackage.jsonto install the component- Edit
index.htmlto manually add proper pointers to the new files, but stay away from the Wiredep and Usemin blocks. They are marked by comments like these:
<!-- build:css(.) styles/vendor.css --><!-- bower:css -->grunt serveto restart the {serve|watch}er
BTW, I consider a best practice to use Bower for libraries needed by the application you are developing, and npm for libraries needed by Grunt or any other infrastructural tool you might want to use.
i18n
The generated app has a good enough support for your i18n needs, by using the way more than good enough angular-gettext.
How it works
Look at this code snippet from app.module.js:
var lang = navigatorlanguages ? navigatorlanguages0 : navigatorlanguage || navigatoruserLanguage;lang = lang; gettextCatalog;gettextCatalog;//// Useful for debugging://// gettextCatalog.debug = true;// gettextCatalog.showTranslatedMarkers = true;The lang variable gets its value from the current language of your browser (usally found under settings / content or something like that), and it's a two-characters language code (e.g. en for English, it for Italian).
That is then used to configure the gettextCatalog and make it load the right JSON file containing all your translated strings.
How to create to-be-translated strings
First you have to mark some strings so that angular-gettext will be able to recognize, extract, and put them inside gettext files.
The best way to learn how to do this, is to read about it in the official docs for angular-gettext.
Once you have some strings marked, stop the {watch|serv}er and launch grunt nggettext_extract to extract the strings from your code and populate –or update– the gettext files in the po directory.
How to translate strings
Then it becomes a matter of working with gettext. What I do is:
- Extract the strings as explained above Open the amazing Poedit
- If it's the first time I'm translating a given application in a given language:
- Choose
Create a new translation - Choose the
po/template.potgettext catalog - Choose the language (e.g. English)
- Translate away and save inside
powith the suggested filename (which is that two-characters code we saw above in How it works)
- If I'm adding strings to a translation I already have:
- Choose
Edit a translation - Choose the
po/<two-characters code>.pofile you want to edit (leave the.moones alone) - This is important: choose Catalog / Update from POT File... from the application menu
- Choose the
po/template.potcatalog file - Translate away and save over the existing
.pofile
- Choose
This will take care of the gettext part.
How to import translated strings back into the Angular app
You'll now have to import back the updated gettext files inside your app.
Well, there's a Grunt task for that: grunt nggettext_compile.
But even better, you don't really have to manually execute it, because both grunt serve (you already know about it) and grunt dist / grunt dist-package (keep on reading for these two, or jump to Production) take care of it.
Just go on as usual –for example with a grunt serve.
nggettext_compile will also be executed, JSON files will be created or updated, and the application will load them at the next manual page refresh (LiveReload doesn't apply here).
Documenting
ngDoc is a recent addition. TODO description.
Testing
As you may already know if you read about naming conventions up there, spec files should be created beside the source file they are related to.
Example: spec file for a controller
app
└── components
    └── home
        ├── home.controller.js
        ├── home.controller.spec.js
Unit tests get executed by the watcher whenever needed. There's also a grunt test task, just in case.
You'll find a test coverage report in tmp/coverage.
Production
Once you are ready for a deploy or a release, it's time to build a dist.
- Check the dist version of your app's configuration in
app/shared/config/dist.config.json - Launch
grunt dist
Then copy the generated –or updated– dist directory and use it as you most like.
Or run grunt dist-package to create a packaged build in tmp/build.
Grunt tasks
Here's a list of the most useful grunt tasks at your disposal. The omitted ones are internal and helper tasks that you are not supposed to ever need using.
| Task | What it's for |
|---|---|
serve |
Builds and serves the development version of the app on port 9001, and watches for changes in the source files |
dist |
Builds the production version of the app |
dist-package |
Creates a packaged build in tmp/build |
nggettext_extract |
Extracts the i18n strings you chose by annotating source files, and saves them into gettext files ready to be translated |
test |
Executes unit tests |
Configuration
TO BE EXPANDED – help wanted
dev.config.json is used in development (e.g. grunt serve), while dist.config.json is used in production (e.g. grunt dist and grunt dist-package).
They are but stubs, samples. You are free to organize and expand on them as you wish. Their contents will be available wherever you inject app.config and pass the ENV service.
Example: var myRESTBackend = ENV.BACKEND.URL.FULL;
Compatible packages
I started to open source some packages I, for one, find useful in my work.
They are a small but growing bunch of services, directives, etc, following the same opinionated practices and conventions you were so kind and patient to read about in this very guide.
Known issues
None at this moment.
License
MIT – see license file.