ng-admin 
Forked from marmelab/ng-admin

Plug me to your RESTFul API to get a complete administration interface (datagrid, filters, complex form widgets, multi-model relationships, dashboard) in no time! Beyond simple CRUD, ng-admin lets you build sophisticated GUIs without getting in your way.
Installation
The current ng-admin version (master) depends on Angular.js 1.6. If you need compatibility with Angular 1.3, use ng-admin 0.9.
Grab ng-admin from your favorite package manager:
npm install ng-admin --save# or yarn add ng-adminWith a Module Bundler
ng-admin is fully compatible with Webpack, and should also be compatible with all
available major module bundlers. If you use one of them, you just have to add this line:
const myApp = angular;
Important note: as we include HTML templates using require to prevent the AJAX
request implied by templateUrl, you will need to configure your module bundler
to deal with HTML. It can be accomplished with Webpack using the HTML loader:
moduleexports =// ...module:loaders:// ...test: /\.html$/ loader: 'html';
If your module bundler also supports SASS or CSS, you can also include stylesheets using:
// SASS version;// CSS version;
Using a module bundler, you would also be able to generate the source map for all your JavaScript and stylesheets, helping you to hunt even the most obscure bugs.
Without a Module Bundler
If you don't have a module bundler, don't worry: you can still include ng-admin with a <script> tag:
Bootstrapping your Admin
Add the ng-admin.min.css and ng-admin.min.js to the HTML, add a <div ui-view="ng-admin">, and configure the admin:
My First Admin
Getting Started
See the Getting Started dedicated chapter for a step-by-step tutorial aimed at beginners.
Usage Examples
- You can find a simple configuration in the blog admin demo, where the entities are posts, comments, and tags. The remote REST API is simulated in the browser, using FakeRest.
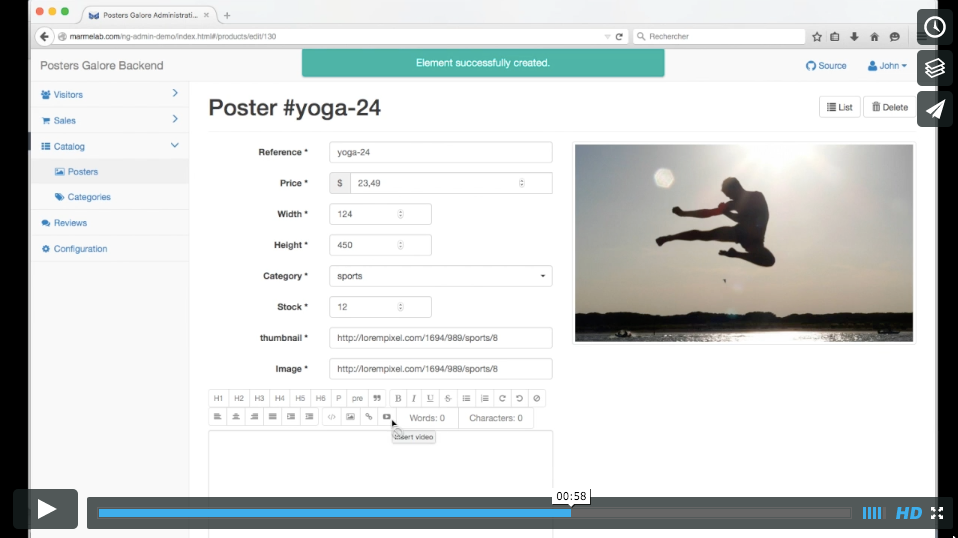
- The Posters Galore demo (source) is a more complete example of an e-commerce administration, with custom authentication, pages, directives and modules, all well organized via WebPack. The remote REST API is also simulated in the browser, using FakeRest.
Configuration Reference
An administration in ng-admin is made of one application containing several entities. Each entity has up to 5 views, and each view has many fields.
application
 |-header
 |-menu
 |-dashboard
 |-entity[]
    |-creationView
    |-editionView
    |-deletionView
    |-showView
    |-listView
        |-field[]
           |-name
           |-type
See Configuration API Reference dedicated chapter for more details.
Tip: You won't find the related classes in the ng-admin project. In fact, the admin configuration API exists as a standalone, framework-agnostic library, called admin-config. Don't hesitate to browse the source of that library to learn more.
Relationships
Ng-admin supports relationships between entities in read and write views, and provides specialized field types for that: reference, referenced_list, reference_many, and embedded_list. The Relationships Reference chapter describes in more details which field type to use for which case.
Also, the Fields section of the Configuration API Reference chapter has a list of all settings for each of these field types.
Menu Configuration
By default, ng-admin creates a sidebar menu with one entry per entity. If you want to customize this sidebar (labels, icons, order, adding submenus, etc), you have to define menus manually.
See Menus Configuration dedicated chapter.
Dashboard Configuration
The home page of a ng-admin application is called the Dashboard. Use it to show important pieces of information to the end user, such as latest entries, or charts.
See Dashboard Configuration dedicated chapter.
Customizing the API Mapping
All HTTP requests made by ng-admin to your REST API are carried out by Restangular, which is like $resource on steroids.
The REST specification doesn't provide enough detail to cover all requirements of an administration GUI. ng-admin makes some assumptions about how your API is designed. All of these assumptions can be overridden by way of Restangular's request and response interceptors.
That means you don't need to adapt your API to ng-admin; ng-admin can adapt to any REST API, thanks to the flexibility of Restangular.
See the Customizing the API Mapping dedicated chapter.
Theming
You can override pretty much all the HTML generated by ng-admin, at different levels.
See the Theming dedicated chapter.
Translation
The ng-admin interface uses English as the default language, but supports switching to another language, thanks to angular-translate.
See the Translation dedicated chapter.
Adding Custom Pages
For each entity, ng-admin creates the necessary pages for Creating, Retrieving, Updating, and Deleting (CRUD) this entity. When you need to achieve more specific actions on an entity, you have to add a custom page - for instance a page asking for an email address to send a message to. How can you route to a specific page and display it in the ng-admin layout?
See the Adding Custom Pages dedicated chapter.
Adding Custom Types
When you map a field between a REST API response and ng-admin, you give it a type. This type determines how the data is displayed and edited. It is very easy to customize existing ng-admin types and add new ones.
See the Adding Custom Types dedicated chapter.
Getting Ready For Production
To build the ng-admin source with the dependencies you need, and to get hints about performance boosters, head to the Getting Ready For Production dedicated chapter.
News
Follow the marmelab blog for news about ng-admin (tutorials, plugins, new releases, etc).
You should also watch the ng-admin release page on GitHub for announcements on new releases, and complete changelog.
Support
Ng-admin is an open-source project, with a community getting larger every day. You will get help by asking politely in any the following channels:
Please give as much context as possible, including and admin configuration snippet, and the response from the API you're mapping.
Looking For a Material UI / React.js version?
marmelab/admin-on-rest, by the same team, uses a different architecture but provides a similar service: an admin GUI for REST APIs, this time with React.js, Redux, react-router, and material UI.
Contributing
Your feedback about the usage of ng-admin in your specific context is valuable, don't hesitate to open GitHub Issues for any problem or question you may have.
All contributions are welcome: please send us a Pull Request for any new feature / bug fix in your fork that you consider worth giving back.
Also, if you have some experience with ng-admin, please answer questions from newcomers in any of the support channels (see above).
Installing Dependencies
Install npm dependencies (for tests) by calling the install target:
make installRunning the example app
To test your changes, run the example app, which is bundled with a sample REST api, by calling:
make runThen, connect to http://localhost:8000/ to browse the admin app. This task uses webpack-dev-server, which means that the browser will reload the page as soon as one file in the source is updated. This makes the blog app our preferred live testing environment.
Testing
ng-admin has unit tests (powered by karma) and end to end tests (powered by protractor). Launch the entire tests suite by calling:
make testTip: If you are working on Karma tests, you can prevent from relaunching the whole process by disabling single-run:
./node_modules/.bin/karma start src/javascripts/test/karma.conf.js
Releasing
Before releasing a new version, concatenate and minify the JS and CSS sources into minified scripts with:
make buildgit add buildgit commit -m 'update built files'git push origin mastergit tag vx.x.x# create a new tag git push origin --tags# publish to npm npm publishTip: Don't commit built files in Pull Requests, it forces rebases on other PRs. The core team will take care of regularly updating these built files.
License
ng-admin is licensed under the MIT Licence, and sponsored by marmelab.