Create Gatsby Web 


Bootstrap a Gatsby Web with pre configured development utilities, SEO optimized, ready support for CI/CD pipeline and CMS.
- Creating a Gatsby Web – How to create a new Gatsby web.
- Connecting CI/CD - How to get CI/CD up and running.
- Setup CMS webhook - How to set webhook from CMS to CircleCI pipeline.
Create Gatsby Web works on macOS, Windows, and Linux.
If something doesn’t work, please file an issue.
If you have questions or need help, please email me at hoangtri241097@gmail.com.
Quick Overview
npx create-gatsby-web
cd <your-project-name>
npm run develop/ yarn develop
If you've previously installed create-gatsby-web globally via npm install -g create-gatsby-web, we recommend you uninstall the package using npm uninstall -g create-gatsby-web to ensure that npx always uses the latest version.
(npx comes with npm 5.2+ and higher, see instructions for older npm versions)
Your site is now running at http://localhost:8000!
Note: You'll also see a second link: http://localhost:8000/___graphql. This is a tool you can use to experiment with querying your data. Learn more about using this tool in the Gatsby tutorial.
When you’re ready to deploy to production, create a minified bundle with npm run build/ yarn build.
Get Started Immediately
You don’t need to install or configure tools.
They are preconfigured so that you can focus on the code. However, all configuration files are exposed so you can customize them whenever you need.
Create a project, and you’re good to go!
CI/CD pipeline support out-of-the-box
You just need to sign up for services, get access tokens and connect your services and the rest is handle my create-gatsby-web
Integrated with scripts to provide real develop-staging-production experience.
Learn more here
CMS support
Pre built webhooks support for CMS, you can configure your CMS to call to CircleCI webhooks. CircleCI is already pre configured run CI/CD job if being call by this webhook.
No more broken deployment if client makes a mistake!
Learn more here
Creating a Gatsby Web
You’ll need to have Node 10 or later version on your local development machine (but it’s not required on the server). You can use nvm (macOS/Linux) or nvm-windows to switch Node versions between different projects.
To create a new web, you may choose one of the following methods:
npx
npx create-gatsby-web(npx is a package runner tool that comes with npm 5.2+ and higher, see instructions for older npm versions)
It will generate the the initial project structure inside the current folder.
Template structure
├── .circleci
│   └── config.yml
├── .storybook
│   ├── addons.js
│   ├── config.js
│   └── webpack.config.js
├── config
│   └── testing
│       ├── setupTests.js
│       └── __ mocks __
│          ├── file-mock.js
│          ├── gatsby.js
│          └── styleMock.js
├── node_modules
├── src
│   ├── images
│   ├── pages
│   │   ├── index.jsx/tsx
│   │   └── your_page
│   │       └── index.jsx/tsx
│   └── components
│       ├── seo
│       │   └── index.jsx/tsx
│       └── < your component >
│           ├── index.jsx/tsx
│           ├── __ stories __
│           │  └── your_component.stories.jsx/tsx
│           └── __ tests __
│              └── your_component.test.jsx/tsx
├── tasks
│   └── deployment
│       ├── gatsby-deploy-end.sh
│       ├── gatsby-deploy-start.sh
│       ├── storybook-deploy-end.sh
│       └── storybook-deploy-start.sh
├── .eslintignore
├── .eslintrc.js
├── .gitignore
├── .huskyrc.json
├── .lintstagedrc.json
├── .lighthouserc.json
├── .prettierignore
├── .prettierrc
├── gatsby-browser.js
├── gatsby-config.js
├── gatsby-node.js
├── gatsby-ssr.js
├── jest-preprocess.js
├── jest.config.js
├── LICENSE
├── loadershim.js
├── README.md
├── package.json
├── tsconfig.json -- only available on typescript template
└── yarn.lock/package-lock.json
-
./circleci: This directory contains CircleCI configuration file. Note that there are 4 type of jobs: preview-staging-release-webhook -
.storybook/: This directory contains all the configuration files for Storybook. -
./config/testing: This directory contains all the MOCK configuration files for Jest testing. -
./node_modules: This directory contains all of the modules of code that your project depends on (npm packages) are automatically installed. -
./src: This directory will contain all of the code related to what you will see on the front-end of your site (what you see in the browser) such as your site header or a page template.srcis a convention for “source code”. -
.eslintignore: This file tells eslint which files it should not track. -
.eslintrc.js: Eslint configuration file. -
.gitignore: This file tells git which files it should not track / not maintain a version history for. -
.huskyrc.json: Husky configuration file. Already setup with a pre git commit hooks. -
.lintstagedrc.json: Lint-staged configuration file. Already setup to auto lint and format code before commit. -
.lighthouserc.json: Lighthouse configuration file. You can adjust passing parameters here. Already configured with optimum parameters. -
.prettierignore: This file tells prettier which files it should not track. -
.prettierrc: This is a configuration file for Prettier. Prettier is a tool to help keep the formatting of your code consistent. -
gatsby-browser.js: This file is where Gatsby expects to find any usage of the Gatsby browser APIs (if any). These allow customization/extension of default Gatsby settings affecting the browser. -
gatsby-config.js: This is the main configuration file for a Gatsby site. This is where you can specify information about your site (metadata) like the site title and description, which Gatsby plugins you’d like to include, etc. (Check out the config docs for more detail). SEO component already preconfigure, only production deployment will get index by Google bots all preview and staging will have noindex meta tag. -
gatsby-node.js: This file is where Gatsby expects to find any usage of the Gatsby Node APIs (if any). These allow customization/extension of default Gatsby settings affecting pieces of the site build process. -
gatsby-ssr.js: This file is where Gatsby expects to find any usage of the Gatsby server-side rendering APIs (if any). These allow customization of default Gatsby settings affecting server-side rendering. Preconfigured to convert stylesheet inline to link, preventing too long head which prevent Facebook, Twitter ... scraping data. -
jest-preprocess.js: This file contains babel options to build gatsby project for Jest testing -
jest.config.js: This file contains all of Jest configurations. -
LICENSE: This boilerplate is licensed under the MIT license. -
loadershim.js: This files contains loader setting for Jest. -
package.json: A manifest file for Node.js projects, which includes things like metadata (the project’s name, author, etc). This manifest is how npm knows which packages to install for your project. -
README.md: A text file containing useful reference information about your project. -
tsconfig.json: This file contains all of typescript configurations for type checking. -
yarn.lock/package-lock.json(Seepackage.jsonbelow, first). This is an automatically generated file based on the exact versions of your npm dependencies that were installed for your project. (You won’t change this file directly).
All configurations are exposed and predefined folder structures, just write codes, no need to config
Once the installation is done, you can start develop right away!
Inside the newly created project, you can run some built-in commands:
npm run develop or yarn develop
Runs the app in development mode.
Your site is now running at http://localhost:8000!
Note: You'll also see a second link: http://localhost:8000/___graphql. This is a tool you can use to experiment with querying your data. Learn more about using this tool in the Gatsby tutorial.
The page will automatically reload if you make changes to the code.
You will see the build errors and lint warnings in the console.
npm run build or yarn build
Builds the app for production to the public folder.
It correctly bundles React in production mode and optimizes the build for the best performance.
The build is minified and the filenames include the hashes.
Your app is ready to be deployed.
npm run storybook or yarn storybook
Runs storybook in development mode.
Storybook live at http://localhost:6006!
npm run test or yarn test
Run all of your test.
npm run test:watch or yarn test:watch
Runs the test watcher in an interactive mode.
User Guide
CLI
Setup CI CD
Video tutorial In-progress
Prerequisites
- Github/CircleCI/Netlify account, we only need free version!
- Github personal access token for CircleCI reporting deployment to Pull Request and Github Deployment, note down the token as
GITHUB_DEPLOYMENTS_TOKEN=<the-token>. - Netlify development personal access token for CircleCI to deploy preview and staging (this one belongs to Dev team Netlify's account). Note down the token as
NETLIFY_ACCESS_TOKEN=<the-token>. This is your staging website. - Netlify production personal access token for CircleCI to deploy production (this one belongs to Client Netlify's account - if you owned the project then development access token is enough). Note down the token as
NETLIFY_CLIENT_ACCESS_TOKEN=<the-token>. This is your production website.
How to
- Upload project to Github's repo, if you want to use CircleCI for free, Github's repo must be public.
- Install LighthouseCI via this LINK, let LighthouseCI access your project repo, note down the TOKEN provided on the authorization confirmation page as
LHCI_GITHUB_APP_TOKEN=<the-TOKEN>. - Run
yarn build/ npm run build, you will get Gatsby built public folder in the root directory. - Run
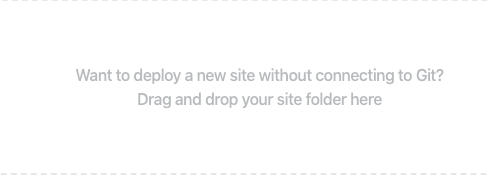
yarn build-storybook/ npm run build-storybook, you will get Storybook built build-storybook folder in the root directory. - Login to Dev team Netlify, upload the public folder via the image below (DO NOT USE new site from GIT), after upload you should get new project deployment in Netlify, click on it and go to site settings, note down the API ID as
NETLIFY_SITE_ID_STAGING=<the-API-ID >. - Still in Dev team Netlify, upload the build-storybook folder via the image below (DO NOT USE new site from GIT), after upload you should get storybook deployment in Netlify, click on it and go to site settings, note down the API ID as
NETLIFY_SITE_ID_STORYBOOK=<the-API-ID >. - Login to Client Netlify, upload the public folder via the image below (DO NOT USE new site from GIT), after upload you should get new project deployment in Netlify, click on it and go to site settings, note down the API ID as
NETLIFY_SITE_ID_RELEASE=<the-API-ID >.
- Login to CircleCI, click on add project -> set up project -> start building -> add manually
- Go back to the main dashboard -> jobs -> click on the setting of your project -> environment variable -> add variable. Then add all the 7 ENV that we just got. After this, you should get something like this:

- Voila! Pat your back because you have done a great job 👏
Setup CMS webhook
Video tutorial In-progress
Prerequisites
- CircleCI personal access token for CMS to call CircleCi webhooks. Note down the token as
CIRCLE-TOKEN=<the-token>. - CMS account, recommended Contentful
- Connection keys from CMS, if you use Contentful, click on settings -> API keys -> Content delivery/preview tokens -> Add API key. Note down as:
CONTENTFUL_SPACE_ID=<the-Space-ID>
CONTENTFUL_ACCESS_TOKEN=<the-Content-Delivery-API-access token>
How to (example with Contentful - similar to other CMS)
- Setup Contentful
- Create a .env in project root directory, put this in the .env file:
CONTENTFUL_SPACE_ID=<the-Space-ID>
CONTENTFUL_ACCESS_TOKEN=<the-Content-Delivery-API-access token>
- Run
yarn add gatsby-source-contentful / npm install --save gatsby-source-contentful - Navigate to gatsby-config, uncomment the block of code:
/***** REMOVE COMMENT TO ENABLE CONTENTFUL CMS
{
	resolve: `gatsby-source-contentful`,
		options: {
			spaceId: process.env.CONTENTFUL_SPACE_ID,
			accessToken: process.env.CONTENTFUL_ACCESS_TOKEN,
		},
	},
******/
- Login to CircleCI, main dashboard -> jobs -> click on the setting of your project -> environment variable -> add variable. Then add your CONTENTFUL_SPACE_ID and CONTENTFUL_ACCESS_TOKEN.
- Setup webhook
Webhook for staging website
- Login to Contentful, settings -> webhooks -> add webhooks
- Details -> name
Trigger CircleCi Build Develop Branch - Details -> URL -> POST ->
https://circleci.com/api/v2/project/github/<org-name-or-your-account-name>/<repo-name>/pipeline - Triggers -> Select specific triggering events -> tick all Publish + Unpublish
- Headers -> add custom header -> Name:
Circle-Token-> Value:<the-token-value> - Content type -> application/json
- Payload -> Customize the webhook payload:
{
  "branch": "develop",
  "parameters": {
    "trigger": false,
    "cms-develop": true
  }
}
- Click save, voila! you got the staging webhook setup. Everytime there is change in contentful, the webhook will trigger CircleCI to run the pipeline and deploy the new content.
Webhook for production website
- Login to Contentful, settings -> webhooks -> add webhooks
- Details -> name
Trigger CircleCi Build Master Branch - Details -> URL -> POST ->
https://circleci.com/api/v2/project/github/<org-name-or-your-account-name>/<repo-name>/pipeline - Triggers -> Select specific triggering events -> tick all Publish + Unpublish
- Headers -> add custom header -> Name:
Circle-Token-> Value:<the-token-value> - Content type -> application/json
- Payload -> Customize the webhook payload:
{
  "branch": "master",
  "parameters": {
    "trigger": false,
    "cms-master": true
  }
}
- Click save, voila! you got the production webhook setup. Everytime there is change in contentful, the webhook will trigger CircleCI to run the pipeline and deploy the new content.
Philosophy
-
All exposed: All configurations are exposed. You have total control of your project settings.
-
No Configuration Required: You don't need to configure anything. A reasonably good configuration of both development and production builds are handled for you, so you can focus on writing code.
-
CI/CD pipeline ready: You can setup your own CI/CD pipeline with just a few steps.
-
CMS support Pre built webhooks support made CMS integration easy.
What’s Included?
Your environment will have everything you need to build a modern Gatsby web:
- 🏎 React, Gatsby, JSX, ES6, TypeScript syntax support.
- 🏆 CI/CD ready with CircleCI and Netlify.
- 🤝 Out-of-the-box webhooks support for CMS.
- 💻 Language extras beyond ES6 like the object spread operator.
- 👌 Autoprefixed CSS, so you don’t need
-webkit-or other prefixes. - 💎 Rich utilities with Eslint, Prettier, Husky and Lint-staged built-in.
- 🛡 A fast interactive unit test runner with built-in support for coverage reporting.
- ✅ A live development server that warns about common mistakes.
- 🕵️♂️ A build script to bundle JS, CSS, and images for production, with hashes and sourcemaps.
The tradeoff is that these are a lot of configuration files. But they are all pre-configured and we have a detail explaination here
Contributing
We'd love to have your helping hand on create-gatsby-web! See CONTRIBUTING.md for more information on what we're looking for and how to get started.
Credits
This project exists thanks to all the people who contribute.
License
Create Gatsby Web is open source software licensed as MIT.