counted
The missing analytics feature for GitHub Releases.
Why?
The GitHub Releases API provides only a point-in-time snapshot
of the download_count property for each asset.
What?
This repository contains a script to fetch the download_count value
for all release assets in a given repository and store that data
in a number of per-release JSON files in that same repository.
By default it will store these files in its own counted directory on a counted branch.
$ cd myrepo$ git pull$ git checkout counted$ ls -1 countedrelease-1234567.jsonrelease-1234568.jsonrelease-1234569.json...$ cat release-1234567.jsonIn this example 1234567 is the release id and 7654321 is the asset id.
This script can be run at any desired frequency, typically daily. The more often it is run, the more accurate data interpolation can be.
How?
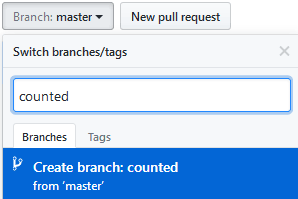
First you'll need to create a counted branch on your repository.
Then Heroku Scheduler can be used to run this script for free.

- Click the
Deploy to Herokubutton above. - Enter a unique-to-Heroku
App name. - Choose a region, one of US or Europe.
- Fill in the
Config Variableswith the values for your GitHub repository.GITHUB_OWNER: GitHub username that owns the repository, e.g.lovell.GITHUB_REPO: Name of the repository, e.g.counted.GITHUB_AUTH_TOKEN: GitHub Personal Access Token grantedpublic_reposcope access.REPO_BRANCH: Git branch to use for commits, default value iscounted.REPO_DIRECTORY: Directory to use to store data, default value iscounted.COMMITTER_NAME: Gituser.namefor this task to commit as, default value iscounted.COMMITTER_EMAIL: Gituser.emailfor this task to commit as, default value iscounted@users.noreply.github.com.
- Click
Deploy appand wait for theYour app was successfully deployedmessage. - Click
Manage App. - Click
Heroku SchedulerunderAdd-ons. - Click
Add new joband enter the following details: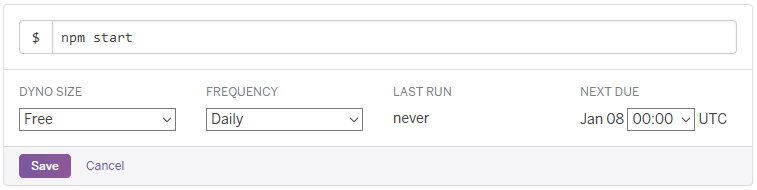
- $:
npm start - Frequency: Daily
- Next due: 00:00
- $:
- Click
Save.
TODO
- Interpolation of timestamped
download_countvalues - Pretty reports
Licence
Copyright 2018 Lovell Fuller.
Licensed under the Apache License, Version 2.0 (the "License"); you may not use this file except in compliance with the License. You may obtain a copy of the License at http://www.apache.org/licenses/LICENSE-2.0
Unless required by applicable law or agreed to in writing, software distributed under the License is distributed on an "AS IS" BASIS, WITHOUT WARRANTIES OR CONDITIONS OF ANY KIND, either express or implied. See the License for the specific language governing permissions and limitations under the License.