Rutynka calendar helper


This is a simple svelte heatmap calendar based on local storage - routine helper for Rutynka apps.
Stand-alone live demo on surge
Stand-alone live demo on vercel
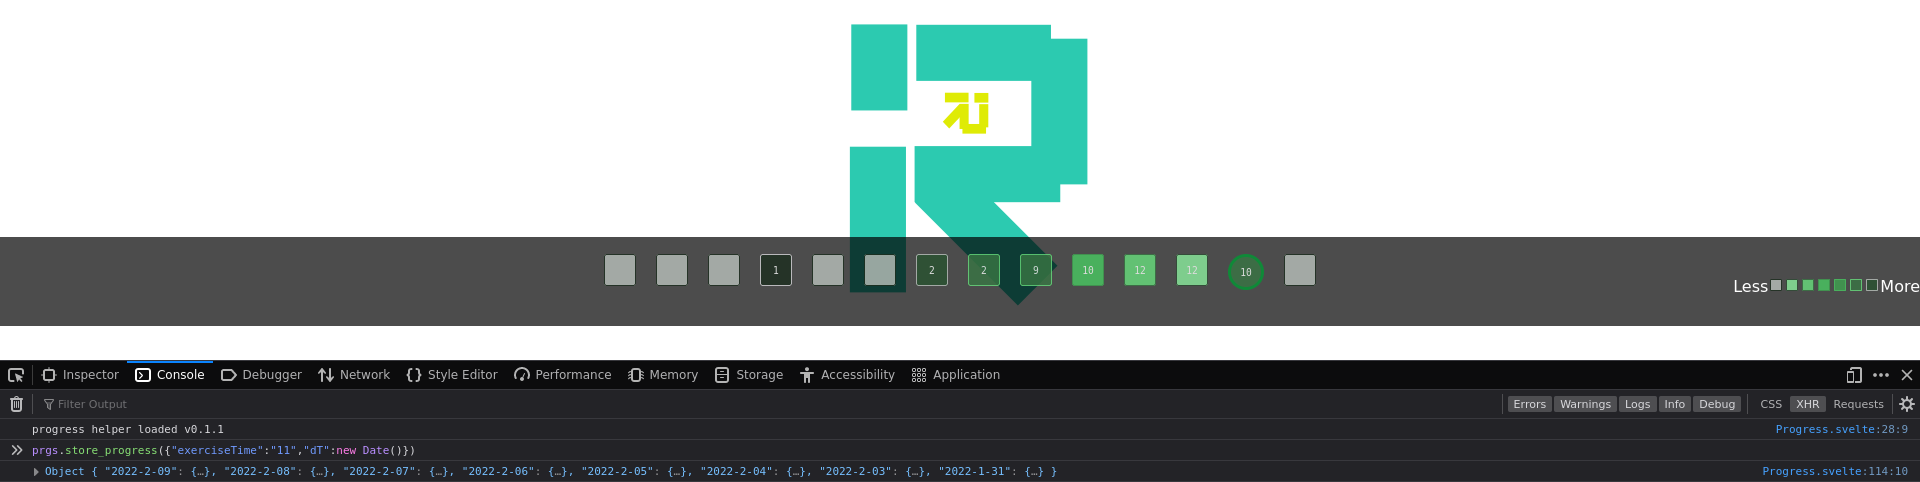
prgs.store_progress({"exerciseTime":"13","dT":new Date()}) in Web Inspector
Get started
Clone and install the dependencies...
npx degit rutynka/helper-progress-calendar#main helper-progress-calendar
cd helper-progress-calendar
yarn install
https://betterstack.dev/blog/npm-package-best-practices/ ...then start Rollup:
yarn devNavigate to localhost:5000. You should see your app running. Edit a component file in src, save it, and reload the page to see your changes.
By default, the server will only respond to requests from localhost. To allow connections from other computers, edit the sirv commands in package.json to include the option --host 0.0.0.0.
If you're using Visual Studio Code we recommend installing the official extension Svelte for VS Code. If you are using other editors you may need to install a plugin in order to get syntax highlighting and intellisense.
Import as Svelte Component with bindings this

npx degit sveltejs/template my-svelte-project
cd my-svelte-project
yarn install
yarn add rutynka/helper-progress-calendar
yarn dev
//my-svelte-project/src/App.svelte
<script>
import Progress from '@rutynka/helper-progress'
export let name;
let progress;
function handleClick() {
console.log('click', progress.store_progress({"exerciseTime":69,"dT":new Date()}))
}
</script>
<main>
<h1>Hello {name}!</h1>
<p>Visit the <a href="https://svelte.dev/tutorial">Svelte tutorial</a> to learn how to build Svelte apps.</p>
<button on:click={handleClick}>Heat up</button>
</main>
<Progress bind:this={progress}/>
<style>
button {background-color:hsla(100, 80%, 60%,0.9)}
main {
text-align: center;
padding: 1em;
max-width: 240px;
margin: 0 auto;
}
h1 {
color: #ff3e00;
text-transform: uppercase;
font-size: 4em;
font-weight: 100;
}
@media (min-width: 640px) {
main {
max-width: none;
}
}
</style>Building and running in production mode
To create an optimised version of the app:
npm run buildYou can run the newly built app with npm run start. This uses sirv, which is included in your package.json's dependencies so that the app will work when you deploy to platforms like Heroku.
Single-page app mode
By default, sirv will only respond to requests that match files in public. This is to maximise compatibility with static fileservers, allowing you to deploy your app anywhere.
If you're building a single-page app (SPA) with multiple routes, sirv needs to be able to respond to requests for any path. You can make it so by editing the "start" command in package.json:
"start": "sirv public --single"Deploying to the web
With Vercel
Install vercel if you haven't already:
npm install -g vercelThen, from within your project folder:
cd public
vercel
vercel deploy my-project
With surge
Install surge if you haven't already:
npm install -g surgeThen, from within your project public folder:
npm run build
surge