Flare P-chain Staking Tool
This repo contains a tool for staking assets.
Because Flare is a fork of Avalanche, like Avalanche, it has three chains:
- C-chain: contract chain, executes EVM smart contracts that manage assets (like ERC-20 tokens).
- P-chain: platform chain, coordinates validators.
- X-chain: exchange chain, handles assets.
When validators require tokens to work (for example, as stake in proof-of-stake systems), these assets need to be moved from the C-chain to the P-chain. This tool also supports moving assets between the C- and P-chains and back.
Installation
There are two ways to install the tool. Unless you plan to contribute to this repository, We recommend using npm (version >= 16).
Using npm
npm install @flarenetwork/flare-stake-tool --globalManually building the repository
For developers, first clone the repo with
git clone https://github.com/flare-foundation/flare-stake-tool.gitthen run yarn and yarn build inside the cloned repo folder, and follow the rest of this guide from the repo folder using bin/flare-stake-tool instead of just flare-stake-tool.
Setting up your environment
There are three ways to use this app:
- With a connected ledger device,
- With an initialized public key,
- With a private key logged inside your environment file.
The ledger device requires no setup, as the needed public key is always extracted from the connected ledger device.
To initialize this app with your secp256k1 curve public key (a 32-byte hexadecimal prefixed 0x02/0x03 or a 64-byte hexadecimal optionally prefixed 0x04), run the following command:
flare-stake-tool init-ctx -p <public key> --network <flare|costwo>This allows the app to produce unsigned transaction hashes, which can be signed externally (using ECDSA), and then sent back to the app to finalize the transaction.
To use this app in a less-secure manner, you can set your private key as an environment variable. To do this, follow the below steps:
-
Obtain the private key (32 bytes either in hexadecimal or cb58 format).
-
Create a file to hold your private key.
-
Paste this code in as follows and enter either the private key in either hex or cb58 format within the quotation marks:
PRIVATE_KEY_CB58="private key"
PRIVATE_KEY_HEX="private key"
WARNING While easier (as signing is done within the app), we discourage the usage of this app with the private key exposed in the file. This is because the private key is exposed to 800+ dependencies, and there is no way to audit them all.
App usage with ledger
Below we describe the functionality offered by the app, when you have your ledger device connected to the computer, with avalanche app running.
IMPORTANT By default, the tool uses blind signing, as the ledger app for displaying the transaction details is in the development phase. This means that you will not see the transaction details on the ledger device, and instead only see the transaction hash. To mitigate this, before ledger-signing, a file is generated locally in a
proofsfolder, which contains the transaction details. Those can be verified via prototype scriptscripts/validateHash.ts.
Address conversion
This describes how to view the P- and C-chain addresses. Those addresses are derived from your public key, which in turn can be derived from your private key.
flare-stake-tool addresses --ledgerSample response:
P-chain address: P-flare1pynhfl09rfrf20s83lf6ra5egqylmx757ahxn6
C-chain address hex: 0xead9c93b79ae7c1591b1fb5323bd777e86e150d4
secp256k1 public key: 0x02efe41c5d213089cb7a9e808505e9084bb9eb2bf3aa8050ea92a5ae9e20e5a692
The P-chain address is in the Bech32 format, while the C-chain uses the Ethereum format to comply with the Ethereum Virtual Machine. Lastly, the public key is in the standard compressed format.
Check balances
This describes how to view your P- and C-chain balances.
flare-stake-tool balance --ledgerSample response:
C-chain 0x5a6a8c28a2fc040df3b7490440c50f00099c957a: 999.000000000000000000 FLR
P-chain P-flare1mwy6yvuk8xjl87scxfvvl63xtex3ennvkkpasz: 1.000000000 FLR
Export and import assets
Move assets from the C-chain to the P-chain
This describes how to move assets from the C-chain to the P-chain.
Funds typically reside on the C-chain account, so they have to be exported from it. Exported funds must then be imported to the corresponding P-chain account. This requires one transaction on each chain, so you need to issue two commands.
flare-stake-tool exportCP -a <amount> -f <fee> --ledger
flare-stake-tool importCP --ledger
Where:
-
amountis the amount to export, in FLR. -
feeis optional. It specifies a gas fee for a transaction in FLR.
Note Methods affecting the P-chain (
importCPandexportPC) always use a fixed gas fee of 0.001FLR, while methods affecting the C-chain (exportCPandimportPC) have variable gas fees and can thus be either set or calculated automatically. If you get theerrInsufficientFundserror, try specifying a higher gas fee when exporting funds. The fee is not deducted from the exported amount, but from the C-chain account. The final amount on the P-chain is therefore exactly theamountspecified.
Sample response:
Transaction with hash 2Ch7Tp3mBxW4QZ57Lr26bddXf7QqNGrukRVbBgwSbrPWisuxYV sent to the nodeMove assets from the P-chain back to the C-chain
IMPORTANT These commands are similar to exporting and importing assets from the C-chain to the P-chain, but they are not the same. Note the reversed P and C.
flare-stake-tool exportPC -a <amount> --ledger
flare-stake-tool importPC -f <fee> --ledger
where amount and fee are optional. If amount after exportPC is not specified, all funds are exported.
Staking
To add a validator node to the flare network, run the following command:
flare-stake-tool stake -n <nodeId> -s <start-time> -e <end-time> -a <amount> --delegation-fee <delegation-fee> --ledgerWhere:
-
nodeIdis the ID of the node being deployed as a validator. -
start-timeis the unix time of the start of the staking process. We suggest you put this time a bit in the future (not use the current time), as the transaction must be confirmed before the staking process starts, otherwise it will revert. -
end-timeis the unix time of the end of the staking process. -
amountis the amount to lock and stake in FLR. -
delegation-feeis the fee in percent that the validator charges for delegating to it. The minimum is 0 and the maximum is 100.
When the staking period ends, the nodes automatically stop acting as validators and the staked amount is returned to the P-chain account.
To check whether a validator has been added successfully, fetch lists of both pending and current validators with this command:
flare-stake-tool info validatorsDelegating
To delegate to a validator node, run the following command:
flare-stake-tool delegate -n <nodeId> -s <start-time> -e <end-time> -a <amount> --ledgerWhere:
-
nodeIdis the ID of the deployed validator node, you wish to delegate to. -
start-timeis the unix time of the start of the delegation process. -
end-timeis the unix time of the end of the delegation process. -
amountis the amount to lock and delegate in FLR.
Opt-out
To opt-out of airdrop, run the following command:
flare-stake-tool opt-out --ledger --derivation-path <derivation-path>Where:
-
derivation-pathis the BIP44/Ledger Live standard derivation path of the account you want to use. By default it is taken as "m/44'/60'/0'/0/0"
Operations with public key
The public key is needed to construct the unsigned transaction hashes, which can then be signed externally (e.g. through a hardware wallet or a custodial API) and sent back to the app to finalize the transaction.
Transation finalization thus requires three steps:
- generate the unsigned transaction inside a json file and obtain the produced hash / message,
- externally sign the hash and send the signature back to the app to finalize the export transaction,
- finalize the transaction with the signature and send it to a network node.
The app-generated unsigned transaction json file respects the below format:
{
  "transactionType": "",
  "serialization": "",
  "signatureRequests": [
    {
      "message": "",
      "signer": ""
    }, ...
  ],
  "unsignedTransactionBuffer": ""
}
Note The messages and signers inside
signatureRequestsshould all be the same, so only one signature is required.
The signed transaction json file that you should generate via raw signing is the same as unsigned, but with appended raw message signature. So, it respects the below format:
{
  "transactionType": "",
  "serialization": "",
  "signatureRequests": [
    {
      "message": "",
      "signer": ""
    }, ...
  ],
  "unsignedTransactionBuffer": "",
  "signature": ""
}
An example signature is of the r|s|v format, e.g. 98f8c0d13bf2b5a5b2216894e503a721a099a1944116b802f2d84c0bd83a1bef3378e1b56d7ccd06de321913b8db0e97f4775e1885c86f6bcc583330d37cf5be01 where the last byte v is the recovery ID and can be either 00/01 or 1b/1c.
Unsigned transaction files are always in the form of ${id}.unsignedTx.json and signed transaction files are always in the form of ${id}.signedTx.json. To send a signed transaction named ${id}.signedTx.json, use the following command:
flare-stake-tool send -i <transaction-id>Move assets from the C-chain to the P-chain
Commands for obtaining unsigned transactions are the same as for the ledger in previous section, except that you ommit the --ledger flag and additionally have to specify transaction id -i <transaction-id>. For example:
flare-stake-tool exportCP -a <amount> -i <transaction-id>Operations with private key
To use the app with the private key, you can copy the commands used with ledger and replace --ledger flag with --get-hacked and add an additional argument --env-path <path to your private key file>. For example:
flare-stake-tool exportCP -a <amount> -i <transaction-id> --env-path <path to your private key file> --get-hackedInteractive CLI
For easier guidance through the process, you can also use an interactive CLI, with the following command:
flare-stake-tool interactiveValidation and misc operations
Getting your node ID:
curl -s -X POST --data '{ "jsonrpc":"2.0", "id" :1, "method" :"info.getNodeID" }' -H 'content-type:application/json;' RPC-URL:PORT/ext/infoCheck the pending validators (To see if the stake or delegation was successful):
curl -s --location --request POST 'RPC-URL:PORT/ext/bc/P' --header 'Content-Type: application/json' --data-raw '{ "jsonrpc": "2.0", "method": "platform.getPendingValidators", "params": { "subnetID": null, "nodeIDs": [] }, "id": 1 }' | jq .Tests
-
Run
yarnto install the dependencies -
Create an
.envwith following content:PRIVATE_KEY_HEX = "88b3cf6b7e9ef18a508209d61311a376bde77be5d069449b1eace71130f8252c" PUBLIC_KEY = "04423fb5371af0e80750a6481bf9b4adcf2cde38786c4e613855b4f629f8c45ded6720e3335d1110c112c6d1c17fcbb23b9acc29ae5750a27637d385991af15190" -
Create a
ctx.jsonwith the following content:{ "publicKey": "04423fb5371af0e80750a6481bf9b4adcf2cde38786c4e613855b4f629f8c45ded6720e3335d1110c112c6d1c17fcbb23b9acc29ae5750a27637d385991af15190", "network": "localflare" } -
Run the docker conatiner via
docker-compose up -d -
Go to
test/helperand runnode queryChain. It will generate output similar to this (note that it may vary):assetId: HK58c7FvFK79cbFsdFf1qVL5bVwQcCRkzZN5Ked8uZsyheeEN blockchainId for X-chain: ecxi7p3JMYsx6abaYt7b9YiGbj6okQUs8QpqSxMKsFwEioff1 blockchainId for C-chain: 2PyHrN5q8uF7tFLHsiCmG7tmkFWMDjikuYJgnHAXV83o8wMTFD blockchainId for P-chain: 11111111111111111111111111111111LpoYY -
Now go to
node_modules/@flarenetwork/flarejs/dist/utils/constants.jsand make changes for the P-chain, C-chain, X-chain and assetId in the following places:
a. Replace avaxAssetId with the assetId
b. Replace blockchainId in n6x with X-chain id
c. Replace blockchainId in n6c with C-chain id
Similarly, for the following part:
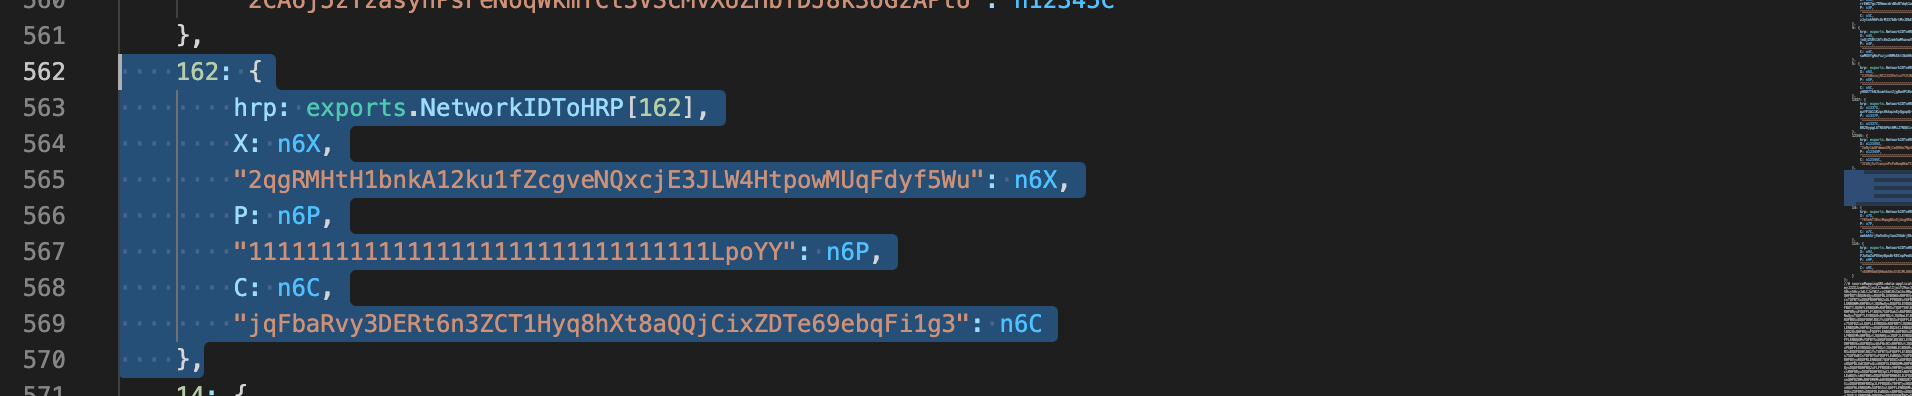
a. Replace the key for n6x with X-chain id
b. Replace the key for n6c with C-chain id
-
Run
yarn run coverageto generate the coverage report -
As we were facing issue with ledger, so we have created separate command to run the testcases:
a. For
ledger/sign-yarn run ledger-sign-testcaseb. For
ledger/key-yarn run ledger-key-testcasec. For
ledger/utils-yarn run ledger-utils-testcased. For
cli-yarn run cli-testcase


Versions
To publish a new version to npm:
- Check that lib can be created
npm pack - Bump to next version
npm version [<newversion> | major | minor | patch | premajor | preminor | prepatch | prerelease | from-git] - Build the project with
yarn build - Publish with
npm publish --access=public - Make sure to push to git with
git push