🚀 Do you want to install Tiledesk on your server with just one click?
Use Docker Compose Tiledesk installation guide
Chat21 is the core of the open source live chat platform Tiledesk.com. Tiledesk is an Open Source Live Chat platform with integrated Chatbots written in NodeJs and Express. Build your own customer support with a multi-channel platform for Web, Android and iOS.
Designed to be open source since the beginning, we actively worked on it to create a totally new, first class customer service platform based on instant messaging.
What is Tiledesk today? It became the open source “conversational app development” platform that everyone needs 😌
You can use Tiledesk to increase sales for your website or for post-sales customer service. Every conversation can be automated using our first class native chatbot technology. You can also connect your own applications using our APIs or Webhooks. Moreover you can deploy entire visual applications inside a conversation. And your applications can converse with your chatbots or your end-users! We know this is cool 😎
Tiledesk is multichannel in a totally new way. You can write your chatbot scripts with images, buttons and other cool elements that your channels support. But you will configureyour chatbot replies only once. They will run on every channel, auto-adapting the responses to the target channel whatever it is, Whatsapp, Facebook Messenger, Telegram etc.
If you need help or just want to hang out, come, say hi on our Discord server.
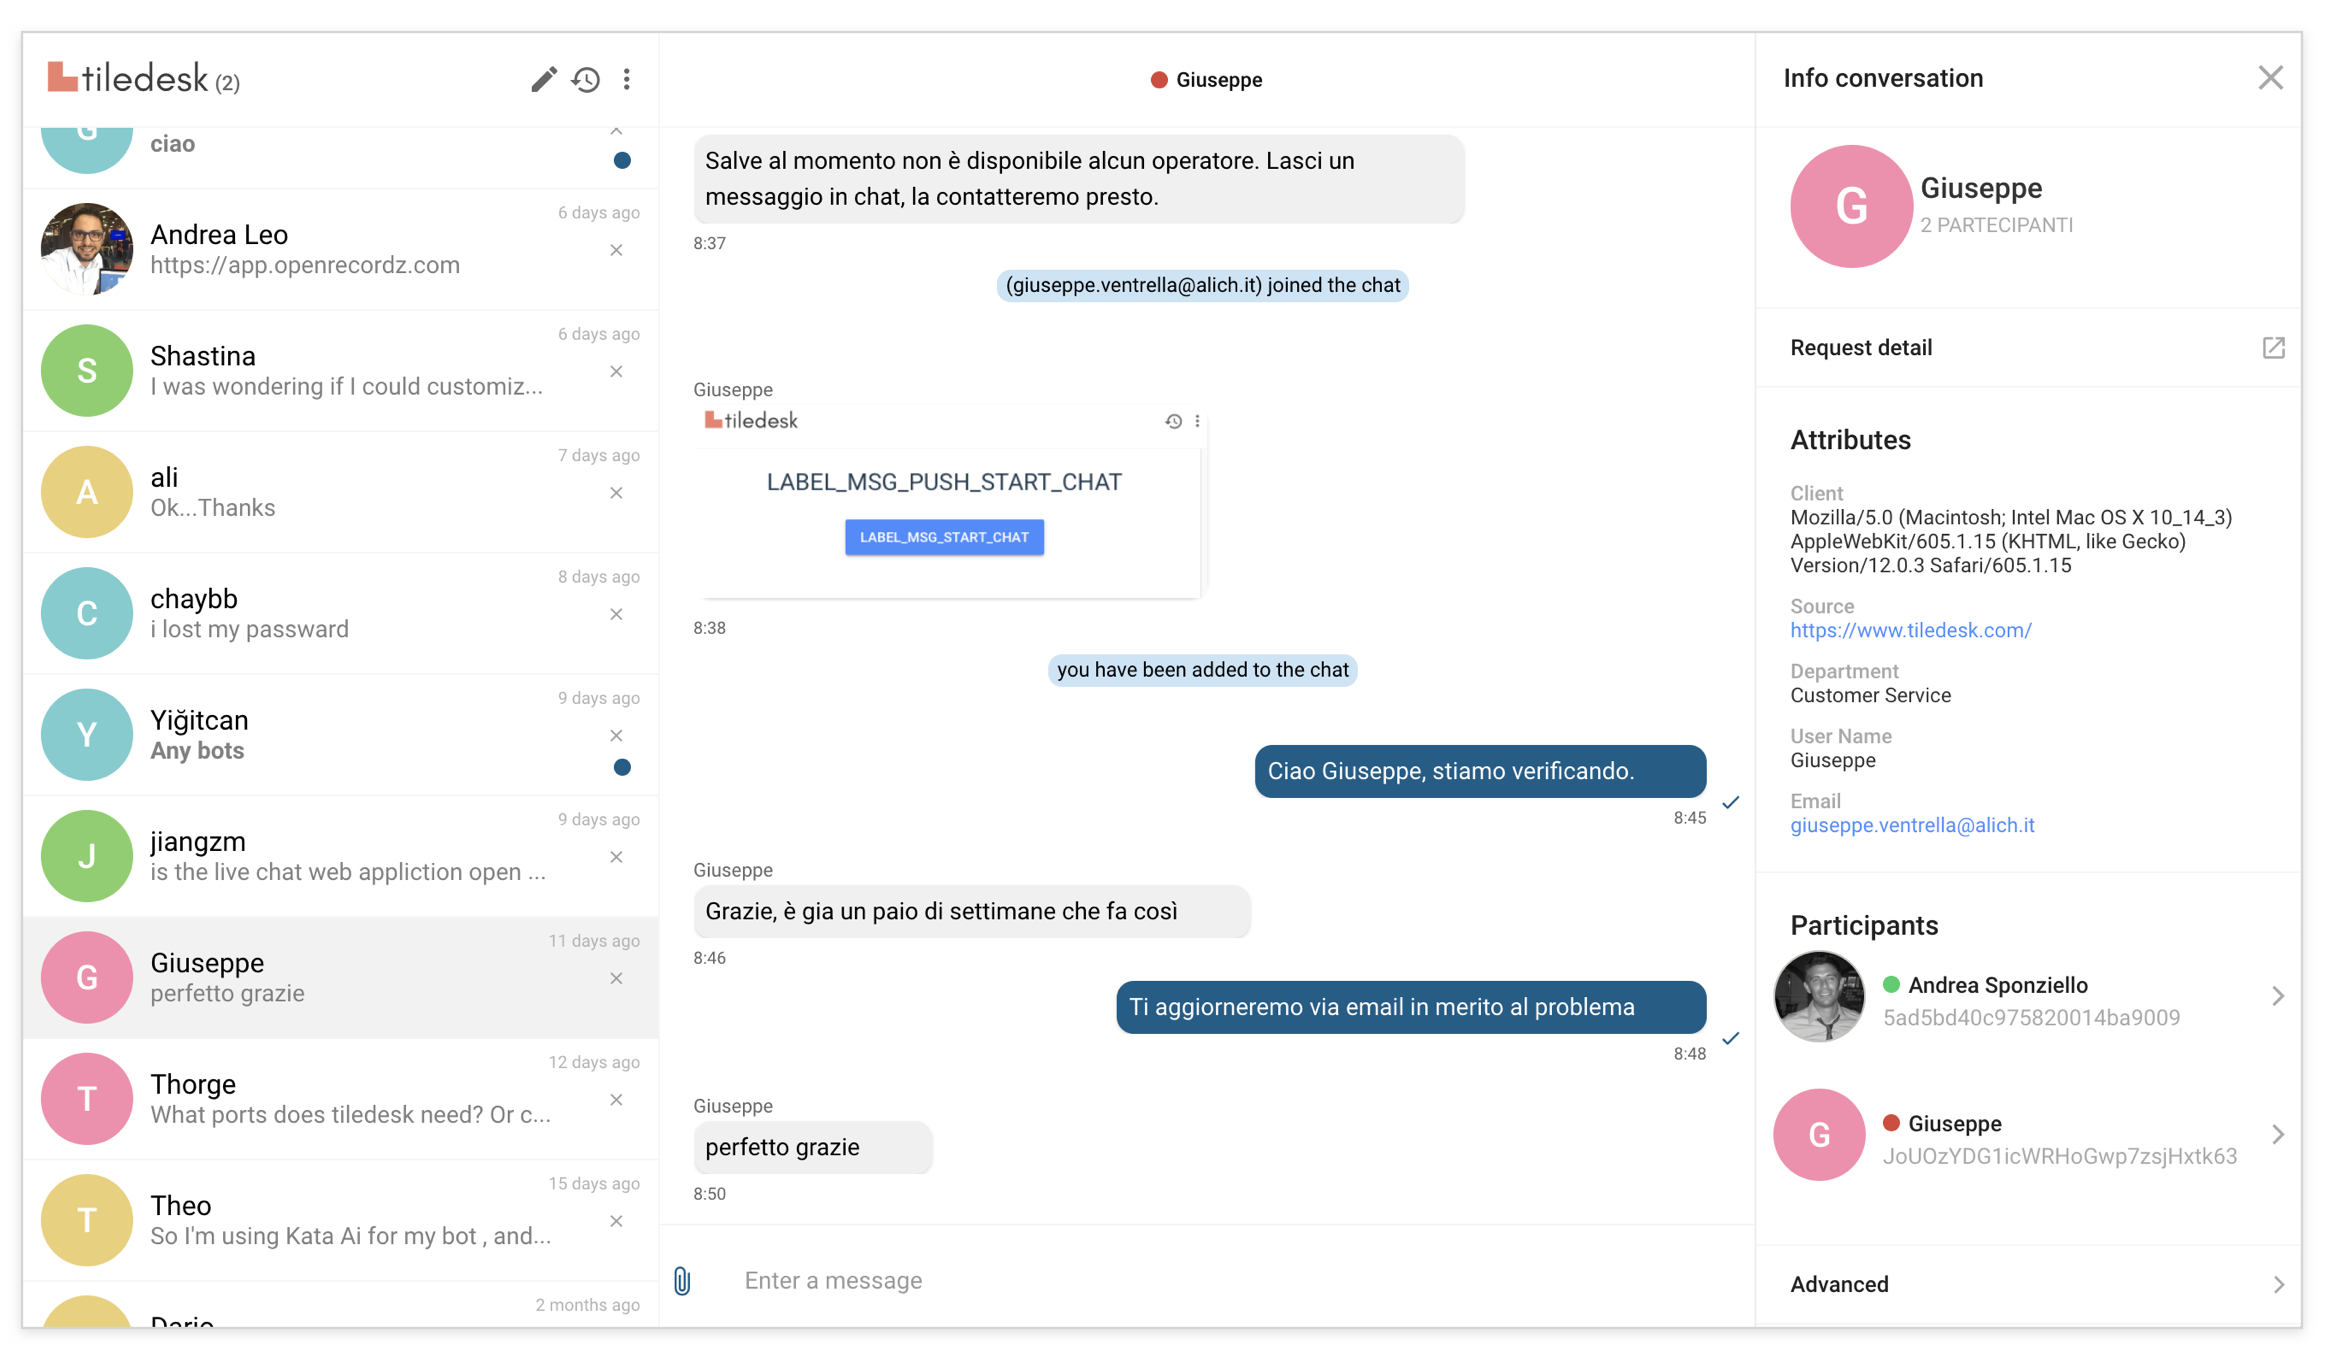
With Chat21-ionic you can:
- Send a direct message to a user (one to one message)
- View the messages history
- The read receipts feature allows your users to see when a message has been sent, delivered and read
- Conversations list view with the last messages sent (like Whatsapp)
- With the Presense Manager you can view when a user is online or offline and the inactivity period
- Responsive design (desktop and mobile)
- View the user profile with fullname and email
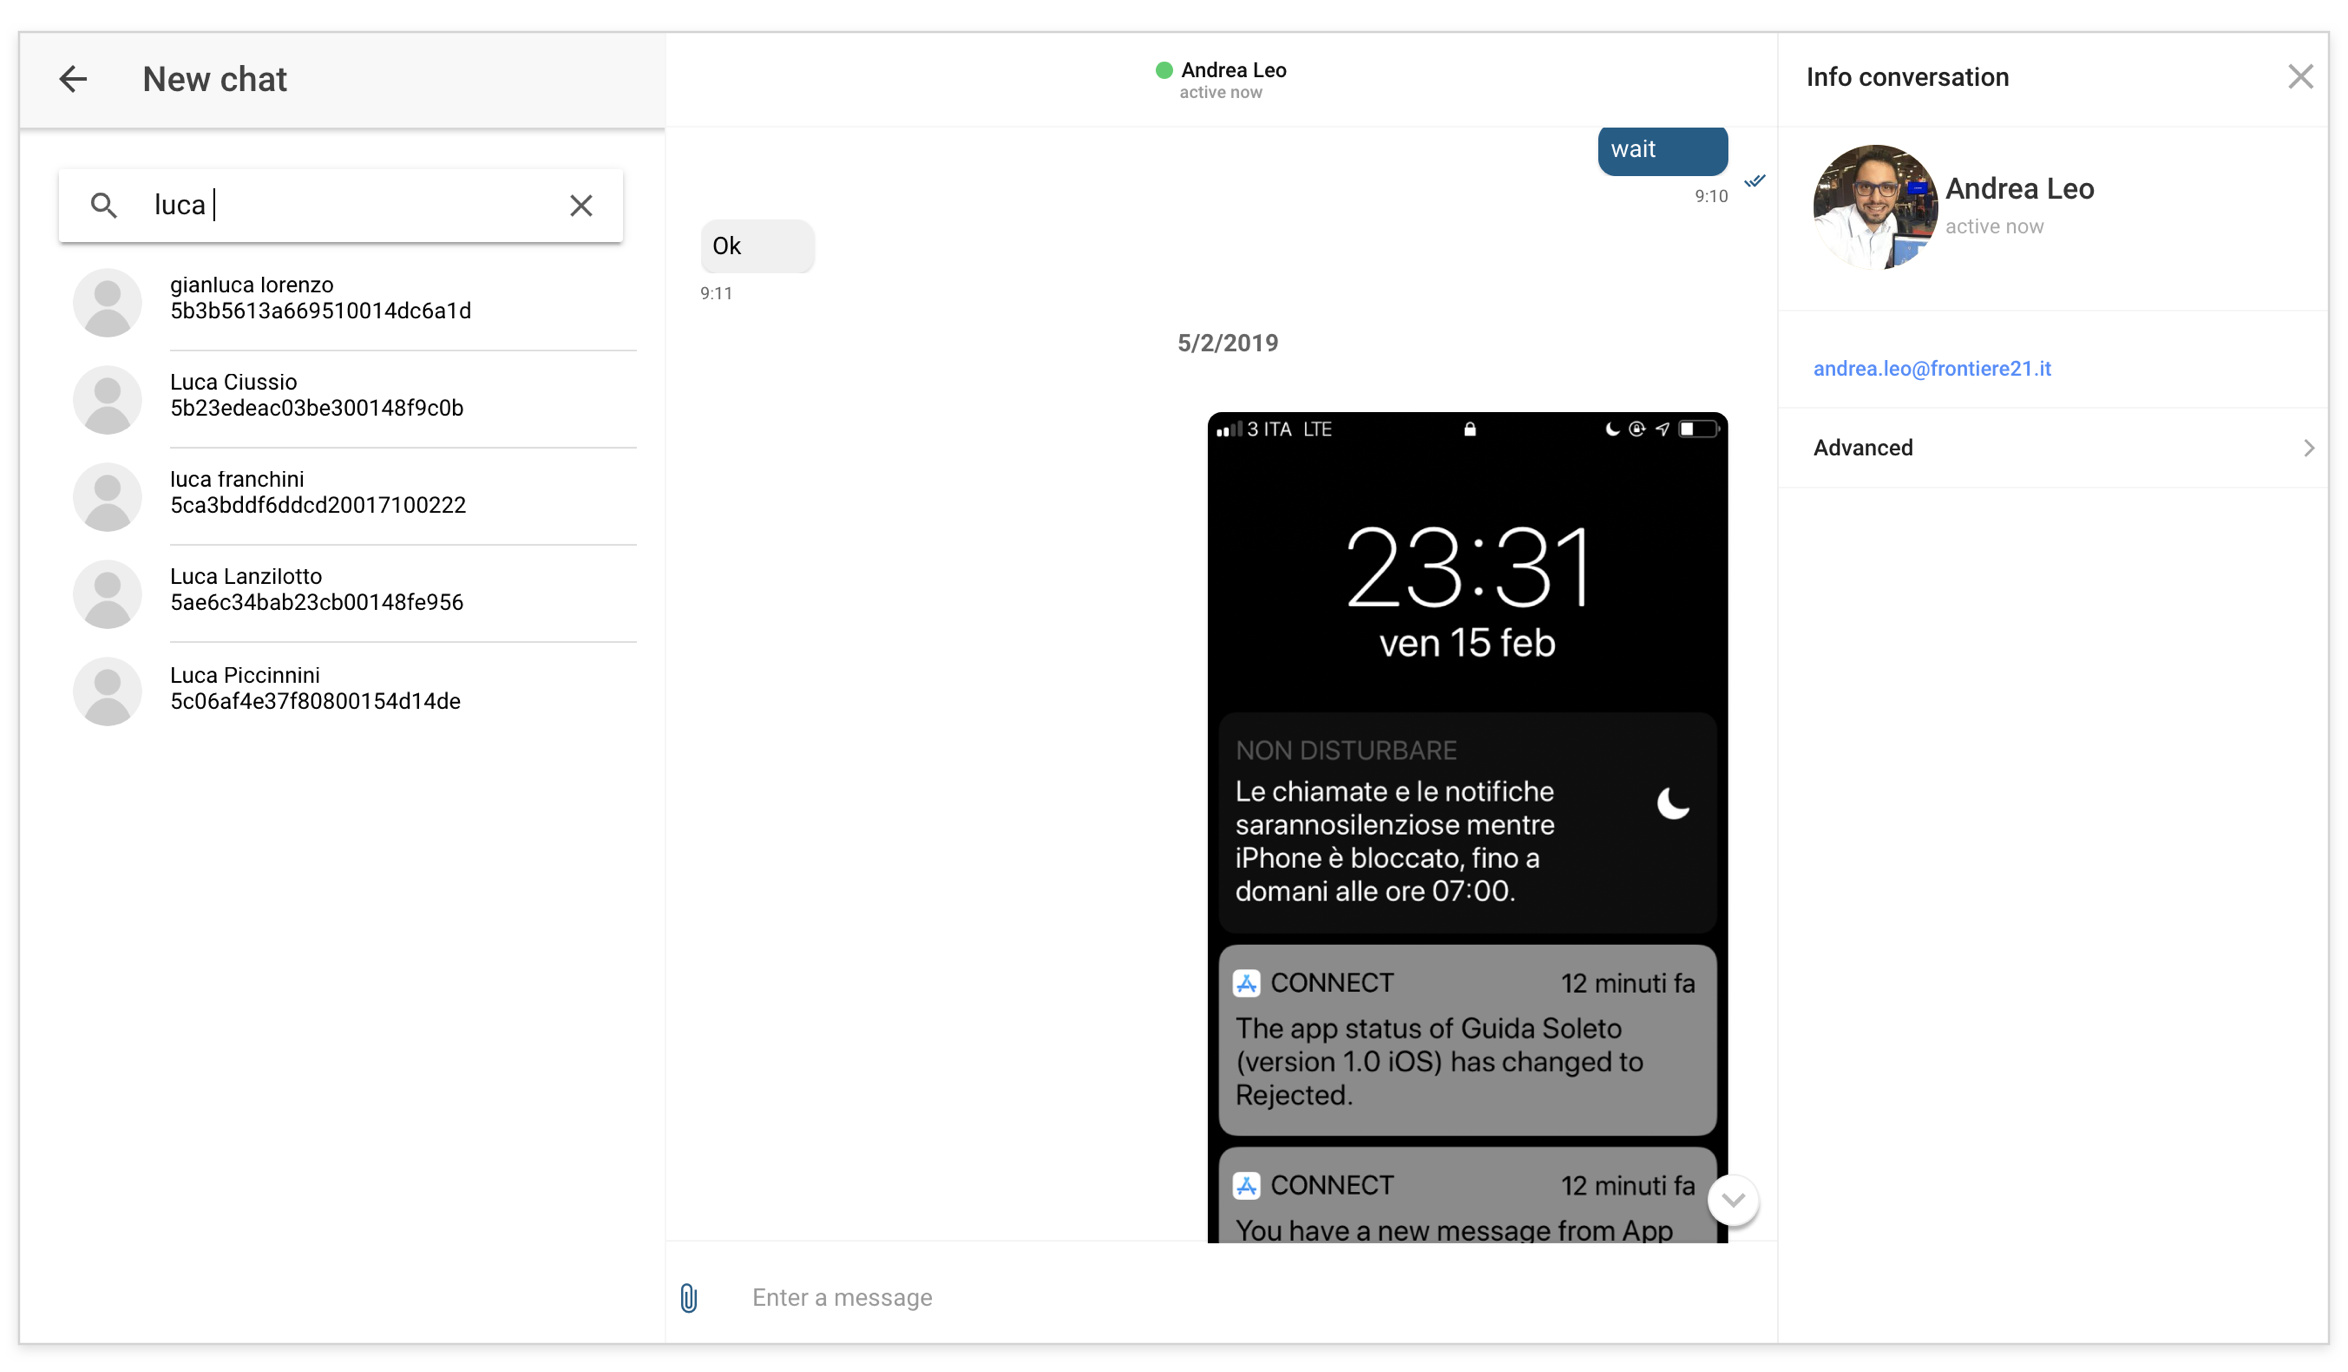
- Login with email and password (Use firebase email and password authentication method )
- Signup with fullname, email, password and profile picture
- Contacts list view with fulltext search for fullname field
Visit https://web.chat21.org/ to see a live demo of chat21-ionic.
In progress git
- Install nodejs:
https://nodejs.org/en/download/ - Install Ionic CLI:
npm install -g ionic - Install Cordova :
npm install -g cordova@7.0.1 - A Firebase project. Create one free on
https://firebase.google.com - "Chat21 Firebase cloud functions" installed. Instructions:
https://github.com/chat21/chat21-cloud-functions
Do you want to install all the Tiledesk components on your server with just one click? Use Docker Compose Tiledesk installation guide
- Install the latest stable release. Check on Github page the last release under the Releases tab and then run
git clone https://github.com/frontiere21/chat21-ionic.git --branch <LATEST-RELEASE-VERSION>cd chat21-ionic
- Build running:
npm install
- Create a Firebase account
- Create a Firebase project in the Firebase console, if you don't already have one. https://console.firebase.google.com/
- Deploy Chat21 Firebase Cloud Functions as described here: https://github.com/chat21/chat21-cloud-functions
- Configure the file environment.ts in src/environments folder:
export const environment = {
    supportMode: false,
    production: false,
    remoteConfig: true,
    remoteConfigUrl: '/chat-config.json',
    globalRemoteJSSrc: "https://<YOUR_CUSTOM_SCRIPT_1>, https://<YOUR_CUSTOM_SCRIPT_2>"
    chatEngine: "mqtt", // OR YOUR CUSTOM CHAT ENGINE
    updloaEngine: "native", // OR YOUR CUSTOM UPLOAD ENGINE
    pushEngine:"none", // OR YOUR CUSTOM PUSH ENGINE
    fileUploadAccept:"*/*",
    logLevel":"<YOUR-PREFERRED-LOG-LEVEL>",
    supportMode: false,
    writeToButton: false,
    archivedButton: false,
    firebaseConfig: {
        tenant:"tilechat",
        apiKey: '123ABC..',
        authDomain: 'XYZ.firebaseapp.com',
        databaseURL: 'https://XYZ.firebaseio.com',
        projectId: 'XYZ',
        storageBucket: 'XYZ.appspot.com',
        messagingSenderId: '123456',
        appId: 'CHANGEIT',
        chat21ApiUrl: '<YOUR_CHAT21_CLOUD_FUNCTION_FIREBASE_ENDPOINT>'
    },
     chat21Config: {
        "appId": "tilechat",
        "MQTTendpoint": "mqtt://<YOUR-MQTT-ENPOINT>",
        "APIendpoint": "http://<YOUR-MQTT-API-ENPOINT>"
    },
    "apiUrl": "https://<YOUR-TILEDESK-API-URL>",
    "baseImageUrl": "https://<YOUR-BASE-IMAGE-URL>",
    "dashboardUrl": "https://<YOUR-DASHBOARD-URL>"
    "widgetBaseUrl": "https:<YOUR-WIDGET-URL>/"
    "wsUrl": 'ws://' + window.location.hostname + '/ws/',
    "emailSection": true,
    "whatsappTemplatesSection": true,
    "googleMapsApiKey":"<YOUR-GOOGLE-MAPS-API-KEY>"
}
};
-
globalRemoteJSSrc: load external scripts by setting a comma separated script string url. -
logLevel: The Chat21-ionic supports 4 log levels. The order is as follows:Error < Warn < Info < Debug -
fileUploadAccept: The Chat21-ionic allows you to manage the type of files that can be uploaded. By default, all file types are accepted. -
wsUrl: allows you to know in real time the agent's availability status, the agent's busy status and the number of unassigned conversations for a selected project -
supportMode: if it is set to true it shows the left sidebar which makes dashboard and chat management smarter -
writeToButton: if set to true, it makes the button for viewing the contact list visible and makes direct conversations with them possible -
archivedButton: if set to true, it makes the button for viewing archived conversations visible -
emailSection: if set to true, allows agents to send offline emails to users -
whatsappTemplatesSection: if set to true, allows agents to set and send a whatsapp already configured template to users in an incoming whatsapp conversation -
googleMapsApiKey:
- open
/src/firebase-messaging-sw.jsand replace messagingSenderId: with < your messagingSenderId > More info here : https://angularfirebase.com/lessons/send-push-notifications-in-angular-with-firebase-cloud-messaging/ - firebase-messaging-sw.js must be accessible in the root of the webapp, for example (https://support.tiledesk.com/firebase-messaging-sw.js)
- After the build process, check the property gcm_sender_id of the manifest.json file. The correct value for firebase is:
"gcm_sender_id": "103953800507"
- Config Firebase auth In the Firebase Console open the Authentication section > SIGN IN METHOD tab you need to enable the Email/password Sign-in Provider and click SAVE. This will allow users to sign-in the Web app with their Email https://firebase.google.com/docs/auth/
- Now you will need to serve the app. Run:
ionic servein the terminal.
- Run:
cordova platform add browser@latest - Run:
ionic cordova build browser
Copy the content of the directory platforms/browser/www to your WebServer public dir.
- Install the Firebase CLI. run:
npm install -g firebase-tools - Run:
firebase login(these steps can be avoided if you have already done before) - Change directories in the terminal to your desired project directory(run:
cd platforms/browser) and run:firebase init- select hosting (press Spacebar to select) and press return
- select your project and press return
- answer the following questions:
- "what do you want to use as your public directory?" www and press return
- "configure as a single-page app?" N and press return
- "file www/index.html alredy exists. Overwrite?" N and press return
- Run:
firebase deploy - In your firebase consol click hosting and click on link your project More info here https://firebase.google.com/docs/hosting/quickstart?authuser=0
- Run on simulator :
ionic cordova run android - Run on device :
ionic cordova run android --device
- Run on simulator :
ionic cordova run ios - Run on device :
ionic cordova run ios --device
To run Chat21-ionic on port 8080 run:
curl https://raw.githubusercontent.com/chat21/chat21-ionic/master/env.sample --output .env

nano .env #configure .env file properly

docker run -p 8080:80 --env-file .env chat21/chat21-ionic
If you want to customize logos and assets you can mount a docker volume and attach it to the assets folder. After that you can override the assets files into the docker volume.
Example:
docker run -p 8080:80 --env-file .env --mount source=chat21-ionic-assets-vol,destination=/usr/share/nginx/html/assets chat21/chat21-ionic
To auto login pass the JWT token as a query parameter of your Chat url as in the following example:
"http://localhost:8100/#/conversation-detail?jwt=<JWT_TOKEN>"